Free Software at Schools
Installing and Maintaining a Debian-Edu Network
Also Known as Skolelinux
Klaus Ade Johnstad
Norway,Oslo, Kampen
<klaus@inout.no>
<klaus@skolelinux.no>
Copyright © 2002, 2003, 2004, 2005 Klaus Ade Johnstad
- Table of Contents
- Preface
- 1. Where and How to Get Help[id=help]
-
- 1.1. Mailing lists Belonging to the Skolelinux/Debian-edu Project[id=maillists]
- 1.2. IRC Chat Channel Skolelinux/Debian-edu[id=irc]
- 1.3. Inviting a Skolelinux/Debian-edu Knowledgeable Person into Your Computer [id=sshtunnel]
- 1.4. Permanent Backdoor into a Skolelinux/Debian-edu Machine with an SSH Tunnel [id=backdoor]
- 1.5. More In-Depth Linux Documentation[id=linuxdoc]
-
- 1.5.1. Documentation and Help Pages Already Installed
- 1.5.2. Skåne Sjælland Linux User Group, Friheden til at skrive bøger(Freedom to Write Books)[id=localdocu]
- 1.5.3. The Linux Documentation Project [id=tldp]
- 1.5.4. Manuals for OpenOffice.org[id=OOdoc]
- 1.5.5. LTSP, Linux Thin Client Server Project(LTSP)[id=ltspdoc]
- 2. Getting the "Right" Hardware[id=hardware]
- 3. Firewall/Router for Skolelinux/Debian-edu
-
- 3.1. Hardware[id=coyotehardware]
- 3.2. Placement of the firewall/router in a Skolelinux/Debian-edu Network[id=coyoteplacement]
- 3.3. Creation of a Coyote Linux Floppy[id=makefloppy]
- 3.4. Upgrading to Newer Versions of Coyote Linux[id=clupgrade]
- 3.5. Coyote Linux Bootup[id=clboot]
- 3.6. Coyote Linux Command Line Login[id=cllogin]
- 3.7. Coyote Linux Web Administrator[id=clgui]
- 3.8. Login via SSH[id=clssh]
- 3.9. Useful Commands in Coyote Linux[id=clcommands]
- 3.10. Coyote Linux as an Ordinary DHCP-Server in a Non-Skolelinux/Debian-edu Network
- 3.11. Coyote Linux and different ISP[id=clisp]
- 3.12. Supported network card and Driver Modules Used[id=clmodules]
- 3.13. Further Information about Coyote Linux[id=clinfo]
- 4. Skolelinux/Debian-edu Installation[id=installation]
- 5. The First Stage of Skolelinux/Debian-edu Installation
- 6. The Second Stage of Skolelinux/Debian-edu Installation[id=secondstage]
-
- 6.1. Second Stage
-
- 6.1.1. Something Went Wrong...
- 6.1.2. Turning off, or Rebooting the Machine
- 7. Something Went Wrong.
- 8. Fine-tuning[id=finetuning]
-
- 8.1. The Famous Command Line[id=cli]
-
- 8.1.1. Shell/Terminal[id=shell]
- 8.2. How to Edit System Configuration Files[id=kedit]
- 8.3. More or Less[id=moreless]
- 8.4. Installing a Kernel with Support for up to 4GB RAM and Multi-Processors[id=smp]
- 8.5. Changing the Size of the LVM-Partitions[id=lvmresize]
-
- 8.5.1. Resizing the /usr Partition[id=lvm-usr]
- 8.5.2. Resizing /skole/tjener/home0[id=lvm-home0]
- 8.5.3. Resizing /skole/backup[id=lvm-backup]
- 8.5.4. Resizing /var[id=lvm-var]
- 8.5.5. Resizing /var/opt/ltsp/swapfiles[id=lvm-swapfiles]
- 8.5.6. Swap[id=lvm-swap]
- 8.5.7. Resizing /var/spool/squid[id=lvm-squid]
- 8.5.8. Adding a New Volume(lv)[id=newlv]
- 8.5.9. Adding a New Disk to LVM in Skolelinux/Debian-edu
- 8.6. Editing Host Netgroups
-
- 8.6.1. The Netgroup Module
- 8.6.2. Adding Hosts to a Netgroup
- 8.6.3. Saving Changes
- 8.6.4. Adding a New Netgroup
- 8.6.5. Adding a Subgroup
- 8.6.6. Deleting a Netgroup
- 8.6.7. Removing Hosts from a Netgroup
- 8.6.8. Removing a Subgroup
- 8.7. Thin Client Setup
-
- 8.7.1. Assigning a Machine a Static IP address
- 8.7.2. Creating Etherboot ROM Images for Ordinary (non-PXE) network cards.[id=matic]
- 8.7.3. Special Floppy Disk with Support for 30 network cards[id=universalboot]
- 8.7.4. Using the MAC Address to Assign a Fixed IP Number to a Thin Client
- 8.7.5. Customising Thin Clients
- 8.8. Do the Network Cards Work?
- 8.9. Administration of Packages
-
- 8.9.1. Updating the Database with Info About Available Packages
- 8.9.2. Upgrading All Installed Packages to a Newer Version
- 8.9.3. Overview of Installed Packages
- 8.9.4. Finding the Name of a Specific Package
- 8.9.5. Showing Available Information about a Package
- 8.9.6. Installing a Package
- 8.9.7. Removing an Installed Package
- 8.9.8. Installing one Specific Version of a Package
- 8.9.9. Installing a Package with the Help of dpkg
- 8.9.10. Searching Through Files that were Installed by a Specific Package
- 8.9.11. Finding Which Package a File Came From
- 8.9.12. Making Your Own Local Mirror for Deb-Packages
- 8.10. The Quota System for Hard Drive Space
- 9. Services Out-of-the-Box in Skolelinux/Debian-edu
- 10. Thin Clients
- 11. Special Adaptations for your Users
-
- 11.1. Deciding Which Directories the Users Should Have
- 11.2. Deciding the Appearance of the Program Menu
- 11.3. Automatic Start of Program at Login
- 11.4. Message to Everyone who Logs in
- 11.5. Giving a Message to All Users That are Logged on
- 11.6. Automatic User Log In
- 11.7. Setting up Desktop, Menu bar, etc the Same for Everyone When the User is Created
-
- 11.7.1. The Kicker, the Bottom Menu Line
- 11.7.2. Desktop Icons, Background
- 12. Daily Operation of Skolelinux/Debian-edu Network with Webmin
-
- 12.1. The Webmin Password
- 12.2. Backup
-
- 12.2.1. Comparison of Various Versions of the Same File
- 12.2.2. Dedicated Backup Server
- 12.2.3. Slbackup from the Command Line
- 12.2.4. Slbackup Log Files
- 12.3. wlus - Webmin Ldap User Simple
- 13. Configuration/Use of the Most Used Programs
-
- 13.1. Webmin
- 13.2. OpenOffice.org
-
- 13.2.1. Starting OOo the First and Second Time
- 13.2.2. Personal Configuration of OOo
- 13.2.3. Using OOo
- 13.2.4. Exporting Directly to PDF-format
- 13.3. Kmail
-
- 13.3.1. Using KMail
- 13.3.2. Automatic Start and Checking of Email at Login.
- 13.4. Konqueror, File Manager
- 13.5. KSirc
- 13.6. kpackage
- 13.7. Gimp
- 13.8. Opera
- 13.9. Mozilla
- 13.10. Kstars
- 13.11. Kgeo
- 14. Useful Programs that are not Included on the Skolelinux/Debian-edu CD
-
- 14.1. Acrobat Reader
- 14.2. Mplayer
- A. Integration of Other Linux Distributions into Skolelinux/Debian-edu with ldap and autofs
- B. Seamless Integration of Mac OS X Machines
- C. Software RAID in Skolelinux/Debian-edu
- D. KDE3.X in Skolelinux/Debian-edu
- E. Compiling Your Own Programs
- F. Custom Start-up Logon for Thin Clients
- G. Extra External Accessory
-
- G.1. Digital Still Camera
- G.2. Digital Video Camera
- G.3. Scanner
- G.4. Reading List
- G.5. CD/DVD
-
- G.5.1. CD-burner
- G.5.2. CD-burner, method #2
- G.5.3. DVD-player
- G.6. USB Pendrive
- H. Various "Homemade" Solutions
-
- H.1. Downloading New Verisons of Skolelinux/Debian-edu CD, in a Smart Way with the Help of rsync
- H.2. Preventing Users from Logging onto Several Thin Clients Simultaneously.
-
- H.2.1. Kicking Out a User
- H.3. Ensuring that all Processes/Programs are Really Finished When Logging Out
- H.4. Placing Desktop Icons for Several Users Simultaneously
- I. Other "Brilliant" Linux Distributions
-
- I.1. Snøfrix id="snofrix"
- I.2. Knoppix
- I.3. BBC
- I.4. SLAX
- I.5. Tomsrtbt
- I.6. Freeduc, Live CD-ROM of Free Foftware for Schools
- J. Various Nice Little Scripts
-
- J.1. Little Scripts
- K. Contribute to this document and Skolelinux/Debian-edu[id=contribute]
- L. install_without_autopartkit.txt[id=withoutautopartkit]
- M. GNU Free Documentation License
-
- M.1. PREAMBLE
- M.2. APPLICABILITY AND DEFINITIONS
- M.3. VERBATIM COPYING
- M.4. COPYING IN QUANTITY
- M.5. MODIFICATIONS
- M.6. COMBINING DOCUMENTS
- M.7. COLLECTIONS OF DOCUMENTS
- M.8. AGGREGATION WITH INDEPENDENT WORKS
- M.9. TRANSLATION
- M.10. TERMINATION
- M.11. FUTURE REVISIONS OF THIS LICENSE
- M.12. How to use this License for your documents
- List of Tables
- 3-1. The Various Names Used for the network cards in Coyote Linux
- List of Figures
- 1-1. Help Pages in Konqueror
- 3-1. An Overview of Placement of the firewall/router in Skolelinux/Debian-edu
- 3-2. Downloading the Source Files for Windows
- 3-3. Windows Can't Find the Necessary dll
- 3-4. Coyote Linux Windows Creator Welcome Image
- 3-5. Local Network Setup
- 3-6. Setting a Password on the Coyote Linux Floppy
- 3-7. Syslog Server
- 3-8. Type of Internet Connection
- 3-9. Static IP configuration
- 3-10. Do not enable the Coyote Linux DHCP-server!
- 3-11. Choosing Driver Modules for Your Network Cards
- 3-12. Creating the Disk
- 3-13. Starting up Coyote Linux
- 3-14. Generating DSS Keys
- 3-15. Coyote Linux Login
- 3-16. Coyote Linux Menu
- 3-17. Changing the Password
- 3-18. Coyote Linux Web Administrator
- 3-19. Coyote Linux Main Menu
- 5-1. Starting up Skolelinux/Debian-edu from the CD
- 5-2. Choosing Language
- 5-3. Installation of Udeb-Packages
- 5-4. Information about the Various "Profiles"
- 5-5. The Various Profiles in Skolelinux/Debian-edu
- 5-6. Loading Necessary Driver Modules
- 5-7. Warning! The contents of all your hard drives will be erased!
- 5-8. Installation of the Final Packages, the Kernel and the Bootloader GRUB
- 5-9. Final Preparation for Second Stage Installation
- 6-1. Starting Skolelinux/Debian-edu from the Hard Drive with GRUB [17]
- 6-2. Skolelinux/Debian-edu Boot in Progress
- 6-3. The Root Password
- 6-4. Password not Visible When you Type it
- 6-5. Installation of Packages in the Second Stage
- 6-6. Installation is Complete- the Necessary Reboot
- 6-7. Installation is Complete- no KDM
- 6-8. Installation is Complete- KDM
- 7-1. Text-based Login
- 8-1. Overview of Netgroups
- 8-2. Adding Hosts to a Netgroup
- 8-3. New hosts Added to the Netgroup
- 8-4. Changes are Saved
- 8-5. Adding a New Netgroup
- 8-6. New Group Added
- 8-7. Adding a Subgroup
- 8-8. Subgroup Added
- 10-1. MToolsFM Startup Screenshot
- 10-2. Possible Choices
- 11-1. Kschoolmenu, Start
- 11-2. Kschoolmenu, Add Menu
- 11-3. Message to Everyone Logged in
- 11-4. Kicker
- 12-1. Webmin Servers
- 12-2. Slbackup, General
- 12-3. Slbackup, Backup Details
- 12-4. Slbackup, Backup Details, Backup Clients
- 12-5. Slbackup, Backup Details, Backup Server
- 12-6. Slbackup, Restore
- 12-7. Slbackup, Restored Files
- 12-8. Slbackup, Maintenance
- 12-9. Slbackup, SSH Keys
- 12-10. Mgdiff
- 12-11. Webmin Login
- 12-12. Welcome Screen- Webmin LDAP User Simple (WLUS)
- 12-13. Configuration of WLUS
- 12-14. New User
- 12-15. Result of New User
- 12-16. Importing the File
- 12-17. File Import
- 12-18. Importing Users from File
- 12-19. Result of File Import
- 12-20. List of Registered Users
- 12-21.
- 12-22. Disable Login
- 12-23. Excluded Users
- 12-24. Re-enabling Login
- 12-25. Kdepasswd, Old Password
- 12-26. Kdepasswd, New Password
- 12-27. Kdepasswd, Successful
- 12-28. Kdepasswd, Too Long Password
- 13-1. OOo, External Address Book
- 13-2. OOo, Registration
- 13-3. OOo, Options
- 13-4. OOo, External Programs
- 13-5. OOo, Toolbars
- 13-6. Printing Directly to pdf-Format
- 13-7. KMail Icon
- 13-8. KMail Startup Screen
- 13-9. KMail Identity
- 13-10. KMail Network
- 13-11. KMail New Account, Pop3
- 13-12. KMail New Account, IMAP
- 13-13. KMail, Confirm Before Send
- 13-14. KMail, Security Settings
- 13-15. KMail, Miscellaneous Settings
- 13-16. KMail, Menu Line
- 13-17. KMail, New Email
- 13-18. KMail, Email Toolbar
- 13-19. KMail, Folder Toolbar
- 13-20. File Manager, Home Icon
Preface
This document is written mainly because nobody else did it, and because it had to be done.
This document is NOT a general Linux book. It is not a document about Linux, but about Skolelinux/Debian-edu. You must supplement reading this document with material from Section 1.5.
 |
You use this document at your own risk! It is to be considered a constant work-in-progress. |
|
Contributions to This Document |
|---|---|
|
I don't intend, nor do I have the time, to maintain this document alone, please read the chapter on how to contribute, by translating, fixing typos, code cleanup, etc |
Chapter 1. Where and How to Get Help[id=help]
1.1. Mailing lists Belonging to the Skolelinux/Debian-edu Project[id=maillists]
Sometimes when you are really stuck, and have no idea how to solve your problem, or maybe you don't even know how to formulate your problem, then it can be very comforting to know that there are several mailing lists out there dedicated to helping you.
There are various mailing lists out there, targeted at different types of users, and in different languages. Have a look at the web page http://developer.skolelinux.no/mailinglister.html
Have a look at Section 13.3 for help on setting up and configuring the mail client KMail.
1.2. IRC Chat Channel Skolelinux/Debian-edu[id=irc]
Eine weitere Möglichkeit Hilfe zu erhalten, stellen die IRC Chat Räume von Skolelinux/Debian-edu dar. Die Nutzer und Entwickler tummeln sich vornehmlich in den Räumen: #debian-edu, #skolelinux, #skolelinux.de auf dem Server irc.debian.org. Wobei in den beiden erstgenannten Räumen vornehmlich auf Englisch und im letztgenannten auf Deutsch kommuniziert wird.
Another place to get help is via IRC, channel: #skolelinux (IRCnet (irc.pvv.ntnu.no, irc.ifi.uio.no, irc.uib.no)). At the moment, this one is for Norwegian-speakers only.
Have a look at Section 13.5 for help on setting up and configuring the IRC-client KSirc.
1.3. Inviting a Skolelinux/Debian-edu Knowledgeable Person into Your Computer [id=sshtunnel]
As long as your Skolelinux/Debian-edu computer has network connection, it possible for someone else to remotely login to your computer with SSH and help you.
First you need to create a user. Refer to Section 12.3 for creating one. In the following, I assume that this newly-created user for this purpose has the username sshhelp. On the machine where your helping hand is logged in, you must also be able to login. Your helping hand must supply you with a username for this purpose; I will assume this username is helper. If the person that is going to help you is logged into a machine with the IP number 127.217.148.238, then you use the command
ssh 127.217.148.238 -R 2100:localhost:22 -l helper
to setup and start an SSH tunnel on port 2100. Your helping hand can use this SSH tunnel to log into your Skolelinux/Debian-edu machine and help you. Now after you have started the SSH tunnel with the command above, your helper will be able to login to your machine with this command issued on his machinessh -l sshhelp -p 2100 localhost
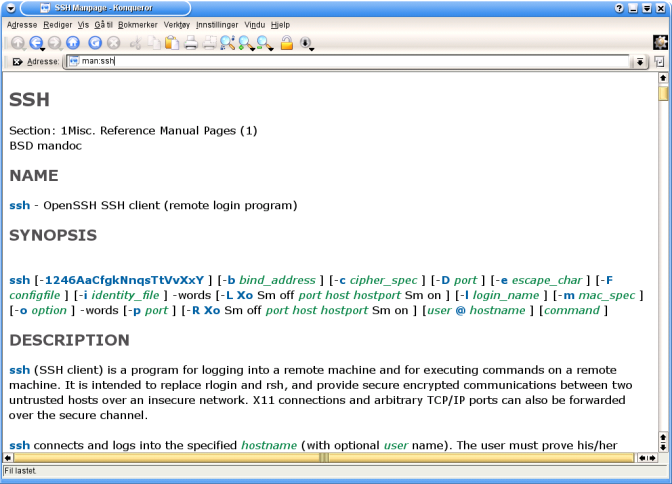
Please have a look at the manual page for SSH,man ssh, or write man:ssh in the address field in the browser/file manager Konqueror, so that you understand the different options used in the commands above. If you are reading this document online with Konqueror then just click here man:ssh
1.4. Permanent Backdoor into a Skolelinux/Debian-edu Machine with an SSH Tunnel [id=backdoor]
There are places where the one in charge of the network is not you, and where this someone who is in charge of the network has blocked incoming SSH connections. If we could login to our server from anywhere, then our life as administrator would be very comfortable indeed. To overcome such showstoppers in the network, we have included in Skolelinux/Debian-edu a script, that sets up an SSH tunnel, similar to the one in Section 1.3, but with an added feature; no need for a helper on the other side, the script handles this for us. This script is located in the package debian-edu-config and once this package is installed, the script is found in /etc/init.d/open-backdoor. This script needs some information from you to run correctly:
RPORT=this is the port that you will be using on the remote machine that you use.
RHOST=this is the DNS name, or IP number to the remote machine that you use.
RUSER=this is the username on the remote machine that you use.
If we take the values from Section 1.3, the script will look like this:
RPORT=2100
RHOST=127.217.148.238
RUSER=help
When you have supplied the necessary parameters RPORT, RHOST and RUSER, you need to setup and configure the necessary SSH keys for the script, so that the script can setup the SSH tunnel automatically for you, without the intervention by a helping hand in Section 1.3. You must login as the user root on the machine where the backdoor-script is running; this can be a server, workstation or thin client server- your choice. Then you must run the command
ssh-keygen -t dsa
When asked for a passphrase, just leave that empty. After you have generated the SSH keys, you must transfer the public part of this key to the machine on the outside, and on this machine place it in the file .ssh/authorized_keys. Make sure you do this in a safe way, not via a Hotmail account. The best would be to use the SSH equivalent scp. You achieve this with the commands from the machine with the backdoor-script running, where you just generated the SSH keys, issue the commandscp -p /root/.ssh/id_dsa.pub RUSER@RHOST:~RUSER
Then login to the remote machine, and issue the commandcat id_dsa.pub >>
~/.ssh/authorized_keys
chmod 600 ~/.ssh/authorized_keys
Now, you should be able to start the backdoor script with the command /etc/init.d/open-backdoor start , and with the command
ssh -l RUSER -p RPORT localhost
you should be able to login from the remote machine to your Skolelinux/Debian-edu machine, very comfortably. |
Now is definitely the time to brush up your knowledge of scp, man scp or write man:scp in the address field in Konqueror. |
|
(Man-in-the-Middle Attack)! |
|---|---|
|
If you have a backdoor script running on many different Skolelinux/Debian-edu machines, then you will experience a frequent warning when trying to login to localhost @@@@@@@@@@@@@@@@@@@@@@@@@@@@@@@@@@@@@@@@@@@@@@@@@@@@@@@@@@@ @ WARNING: REMOTE HOST IDENTIFICATION HAS CHANGED! @ @@@@@@@@@@@@@@@@@@@@@@@@@@@@@@@@@@@@@@@@@@@@@@@@@@@@@@@@@@@ IT IS POSSIBLE THAT SOMEONE IS DOING SOMETHING NASTY! Someone could be eavesdropping on you right now (man-in-the-middle attack)! It is also possible that the RSA host key has just been changed. The fingerprint for the RSA key sent by the remote host is ba:bc:68:4c:0b:72:4b:89:d3:04:00:c3:ab:8b:b8:98. Please contact your system administrator. Add correct host key in /home/klausade/.ssh/known_hosts to get rid of this message. Offending key in /home/klausade/.ssh/known_hosts:2 RSA host key for localhost has changed and you have requested strict checking. Host key verification failedThis is nothing to get scared about. It just means that you must delete (in this case line 2) the line in the file /home/klausade/.ssh/known_hosts containing localhost |
1.5. More In-Depth Linux Documentation[id=linuxdoc]
There is an enormous amount of written material about every aspect concerning Linux and GNU. Online you'll find full in-depth books with +1000 pages, and shorter 1/2 DIN A4 pages. Your local bookstore should probably have at least 100 Linux relevant book titles available.
1.5.1. Documentation and Help Pages Already Installed
Almost all programs and commands on your system come with a help page. These pages are available from the command line, like man ssh which gives you this:
SSH(1)                  System General Commands Manual                  SSH(1)

NAME
     ssh - OpenSSH SSH client (remote login program)

SYNOPSIS
     ssh [-l login_name] hostname | user@hostname [command]

     ssh [-afgknqstvxACNPTX1246] [-b bind_address] [-c cipher_spec]
         [-e escape_char] [-i identity_file] [-l login_name] [-m mac_spec]
         [-o option] [-p port] [-F configfile] [-L port:host:hostport] [-R
         port:host:hostport] [-D port] hostname | user@hostname [command]

DESCRIPTION
     ssh (SSH client) is a program for logging into a remote machine and for
     executing commands on a remote machine.  It is intended to replace rlogin
     and rsh, and provide secure encrypted communications between two
     untrusted hosts over an insecure network.  X11 connections and arbitrary
     TCP/IP ports can also be forwarded over the secure channel.

     ssh connects and logs into the specified hostname.  The user must prove
     his/her identity to the remote machine using one of several methods
     depending on the protocol version used:
They are also available graphically in Konqueror by writing in the address field
man:ssh
1.5.2. Skåne Sjælland Linux User Group, Friheden til at skrive bøger(Freedom to Write Books)[id=localdocu]
This is a Danish Linux User Group,(LUG - Linux User Group). They have about 1830 pages of very well-written Linux documentation- all in Danish. All of these pages can be downloaded or read online in various formats, such as html, ps, pdf, Palm Pilot.
These pages are organised into 15 different books; all available from Skåne Sjælland Linux User Group
1.5.3. The Linux Documentation Project [id=tldp]
More in-depth books and guides are located in "The Linux Documentation Project"- all in English,as well as other languages.
The Linux Documentation Project
|
A lot of already available documentation is ready to be installed on your Skolelinux/Debian-edu machine. Have a look at what is available with apt-cache search ldp and alsoapt-cache search documentation|more scroll down the list with the spacebar, and install what you find interesting with the commandapt-get install packagename if I wanted to install the package doc-linux-html I would issue the commandapt-get install doc-linux-html look at section FIXME |
1.5.4. Manuals for OpenOffice.org[id=OOdoc]
The Norwegian Board of Education (Læringssenteret) have published small, handy manuals, in Norwegian for the different components of OpenOffice.org, such as Writer, Impress, Calc, Draw and the HTML-editor.
These manuals can be downloaded individually, or together (211 pages), from the Board of Education's web page at OpenOffice.org user manual
|
This kind of OpenOffice.org material also exists in your language. |
1.5.5. LTSP, Linux Thin Client Server Project(LTSP)[id=ltspdoc]
The cornerstone to a well-functioning Skolelinux/Debian-edu is the thin client. In order to get these thin clients running smoothly, there is a good piece of documentation, which is already translated into several languages, Linux Terminal Server Project
Chapter 2. Getting the "Right" Hardware[id=hardware]
2.1. Firewall/Router[id=coyote]
 |
The latest version of Coyote Linux is 2.13 |
A short summary on things you need to create a Coyote Linux firewall/router for Skolelinux/Debian-edu.
-
An old used computer, anything from Pentium 75MHz CPU and upward, with 16MB of RAM or more, no need for a hard drive or CD-ROM [1].
-
Two network cards, they can be type ISA or PCI. A mix is possible, 10Mbit or 100Mbit, support for 1Gbit should be available. Any type of network card supported by the Linux kernel is usable, but since there is no automatic detection of what kind of network card you are using, you must specify yourself when creating the Coyote Linux-floppy which drivers your network card uses. [2] This means that it might be a bit troublesome to use no-name network cards. Personally, I prefer to use network cards from the manufacturer 3Com, as almost all PCI network cards from them use the module 3c59x.
Short List of Network cards I use with Success in my Coyote Linux Machines, and Their Corresponding Driver Modules:
-
3Com509 Module:3c509
-
3Com900 Module:3c59x
-
Intel Ethernet Pro 100 Module:eepro100
-
3Com590 Module:3c59x
-
RTL8139 Module:8139cp or 8139too
-
-
2 diskettes, preferably new and unused
-
1 crossover network cable to connect Coyote Linux via the LAN-network card to the Skolelinux/Debian-edu eth0 network card[3]
-
A machine with a floppy drive and an Internet connection, to download Coyote Linux; this can either be a Linux machine or a Windows machine, Coyote Linux. Source files exist for Linux and Windows- both produce a workable Coyote Linux floppy.
The procedure for making this Coyote Linux floppy is similar on Linux and Windows, except that it's a command line script in Linux and a click&point thing in Windows.
-
Download a copy of Coyote Linux, from coyotelinux.com, look in the section Downloads, then look in Coyote Linux - Floppy Firewall
What you are looking for exists in mainly two versions, one for Linux,( Linux Floppy Creator Scripts),and the other one for Windows, ( Coyote Linux Windows Disk Creator). Choose the one that suits you best- the resulting floppy will be the same.
|
The hardware specifications listed here are based on my own experience; yours may vary. |
2.2. Main Server[id=mainserver]
The function of this profile is further described in Section 4.3
The hardware specification for this profile depends mainly on how many users you have.
-
You should opt for SCSI-disks, or SATA. Only use IDE-disks for small networks with few users.
The size of the disk (or the RAID) is dictated by how many users you have, and how much space you give each of them. See FIXMESection 8.10
-
A network card of good quality, 100Mbit or 1000Mbit
-
The CPU doesn't need to be very fast- about 500-1000MHz should do fine. This profile is mainly a file server profile.
-
256MB-512MB RAM should be enough.
|
The hardware specifications listed here are based on my own experience; yours may vary. |
2.3. Thin Client Server[id=ltspserver]
The function of this profile is further described in FIXME Section 4.3
The most important, absolutely important thing is plenty of high quality ECC RAM.
-
The amount of RAM you need depends on how many thin clients you have, and the pattern of use, see FIXME the sidebar Placeholder for fixme[id=fixme]. The rule of thumb says 64-124MB RAM on the thin client server for each thin client you have and about 256MB for the server itself. For about 40-50 thin clients 4GB of RAM is sufficient, which is also the maximum amount of RAM that a ready-compiled Linux kernel for Skolelinux/Debian-edu supports. See FIXME Section 8.4 how to install a kernel with support for up to 4GB of RAM and multiprocessor(SMP). If you have more than 4GB of RAM in your server, then you must compile your own kernel with support for that. That is not (yet) the scope of this document, but the clue is to have in your kernel config file
CONFIG_HIGHMEM64G=Y
-
You definitely want to have two processors, that way one user can start a heavy process, such as Gimp, and lock up one CPU, and there will still be one easily available for the other users on the system. It's not crucial to have the fastest CPU available on the market, having two is more important.
-
On a machine with the thin client server profile installed, no user data or home directories will be saved. All user data will be NFS-mounted[4] from the machine with the profile main server. There is no need for a large disk on this machine, unless you choose to also use it as an external backup machine, see FIXME the sidebar Placeholder for fixme[id=fixme]. A 9GB disk is enough for such a machine, but it should be SCSI, because of the heavy load with many thin clients.
-
You must have two network cards, of good quality. One card (eth0) will connect to the main server to get home directories; the other (eth1) will connect to the thin-client switch
|
Remember that each thin client uses about 2Mbit of network bandwidth, which means that on a 100Mbit network, you can't have more than about 50 thin clients. If you need more than that, you must get more thin client servers, or invest in a 1Gbit network. I would choose more thin client servers. |
|
The hardware specifications listed here are based on my own experience; yours may vary. |
2.4. The Thin Client[id=thinclient]
The function of this profile is further described in Section 4.3
-
You need a machine with a video card that is possible to configure automatically, otherwise you must manually configure the video card by hand. You do not want to use old onboard ISA-based video cards- they are just trouble.
-
You want to have a network card that is capable of a so-called PXE-boot. That means you won't need to make any boot floppies for the thin client, which is a bothersome thing. Boot floppies are bothersome to create, and they get lost. You need them every time you boot the thin client. With a PXE-card it's just plug&play- you turn on the machine, and that's it. PXE-network cards do cost a little bit more than normal network cards, but they're worth it, definitely.
If you don't have PXE-network cards, you must create boot floppies for your cards. You should first have a look at Section 8.7.3, that is a kind of universal boot floppy, with support for the 30 most common network cards. If that one doesn't work with your network card, then you can visit rom-o-matic.com and follow the online instructions there for making boot floppies.
-
You need a minimum of 32MB RAM[5] in the thin client. In newer versions of Skolelinux/Debian-edu, present in Venus 1.0, there is the possibility to use swap over NFS to the thin client. This is done automatically if you add the MAC address of your thin client in /etc/dhcp3/dhcpd-skolelinux.conf. Have a look at Section 8.7.4
-
Your processor doesn't need to be faster than 100MHz.[6]
-
There is absolutely no need for a hard drive. It just makes noise, generates heat and uses unnecessary power. Remove it, or disable it physically.
-
A floppy drive, if you want to use it in the thin client, see FIXME Section 10.2
-
A connector for USB, if you want to use it in the thin client, see FIXME Section 10.3
-
A PCI sound card, if you want to use sound on your thin client- only advisable if you have enough bandwidth available. Sound consumes plenty of bandwidth, see FIXME Section 10.4
|
Plenty of people have wanted and tried to get the CD-ROM to work in a thin client, but without success. If you have managed to get it to work, please let me know. |
2.5. Workstation[id=workstation]
The function of this profile is further described in Section 4.3
The hardware requirement for this profile all depends on what you have available, the intended use of the machine, and how fast you want the machine to do things. Unlike the other server profiles such as main server and Thin-client server, this profile is mainly to be used by one user at a time, so making a "bad" hardware choice will only affect one user.
You will need a hard drive with a minimum size of about 1700MB plus 4 times the amount of RAM in the machine. There is no need for a big hard drive in this machine, unless you plan to use it as an external backup server FIXME the sidebar Placeholder for fixme[id=fixme]. If you do have a really big hard drive in this machine, and would like to put it to good use, you could add another lv to the machine, and use it to save big files such as video, images, ISO-images, see Section 8.5.8
|
If you have a rather small hard drive, but plenty of RAM, maybe as much as 940MB, then the swap partition alone would end up being almost 2GB big. If you think this is too much, then you can lower the amount of RAM that the installer sees by booting with the option when you install Skolelinux/Debian-edu. This way the installer only sees 64MB of RAM, and will only make a 128MB big swap partition, see Figure 5-1. It is only during the first stage of installation that this low amount of RAM is seen by the system. Later all available RAM is visible and in use, but maybe you need to install a HIGHMEM-enabled kernel, see Section 8.4 |
|
It's also possible during installation to decide what size partitions the automatic partitioning will make. Have a look in directory /etc/autopartkit/ during install, use ALT-F2 and the editor nano to edit those files. Note: this is for advanced users only. |
Chapter 3. Firewall/Router for Skolelinux/Debian-edu
3.1. Hardware[id=coyotehardware]
A short summary of needed hardware for making Coyote Linux for Skolelinux/Debian-edu:
|
Should parse the contents somehow from Section 2.1, should be no need to write the same thing twice. |
3.1.1. The Latest Version of Coyote Linux
Coyote Linux is a product that undergoes continuously development, with several new releases each year.
At the moment, date=16.10.2004, the latest stable version of Coyote Linux is 2.13. This document is written while version 2.06 was stable, but there shouldn't be any major differences.
3.2. Placement of the firewall/router in a Skolelinux/Debian-edu Network[id=coyoteplacement]
|
Although I keep mentioning the necessary firewall/router and Coyote Linux in the same sentences, that doesn't mean that you must use Coyote Linux for this purpose. You can use a dedicated router from any commercial manufacturer you like, or something similar to Coyote Linux such as FloppyFirewall, Gibraltar. It's just that I personally prefer Coyote Linux. You must just remember that whatever firewall/router you use, it must be configured like A |
The firewall/router has a defined role in the Skolelinux/Debian-edu network. Without it, the network will not function optimally.
Coyote Linux has two network cards, each having different roles. One network card is to be connected to the existing network, so that it gets connected to the Internet. In Coyote Linux, this network interface is called WAN, eth1, Internet. The other card, which is to be connected to your Skolelinux/Debian-edu network is called LAN, eth0, LAN network. This card is connected either directly to the Skolelinux/Debian-edu mainserver with a crossover cable (for small networks), or via a switch making a so-called 10.0.2/23-backbone network.
|
Don't mix up the different roles of eth0 and eth1 in Coyote Linux and Skolelinux/Debian-edu |

A similar diagram with an overview of a complete Skolelinux/Debian-edu network is available in Section 4.1
|
FIXME, should be translated. |
3.3. Creation of a Coyote Linux Floppy[id=makefloppy]
Basic Configuration of the firewall/router
-
Regardless if you choose to create the Coyote Linux floppy on a Linux or Windows machine, the following configuration must be used. This also applies to any other firewall/router than Coyote Linux
-
local network interface:
IP Address: 10.0.2.1
Netmask:    255.255.254.0
Broadcast:  10.0.3.255
Network:    10.0.2.0
-
Install the Big Pond login software? [y/n]:n
Press "n"
I think this refers to some extra stuff you need if you happen to get net access from the provider Big Pond, but I'm not really sure. Anybody know?
-
Do you want to enable the Coyote DHCP-server [y/n]: n
Press "n"
Since Skolelinux/Debian-edu already has a DHCP-server running, you must disable the DHCP-server on your firewall/router, and on any other machines you want to integrate into your Skolelinux/Debian-edu-network. Having two DHCP-servers on the same network usually doesn't work very well.
-
-
After you have downloaded the Coyote Linux source files, you need to unpack them. You must be superuser root to unpack them.
tar zvxf coyote-2.06.tar.gz
cd coyote
./makefloppyshIf a new version of Coyote Linux exists at the time you read this, then you must replace the version 2.06 in the commands above with the version number you have downloaded.
-
When creating a Coyote Linux on a Linux machine, these are the questions asked, and the answers you should give:
-
Coyote floppy builder script v2.9

Please choose the desired capacity for the created floppy:

1) 1.44MB (Safest and most reliable but may lack space needed for
           some options)
2) 1.68MB (Good reliability with extra space) - recommended
3) 1.72MB (Most space but may not work on all systems or with all
           diskettes)

Enter selection:2
Choose here what is recommended «1.68MB»
-
Please select the processor type in the destination Coyote Linux system:
Choose «2) 486dx or better (has a math co-processor)» if you use a relatively new machine (newer than 486), if you make the wrong choice here you machine will not boot.
This question isn't present in newer versions of Coyote Linux, since the support for machines without a math co-processor has been removed
-
Please select the type of Internet connection that your system uses.

1) Standard Ethernet Connection
2) PPP over Ethernet Connection
3) PPP Dialup Connection

Enter Selection:
Here you would normally choose option 1)
-
Configuring system for Ethernet based Internet connection.
By default, Coyote uses the following settings for the local network
interface:

IP Address: 192.168.0.1
Netmask:    255.255.255.0
Broadcast:  192.168.0.255
Network:    192.168.0.0

Would you like to change these settings? [Y/N]: y
Enter local IP Address [192.168.0.1]: 10.0.2.1
Enter local Netmask [255.255.255.0]: 255.255.254.0
Enter local Broadcast [192.168.0.255]: 10.0.3.255
Enter local network number [192.168.0.0]: 10.0.2.0
These network settings for the local network must be changed, see A
-
Does your Internet connection get its IP via DHCP? [y/n]:
Answer yes(y) or no(n), according to you network configuration.
If you do not get IP via DHCP, you need to fill in some information:
Please enter the information for your static IP configuration
Internet IP Address:
Internet Subnet Mask [255.255.255.0]:
Internet Broadcast [Enter = Default]:
Internet Gateway Address:
Domain Name:
DNS Server 1:

DNS Server 2 (optional):
-
Enter your DHCP hostname:
Normally you can leave this one blank
-
Install the Big Pond login software? [y/n]:
I think this refers to some extra stuff you need if you happen to get net access from the provider Big Pond, but I'm not really sure. Anybody know?
-
Do you want to enable the Coyote DHCP server? [y/n]: n
Here you must answer «n»!
-
If you don't know what a DMZ is, just answer NO
Do you want to configure a De-Militarized Zone? [Y/N]: n
Here can press just «n»
-
You now need to specify the module name and parameters for your network cards.

If you are using PCI or EISA cards, leave the IO and IRQ lines blank.

Enter the module name for you local network card:
This is the tricky part, knowing what kind of driver modules to use for your network cards; even knowing what kind of network cards you have is sometimes difficult. Have a look at Section 3.12 for an overview of available driver modules. Remember to not use the ending .o when writing what driver module to use.
I prefer newer cards from 3Com. Almost all of them use the driver module 3c59x.
-
Syslog server address:
This you can leave blank.
It should be possible to use the Skolelinux/Debian-edu mainserver as Syslog server, but I haven't tried this yet. The address to use would then be 10.0.2.2
-
-
You must now insert a floppy in the machine. Remember to turn the write protection off. The creation of the floppy will take a few minutes.
3.3.1. Creating a Coyote Linux Floppy on a Windows Machine[id=clwin]
If you create the floppy on a Windows machine, it's almost the same procedure as with Linux.
This error appears when you click on the wrong Coyote Linux exe-file. Here you just press 'Next' Here you must fill in the necessary network information; see A


Filling in the correct values for IP address and Netmask will make Coyote Linux correctly calculate the values for Broadcast address and Network address
Without this password, you can't logon your Coyote Linux machine later, see Section 3.6 Just leave this blank, or have a look at 2.k Choose whatever is most appropriate for you. If you get a DHCP-assigned address, then it is likely that you will not need to give any more information about your connection. \ If you have a static address, then fill in the appropriate values here. \ Do not enable the Coyote Linux DHCP-server. There is already one running on the mainserver Drag and drop to choose the correct network cards in your Coyote Linux machine. Place a floppy in the floppy drive, and press 'Next'.


3.4. Upgrading to Newer Versions of Coyote Linux[id=clupgrade]
|
This chapter should be moved to after the introductions to available commands in Coyote Linux |
Coyote Linux is a product that is in active development and maintenance, just like Skolelinux/Debian-edu. That means that new versions are released quite often, with new features and security fixes. Especially because of the security fixes, you should always use the latest stable version of Coyote Linux
Since Coyote Linux runs solely from floppy, there is no system, per se, to upgrade. You must create a totally new floppy, as in Section 3.3. To make this process as easy as possible, there are some simple things to keep in mind.
-
Finding out what kind of network cards you have: If you have forgotten what kind of network cards you use and didn't write it down somewhere, then you can use the command lsmod to list all loaded driver modules that are in use. Maybe that way you'll remember which network cards you have.
coyote# lsmod
Module                  Size  Used by
3c509                   7732   2
ip_nat_quake3           1768   0 (unused)
ip_nat_mms              2608   0 (unused)
ip_nat_h323             2060   0 (unused)
ip_nat_amanda            876   0 (unused)
ip_nat_irc              1904   0 (unused)
ip_nat_ftp              2384   0 (unused)
ip_conntrack_quake3     1848   1
ip_conntrack_mms        2704   1
ip_conntrack_h323       2065   1
ip_conntrack_egg        2280   0 (unused)
ip_conntrack_amanda     1488   1
ip_conntrack_irc        2672   1
ip_conntrack_ftp        3440   1
In this listing of loaded modules you see that the network card 3Com509 is in use, twice. For a list of supported modules, look in Section 3.12
It would be best to write down somewhere what network cards you use in the machine.
-
What kind of port forwarding do you have?
Information about your port forwarding rules, if you have made any, is in the file /etc/coyote/portforwards
coyote# more /etc/coyote/portforwards
port Y 10.0.2.2 tcp 2333 22 # Example - Secondary SSH
3.5. Coyote Linux Bootup[id=clboot]
Boot your Coyote Linux, making sure the Coyote Linux floppy is in the floppy drive, and that the machine has been configured in BIOS to boot from floppy.

Generating DSS keys- this will take several minutes on a slow system.

If all goes well, you will see the Coyote Linux text-based login screen. You will recognise that all has gone well when you see the magic words
LAN network: UP
WAN network: UP
In this screenshot, both network cards are defect.
FIXME, replace with a screenshot where network cards work.

- Q: It appears that the network card (LAN) that goes to the Skolelinux/Debian-edu network is not working: DOWN
- Q: It appears that the network card (WAN) that is connected to the Internet is not working: DOWN
- Q: I have tried several different driver modules for my network cards, but I still haven't found the correct driver.
Q: It appears that the network card (LAN) that goes to the Skolelinux/Debian-edu network is not working: DOWN
A: If you have configured your network card according to A but it's still not working, then maybe you have chosen the wrong driver module for your network card
A: There are two obvious reasons why the WAN network card is not UP:
-
You are trying to connect using the wrong Internet connection type. Have a look again at 2.c
If you have a connection with a DHCP-assigned address, and not a static one, then there must be a physical connection with a network cable between Coyote Linux and the connection.
-
You have chosen the wrong driver module for this network card.
You could try to login to Coyote Linux and then first choose q) to get out of the Coyote Linux menu, then issue the command
dmesg|more
use SPACE to page. Look for references to eth0 and eth1. Look at the sidebar Different Names Used for the network cards[id=clnicnames] for a reminder about what eth0 and eth1 means. There is usually an indicator there as to what the problem is.
Q: I have tried several different driver modules for my network cards, but I still haven't found the correct driver.
A: Have you had a look at this web page containing info about network card and corresponding driver modules for Coyote Linux? http://www.dalantech.com/ubbthreads/showflat.php?Cat=&Board=unix&Number=32746&page=0&view=collapsed&sb=5&o=&fpart=1
3.6. Coyote Linux Command Line Login[id=cllogin]
You can now login using the command line, with the username root, and empty password, which is the only user available in Coyote Linux. The first thing you must do is to set the root password for your Coyote Linux[8]
|
If you don't set any password on your Coyote Linux, then anybody can gain access to it by going to the address http://10.0.2.1:8180 |
|
You must set the root password, also called the system password, immediately for Coyote Linux! |
coyote login: root
This what you see when login to Coyote Linux the Menu;

The first thing you must do, is change the root password. Choose 2) Change system password, do so by pressing «2» then press ENTER

You choose a password, minimum 5 characters, maximum 8 characters, which you type twice. Be aware that there is no output to the screen when you type the password, in case someone is looking over your shoulder.
Password changed.
Updating webadmin password...

Press ENTER to return to system menu.
If this is the feedback you get from Coyote Linux, then you have successfully changed the root password.
Since Coyote Linux runs from floppy, and stores everything in RAM, which is lost when you reboot Coyote Linux, you must save this new password to the floppy. Do this by choosing w) Write configuration to disk
Your new password is saved to the Coyote Linux floppy when you see this:
Backup script complete. Press ENTER to return to menu.
All changes you have made to Coyote Linux, are now saved to the floppy.
You can now reboot Coyote Linux, and you will see that the new password is in use. You can reboot Coyote Linux by pressing the ON/OFF-button on your Coyote Linux machine, or by choosing r) Reboot system from the Coyote Linux Menu.
If you have managed to get both network cards working, and Coyote Linux have a network connection, then you don't need to login using the command line anymore. In the future, you can use your web browser to login to Coyote Linux, look at Section 3.7
When choosing q) quit you will end up at the command line in Coyote Linux if you need to go back to the Coyote Linux Menu, then type menu and press ENTER.
See Section 3.9 for a list of a few useful commands you can use from the command line in Coyote Linux
3.7. Coyote Linux Web Administrator[id=clgui]
Coyote Linux has a nice and well-functioning web administrator that lets you perform almost all day-to-day operations. Point your web browser to the address http://10.0.2.1:8180
At this address you will be met by the Coyote Linux web administrator. Click on the link, and then write in the username root and the password you made, refer to Figure 3-16

All options and choices are done in the Main Menu to the left.

-
Show configuration
Choosing this will give you the status of your network cards, the IP addresses they have, uptime of Coyote Linux, load and such.
-
LAN configuration
Here you have the option of changing the configuration of the LAN network card, the one that goes to the Skolelinux/Debian-edu network.
Don't change anything here! Doing so will severely reduce the performance of your Skolelinux/Debian-edu network.
Leave the values as they are, refer to A.FIXME Should parse the contents of change_ip_setup in here, later.
-
Internet configuration
Here you have the chance of changing the values of your WAN network card, the one that goes to Internet. If you get a new ISP, or go from getting your IP address assigned by DHCP to having a static IP address, then this is the place to change that kind of information with no need for creating a new Coyote Linux floppy from scratch. See 2.c
-
DHCP configuration
This gives you the chance to configure the DHCP-server that comes with Coyote Linux.
Do not enable the DHCP-server in Coyote Linux! See 2.h
-
Administrative Configurations
Here you can enable/disable services such as DNS, SSH, webadmin.
-
Optional Configs
This is where you can change things such as the NTP-server (external machine that keeps accurate time. I use the value Remote Time Server:ntp.uio.no, and Time Zone: CET to keep the clock in my Coyote Linux accurate. It should be possible to use mainserver as NTP-server.
-
Port Forwarding
Here you can change and enable port forwarding on Coyote Linux. This is a very practical and neat feature in a Skolelinux/Debian-edu network. Since Coyote Linux stops and blocks most connections, even passing SSH, it's nice to be able to use port forwarding and that way still get past Coyote Linux with incoming SSH-connection to the Skolelinux/Debian-edu network.
With this port forwarding rule
Yes TCP Any 22 10.0.2.2 22 No SSH straight into Mainserver
all SSH-connections coming to Coyote Linux will be redirected to the Skolelinux/Debian-edu main server. If this is advisable in your network, you must decide.
-
Firewall Configuration
Here you can setup and configure the firewall rules in Coyote Linux. There are plenty of ready-made rules that you can use as examples.
-
System password
Here you can change the root password, also known as the system password in Coyote Linux, just like you did using the command line in Section 3.6.
-
Configuration file
This is the file that contains all your configurations.
-
Backup configuration
If you have made any changes in Coyote Linux, then you must remember to write them to floppy, by choosing this Main Menu item, otherwise your changes will be gone when you reboot Coyote Linux. There is a red warning at the bottom of the screen whenever you make changes to Coyote Linux without having them written to the floppy.
-
Reboot system
When you need to reboot Coyote Linux, you can do so from this Main Menu item. You will have to reconfirm this option.
    Are you sure you want to reboot
                  the system?
3.8. Login via SSH[id=clssh]
Sometimes it might be necessary to login to Coyote Linux when there is no web browser available, or if you prefer to use the command line. Then you can use ssh to connect to Coyote Linux.
If you are logged in to a machine in the Skolelinux/Debian-edu network, then you use
ssh -l root 10.0.2.1
to login to Coyote LinuxIf you are outside of the Skolelinux/Debian-edu network, you must replace the value 10.0.2.1 with the appropriate value as seen for network card WAN in i. In this case, it would be
ssh -l root 192.168.1.10
You will be met by almost the same choices as when logged into the Coyote Linux web administrator, but presented in a text-based menu.
                Coyote Linux Gateway -- Configuration Menu


  1) Edit main configuration file         2) Change system password
  3) Edit rc.local script file            4) Custom firewall rules file
  5) Edit firewall configuration          6) Edit port forward configuration

  c) Show running configuration           f) Reload firewall
  r) Reboot system                        w) Write configuration to disk

  q) quit                                 e) Exit
  ----------------------------------------------------------------------------
  Selection:
You have almost the same options as when logged into the Coyote Linux web administrator, see Section 3.7 for a brief description of the different choices.
When choosing q) quit you will end up at the command line in Coyote Linux if you need to go back to the Coyote Linux Menu, then type menu and press Enter.
If you see this when trying to login to Coyote Linux:
klaus@tjener:~$ ssh 10.0.2.1 -l root
@@@@@@@@@@@@@@@@@@@@@@@@@@@@@@@@@@@@@@@@@@@@@@@@@@@@@@@@@@@
@    WARNING: REMOTE HOST IDENTIFICATION HAS CHANGED!     @
@@@@@@@@@@@@@@@@@@@@@@@@@@@@@@@@@@@@@@@@@@@@@@@@@@@@@@@@@@@
IT IS POSSIBLE THAT SOMEONE IS DOING SOMETHING NASTY!
Someone could be eavesdropping on you right now (man-in-the-middle attack)!
It is also possible that the RSA host key has just been changed.
The fingerprint for the RSA key sent by the remote host is
34:b7:a3:9b:06:4c:e2:30:1b:0d:03:45:7b:22:b7:dd.
Please contact your system administrator.
Add correct host key in /skole/tjener/home0/klaus/.ssh/known_hosts to get rid of this message.
Offending key in /skole/tjener/home0/klaus/.ssh/known_hosts:27
RSA host key for 10.0.2.1 has changed and you have requested strict checking.
Host key verification failed.
Then it is most likely because you had previously logged into a different machine with the IP address 10.0.2.1, or you have changed a network card in Coyote Linux, or it is really a man-in-the-middle attack. The solution is to remove the offending key, in this case it's line number 27, in file /skole/tjener/home0/klaus/.ssh/known_hosts.
3.9. Useful Commands in Coyote Linux[id=clcommands]
Useful commands in Coyote Linux.
-
ping
Useful to find out if the network is working. This command will see if there is any connection to Skolelinux/Debian-edu main server
coyote# ping -c5 10.0.2.2
PING 10.0.2.2 (10.0.2.2): 56 data bytes
64 bytes from 10.0.2.2: icmp_seq=0 ttl=64 time=0.9 ms
64 bytes from 10.0.2.2: icmp_seq=1 ttl=64 time=0.5 ms
-
coyote#uptime
This command gives you the time Coyote Linux has been running since last boot.
coyote# uptime
  2:37pm  up 80 days,  7:55, load average: 0.00, 0.00, 0.00
-
coyote#dmesg
This command prints the information that the Linux kernel has found on your machine, things such as amount of RAM, CPU, network cards. If the output from dmesg is too much for the size of your screen, then you can pipe the output to the pager 'more', and use SPACE to read it all,
dmesg|more
-
coyote#ifconfig
Shows verbose information about your network cards.
coyote# ifconfig eth0 Link encap:Ethernet HWaddr 00:50:DA:43:7A:E9 inet addr:10.0.2.1 Bcast:10.0.3.255 Mask:255.255.254.0 UP BROADCAST RUNNING MULTICAST MTU:1500 Metric:1 RX packets:27541711 errors:0 dropped:0 overruns:0 frame:0 TX packets:34408201 errors:0 dropped:0 overruns:0 carrier:0 collisions:0 txqueuelen:100 RX bytes:4029268333 (3842.6 MiB) TX bytes:2039998168 (1945.4 MiB) Interrupt:14 Base address:0x8000 eth1 Link encap:Ethernet HWaddr 00:90:27:74:66:3B inet addr:193.116.174.121 Bcast:193.156.179.127 Mask:255.255.255.128 UP BROADCAST RUNNING MULTICAST MTU:1500 Metric:1 RX packets:34739492 errors:0 dropped:0 overruns:0 frame:0 TX packets:25470323 errors:0 dropped:0 overruns:0 carrier:0 collisions:0 txqueuelen:100 RX bytes:2060262113 (1964.8 MiB) TX bytes:3837976022 (3660.1 MiB) Interrupt:12 Base address:0x1000 lo Link encap:Local Loopback inet addr:127.0.0.1 Mask:255.0.0.0 UP LOOPBACK RUNNING MTU:16436 Metric:1 RX packets:83 errors:0 dropped:0 overruns:0 frame:0 TX packets:83 errors:0 dropped:0 overruns:0 carrier:0 collisions:0 txqueuelen:0 RX bytes:9112 (8.8 kiB) TX bytes:9112 (8.8 kiB) -
coyote#lsmod
This command lists loaded driver modules- useful to see which driver modules are used by the network cards.
coyote# lsmod
Module                  Size  Used by
eepro100               17516   1
3c59x                  24408   1
mii                     1852   0 [eepro100]
ip_nat_quake3           1608   0 (unused)
ip_nat_mms              2448   0 (unused)
ip_nat_h323             2044   0 (unused)
ip_nat_amanda           1020   0 (unused)
In this listing, you'll see that the network card driver modules Intel pro100 and 3com series 3c59x which include 3c590, 3c595, 3c900, 3c905 are loaded. See Section 3.12
-
coyote#route
-
coyote#traceroute
Useful to trace the route a network packet takes; a nice way to find out where the problem really lies.
-
coyote#showcfg
Another command that gives information about the state of the network cards.
Coyote running configuration display utility.

Internet up (eth1): YES
Local network up (eth0): YES

---------------Internet configuration------------
IP Address  193.156.172.101 (DHCP Assigned)
Netmask     255.255.255.128
Gateway     193.116.172.1
---------------Local configuration---------------
IP Address  10.0.2.1
Netmask     255.255.254.0
Broadcast   10.0.3.255
---------------Resolver configuration------------
domain holmlia.gs.oslo.no
nameserver 193.156.192.40
nameserver 193.156.192.50
-------------------------------------------------
2:52pm up 80 days, 8:09, load average: 0.00, 0.00, 0.00
-
coyote#free
Use this command to see how much RAM you have in the machine, and how much is being used. This machine has 32MB of RAM.
coyote# free total used free shared buffers Mem: 30860 6004 24856 0 0 Swap: 0 0 0 Total: 30860 6004 24856 -
coyote#menu
This commands starts the Coyote Linux Menu
                Coyote Linux Gateway -- Configuration Menu


  1) Edit main configuration file         2) Change system password
  3) Edit rc.local script file            4) Custom firewall rules file
  5) Edit firewall configuration          6) Edit port forward configuration

  c) Show running configuration           f) Reload firewall
  r) Reboot system                        w) Write configuration to disk
3.10. Coyote Linux as an Ordinary DHCP-Server in a Non-Skolelinux/Debian-edu Network
Coyote Linux is a perfect candidate if you just need a DHCP-server for your network, regardless of what type of machines you have in your network- Linux, Windows or Mac.
The only thing you have to configure differently, is to enable the DHCP-server. See 2.h
A short summary of making a Coyote Linux DHCP-server:
Coyote Linux as an Ordinary DHCP-server
-
Remember to answer Yes to the question «Do you want to enable the Coyote DHCP-server [y/n]:»
-
Once you have your Coyote Linux DHCP-server running, you will probably need to use a different address to login to it, if you didn't change the default LAN configuration:
Configuring system for Ethernet based Internet connection


By default, Coyote uses the following settings for the local network
interface:

IP Address: 192.168.0.1
Netmask:    255.255.255.0
Broadcast:  192.168.0.255
Network:    192.168.0.0

Would you like to change these settings? [Y/N]: n
then you'll have to use the address 192.168.0.1 instead of 10.0.2.1 when logging in to the Coyote Linux web administrator, see Section 3.7 and Section 3.8
The new addresses are in this case:
-
ssh -l root 192.168.0.1
-
3.11. Coyote Linux and different ISP[id=clisp]
|
I have not yet encountered an ISP that didn't work with Coyote Linux. Please tell me if you know of one. |
This is list of ISP's that I know work well with Coyote Linux
-
Nextgentel, Norway
-
Tele2 ADSL Privat, Norway
-
Tele2 ADSL Bedrift, Norway
-
UPC Chello Classis, Norway
-
Utdanningsetaten (The Department of Education) in Oslo (Not yet tested on InnsIKT-schools)
Due to a strange network policy at the Department of Education in Oslo, you must make the following changes at your mainserver:
In the file /etc/bind/named.conf change the following stanza:
        // forwarders {
        // By special request from the good people inside the Dept of Education in
        // Oslo:
        //      193.156.192.40;
        //      193.156.192.50;
        // Dept. of Education in Oslo  end of block
        //      0.0.0.0;
        // };
change it to
           forwarders {
        // By special request from the good people inside the Dept of Education in
        // Oslo:
                193.156.192.40;
                193.156.192.50;
        // Dept. of Education in Oslo end of block
        //      0.0.0.0;
           };
That means removing the comment-slashes in front of forwarders.
If you don't do this, you will not be able to connect to the Internet due to DNS problems, and some BSD-network guy at the Department of Education will bite your head off.
After you have made this change in /etc/bind/named.conf, you must restart bind, with
/etc/init.d/bind9 restart
[9] -
Telenor ADSL, Norway
-
Høgskolen i Oslo (Oslo College)
You must make the same bind changes as with the Department of Education Oslo,/etc/bind/named.conf
3.12. Supported network card and Driver Modules Used[id=clmodules]
3.12.1. Supported network card and Driver Modules Used
This is the list of driver modules included with Coyote Linux. All of the driver modules for network cards are also listed.
tjener:/home/klaus/coyote/data/kernel/drivers# ls
3c501.o     ewrk3.o                ne.o
3c503.o     fealnx.o               ni5010.o
3c505.o     hp100.o                ni52.o
3c507.o     hp.o                   ni65.o
3c509.o     hp-plus.o              pcnet32.o
3c515.o     ip_conntrack_amanda.o  ppp_async.o
3c59x.o     ip_conntrack_egg.o     ppp_deflate.o
8139cp.o    ip_conntrack_ftp.o     ppp_generic.o
8139too.o   ip_conntrack_h323.o    pppoe.o
82596.o     ip_conntrack_irc.o     pppox.o
8390.o      ip_conntrack_mms.o     ppp_synctty.o
ac3200.o    ip_conntrack_quake3.o  sch_htb.o
amd8111e.o  ip_conntrack_rtsp.o    sch_ingress.o
at1700.o    ip_conntrack_talk.o    sch_sfq.o
b44.o       ip_conntrack_tftp.o    sis900.o
bsd_comp.o  ip_nat_amanda.o        slhc.o
cls_fw.o    ip_nat_cuseeme.o       smc9194.o
cls_u32.o   ip_nat_ftp.o           smc-ultra.o
cs89x0.o    ip_nat_h323.o          softdog.o
de4x5.o     ip_nat_irc.o           starfire.o
depca.o     ip_nat_mms.o           sundance.o
dgrs.o      ip_nat_quake3.o        tlan.o
dmfe.o      ip_nat_rtsp.o          tulip.o
e100.o      ip_nat_talk.o          typhoon.o
e2100.o     ip_nat_tftp.o          via-rhine.o
eepro100.o  lance.o                wd.o
eepro.o     lp486e.o               winbond-840.o
eexpress.o  mii.o                  zlib_deflate.o
epic100.o   natsemi.o              zlib_inflate.o
eth16i.o    ne2k-pci.o
3.12.2. The Special Case of 3Com 509 ISA network card
This is a very popular network card. My Coyote Linux has two of them, both produced in 1989, and running continuously for about 3 years in my Coyote Linux. Once you have managed to get them running, they will probably run for a long time. It's just a bit difficult sometimes to get them running.
They are ISA type, which means their IO, IRQ and such must be configured by hand, not automatically, which can be quite a challenge, especially if you use two of them in a machine.
The IO and IRQ on these cards must be configured with a old DOS-configuration program, which can be a bit hard to find these days.
This DOS-configuration program is called 3c5x9cfg.exe, and you use it like this;
-
Boot the machine into DOS, either MS-DOS or Freedos, or any other DOS variant. Using a W95 or W98 boot floppy is one way of doing it.
-
Once the machine is in DOS, insert the floppy with the program 3c5x9cfg.exe, and run it by typing 3c5x9cfg.exe using the DOS command line.
-
Once 3c5x9cfg.exe is started, then with each of your 3c509 network card, configure them with the option 'auto'
|
There have been reports of problems with two 3c509's in the same machine when one of the cards is a combo type, which is a type of card that has several different types of network connectors. |
It's possible to find 3c5x9cfg.exe here: Ruprecht-Karls-Universität Heidelberg
Chapter 4. Skolelinux/Debian-edu Installation[id=installation]
The installation of the different Skolelinux/Debian-edu profiles, mainserver, Thinclientserver and workstation are almost identical during the first and second stages of installation.
|
I will not go into the details about the last two available profiles in Skolelinux/Debian-edu,standalone and standalone-extras. They are not really part of the Skolelinux/Debian-edu network, but are meant for home use. |
First, you need to make sure the machine is able to boot from the CD-ROM.
4.1. Network Architecture[id=architecture]
|
This section should be it's own chapter, with plenty of diagrams. The intro by pere should be used in the preface. |
This is based on http://developer.skolelinux.no/arkitektur/arkitektur.html
4.2. Preparing the Machine to Boot from CD-ROM[id=bios]
Maybe your machine is already configured to boot from the CD-ROM. Start your machine with the Skolelinux/Debian-edu CD in the CD-ROM.
If you then see something similar to the screenshot in Figure 5-1, then you can skip straight to Section 5.2; otherwise, keep on reading.
If your machine has the BIOS option to boot from CD-ROM, then setting the CD-ROM as the first boot option in the BIOS may help. Later when the first stage of installation is over, you should change it back, so that the machine will boot from the hard drive.
Normally, when you turn the computer on, you will see how to enter the BIOS setup. It's usually one of the keys F1, INS, F10 or maybe DEL. Refer to your manual, or the supplier of the computer, if you aren't able to get the machine to boot from the CD-ROM.
Another option, when the machine will not boot directly from CD-ROM, or you can't gain access to the BIOS, is to use SBM(Smart Boot Manager). This is a floppy that you boot from, which makes it possible to choose to boot from the CD-ROM. SBM is included on the Skolelinux/Debian-edu CD. Have a look in the directory install on the CD. There you will find a file called sbm.bin. Transfer this file to a floppy using the utility rawrite. In Windows, you'll find rawrite in the directory install as well. Have a look at the file awrite2.txt for further info about rawrite
|
Do not try to simply copy sbm.bin to a floppy. That will not work. You have to use the utility rawrite |
For further information about what SBM is, you should read the file README.sbm, you'll find that file in the directory install as well
If you have a running Linux system, then you mount your CD, and transfer sbm.bin with the command
dd if=/cdrom/install/sbm.bin of=/dev/fd0
You may need to change the mount point used for your CD-ROM, and possibly also for the floppy.4.3. A Short Description of the Profiles in Skolelinux/Debian-edu[id=profiles]
|
The profile description you see during installation, like in Figure 5-4 comes from the file src/debian-edu-install/debian/debian-edu-install.templates at alioth.debian.org |
A Short Summary of the Different Profiles in Skolelinux/Debian-edu, and How They can be Combined
-
Main server
All Skolelinux/Debian-edu networks must have one, and only one machine with this profile installed. You can combine this with workstation or thin client server if you like.
Every Skolelinux network needs one, and only one machine running the 'Main Server' profile. This machine provides the (network)services (mainly file/network and LDAP), so without this machine the network does not work. Since this machine will hold all data files it will need a lot of hard disk space. Installing this option solely results in a machine without a Graphical User Interface(=GUI). If you want a GUI you'll need to include the workstation profile or thinclientserver [11]
-
Workstation
Machines running the 'Workstation' profile are normal machines. Users logging on to a workstation are authenticated by the machine running the mainsserver profile, and have their documents and personal settings stored in home directories on the machine running the mainserver profile.
If you want access to peripherals such as CD/DVD-players/burners, digital cameras, scanners, then this is the profile you want to install.
-
Thin client server
Machines running the thin client server profile are able to accept thin client connections. This profile also includes the workstation profile. To prevent network congestion machines running this profile need to have two network cards. All three profiles named so far, main server, workstation and thin client server, can be installed on the same machine.
This profile also includes the profile workstation
-
Main server + thin client server(including workstation)
This combination of profiles, also called a combi-profile, makes it possible to setup a complete Skolelinux/Debian-edu network with Workstations and thinclients using only one server. This is an acceptable solution if you only intend to run a small Skolelinux/Debian-edu network, maybe about 10-15 thin clients and a few workstations. For bigger installations this is definitely not advisable.
-
Main server + workstation
This combination of profiles mainly gives you a main server with a GUI. If you don't like the idea of administering your main server from the command line, then this is the combination you should choose.
-
These two profiles, 'standalone' and 'standalone-extras', are not a part of the Skolelinux/Debian-edu network. For this reason, I will not yet deal with these profiles in this document.
Standalone and standalone-extras
The two profiles 'standalone' and 'standalone-extras' cannot be installed on the same machine together with any of the profiles main server, workstation and thin client server
The 'standalone' profile is experimental and not yet functioning. Machines running the 'standalone' profile are meant to be run outside the Skolelinux/Debian-edu network (e.g. in the homes of pupils and teachers) as a standalone machine.
The 'standalone-extras' profile is complementary to the 'standalone' profile, providing extra programs for it.
Chapter 5. The First Stage of Skolelinux/Debian-edu Installation
5.1. Where to get the Skolelinux/Debian-edu CD-ROM[id=getcdrom]
There are basically two ways of getting the Skolelinux/Debian-edu CD-ROM. Either you download it yourself, or you get someone else to do it for you.
5.1.1. Downloading the Skolelinux/Debian-eduCD-ROM[id=downloadcd]
The most recent stable Skolelinux/Debian-edu can be found at ftp://ftp.skolelinux.no/skolelinux-cd/skolelinux-i386-current.iso
Further information about where to download the CD, and which version is the latest stable one can be found at http://www.skolelinux.org/portal/get_started/download/document_view
5.2. First Stage[id=firststage]
The installation of Skolelinux/Debian-edu is divided into two stages, referred to as firststage and secondstage. The first stage starts when the machine boots from the Skolelinux/Debian-edu CD, and ends with the first reboot. The second stage starts when the machine boots from GRUB, and ends when the installation is finished and the machine reboots for all services to properly restart. It's during the second stage that you type the root password.
firststage usually takes about 10 minutes on a relatively fast machine, while secondstage takes a bit more, about 15-45 minutes.
The Different Steps in the First Stage of Installation
-
Power up your machine, making sure it is able to boot from the CD-ROM. See Section 4.2.
If your machine is able to boot from the CD-ROM, then you will be met by this picture:

There's not that much to do here, other than pressing ENTER[13]
|
"Expert" Installation[id=expert] It's possible to choose a less automatic installation, by booting with the option Press F1 for help, or Enter to boot:linux DEBCONF_PRIORITY=medium From Skolelinux/Debian-edu version RC3 it should be possible to just type Press F1 for help, or Enter to boot: expert instead.
|

Here you must choose the language you want to use during installation. This language will be the pre-selected language for the all users. This doesn't exclude the use of any of the other available and supported languages in Skolelinux/Debian-edu. If you later want to change the default pre-selected language, have a look at the files /etc/environment, /etc/kde2/system.kdeglobals and /etc/X11/XF86Config-4, and the command update-locale-config. The command man update-locale-config will give you more information about this command, and supported languages.[14]
Notice to the right in this screenshot the #-sign. This indicates that there is more text available, but that it's not possible to display all of it in one screen. Use the Arrow UP/DOWN or PageDown and PageUp keys to scroll through the whole text.
At this point in the installation, it's possible to jump to a Virtual Terminal(VT) with the key combination ALT+Arrow LEFT/RIGHT or ALT+F1,F2,F3,F4. On F2 you have a VT where you can edit files during installation.

The necessary udeb-packages will be installed.[15] A progress bar will keep you informed about the progress.


Have a look at Section 4.3 for a short description of the various profiles.
Have a look at the sidebar Keyboard Layout for a brief explanation of the different keyboard keys used during installation.
You choose the profiles you want to install by placing a mark in front of the desired profile by using the SPACEBAR to place the mark. To navigate between the different fields, you use TAB, and when you are done, move to OK and install by pressing ENTER.
If your hard drive is not recognised, then you may need to manually load the driver module for your hard drive, SCSI-controller or your RAID-controller; do this in VT#2

After you have chosen which profile to install, the necessary packages are installed. Hopefully, you have only chosen hardware that works out-of-the-box with Skolelinux/Debian-edu.

|
Everything you have on your hard drives will be deleted when installing Skolelinux/Debian-edu- don't try to avoid it. Skolelinux/Debian-edu will not easily co-exist together with any other operative system.[16] |
To continue with the installation, you must choose Yes.

The final packages (the Linux kernel and the bootloader GRUB)will now be installed. You now have a working minimalistic Debian system installed.

Make sure that the CD is not in the CD-ROM when you restart the machine. If you forget to remove it, the installation will start all over again.
|
The first stage of Skolelinux/Debian-edu installation is now finished. |
|
In future versions of Skolelinux/Debian-edu the installation will end by making a copy on a diskette of the relevant log files made during installation, if you have a floppy drive, and if you have a diskette available. If something goes wrong during installation, you can then easily forward these log files to Skolelinux/Debian-edu-knowledgeable people. See Chapter 1. The floppy must be DOS-formated. |
Chapter 6. The Second Stage of Skolelinux/Debian-edu Installation[id=secondstage]
6.1. Second Stage
The installation of Skolelinux/Debian-edu is divided into two stages, referred to as firststage and secondstage. The first stage starts when the machine boots from the Skolelinux/Debian-edu CD, and ends at the first reboot. The second stage starts when the machine boots from GRUB, and ends when the installation is finished and the machine reboots for all services to properly restart. It's in the second stage that you type the root password.
firststage usually takess about 10 minutes on a relatively fast machine, while secondstage takess a bit more time, about 15-45 minutes.
|
The second stage of the Skolelinux/Debian-edu installation starts now. |

Notice the countdown in the last line in this screenshot. GRUB is configured to automatically boot Skolelinux/Debian-edu after 5 seconds (in this concrete screenshot the counter has reached 4 seconds). The countdown can be stopped by pressing one of the Arrow keys. The arrow keys are also used to choose which of the available Linux kernels you want to boot. The automatic boot is very handy for booting the system unattended.
In the GRUB configuration file, /boot/grub/menu.lst you can choose to change the default value for the countdown, the appearance of the GRUB menu, the name of the different kernels to boot, set a password, etc.
In this screenshot you have two boot choices.
Debian GNU/Linux, kernel 2.4.22-1-386
Debian GNU/Linux, kernel 2.4.22-1-386 (recovery mode)
You choose by highlighting the kernel you want to boot, move between the different kernels with the Arrow UP/DOWN keys, and boot the chosen kernel by pressing ENTER.
Usually you would just boot the default kernel without making any active choices, that is the line that does not contain (recovery mode). The line containing (recovery mode) is used when you need to either do some repair or maintenance on the system, like when you need to resize the lv-partition /usr. When booting with the option (recovery mode) only a few basic services is started, no GUI. Booting with (recovery mode) is the same as Runlevel 1, which also can be reached from the command line by typing init 1 See man init.
|
Password Protecting your BIOS |
|---|---|
|
Remember to also put a password on your BIOS, so that it's not possible to change the boot order and boot from floppy, CD-ROM, or only from the hard drive. |
|
Is your Server Placed in a Public Place? |
|---|---|
|
If you have placed your server, against all sane advice, in a room with public access where everybody has physical access to the machine, then I advise you to immediately set a password on GRUB.
To set a password on GRUB, you open the file /boot/grub/menu.lst with your favourite editor, and add the options password and lock in appropriate places, like: password --md5 $1$xZBDT0$8uoCO9XQGpBeXKnhUoU5A title Debian GNU/Linux, kernel 2.4.26-1-386 root (hd0,0) kernel /boot/vmlinuz-2.4.26-1-386 root=/dev/hda1 ro initrd /boot/initrd.img-2.4.26-1-386 savedefault boot title Debian GNU/Linux, kernel 2.4.26-1-386 (recovery mode) lock root (hd0,0) kernel /boot/vmlinuz-2.4.26-1-386 root=/dev/hda1 ro single initrd /boot/initrd.img-2.4.26-1-386 savedefault bootIn this example, it's not possible to boot any other kernel than the normal kernel. Starting the GRUB command line is also not possible, without first providing the password, of course not in encrypted form. Remember to put appropriate access rights on the file /boot/grub/menu.lst so that ordinary users can't read it. chmod 600 /boot/grub/menu.lst |

While booting Skolelinux/Debian-edu you will see a lot of seemingly cryptic messages scrolling by on your screen. These are useful messages from the Linux kernel.[18]
|
More or Less |
|---|---|
|
When you want to view the contents of text files, such as system configuration files, then the programs more and less, so-called pagers are useful. Have a look at Section 8.3, or just man more |
|
Remember to insert the CD. |

The password you are about to create, is the famous root password. With this password you will be able to do anything. Please read carefully the information provided on-screen.
Why such caution? The root account doesn't have the restrictions that normal user accounts have. A malicious or unqualified user with root access can have disastrous results. Note that you will not be able to see the password as you type it. Please enter the same root password again to verify you have typed it correctly. |

Note that you will not be able to see the password as you type it. You must type it twice, the same way both times. If you do it wrong, you get another chance.

After you have created the root password, the installation of packages in the second stage starts. Remember to insert the CD in the CD-ROM drive- you will be prompted to do so if you have forgotten. The rest of the installation takes about 15-45 minutes, depending on how fast your machine is.
|
You may now leave the machine, and take a well-deserved break. Have a refreshing drink. The installation will be completed without any further input from you. |


Here you login with
Username: root
Password:
You can use TAB to move between the fields Username and Password, and then press ENTER to login, instead of using the mouse.
6.1.1. Something Went Wrong...
Sometimes something goes wrong during installation. The most frequent error is the failure to automatically configure the video card when you have chosen to install a machine that includes one of the profiles workstation or ltspserver
Everything that happens during installation is logged in the file /var/log/installer.log. There is also plenty of useful information logged in the files in /var/log/debian-installer. When you need help with a problem that has occurred during installation, these files are very handy to have ready for diagnosing the problem. Always include instaler.log in your bug reports. See Chapter 1 to get help.
|
See the section Something went wrong... for other common failures that occur during installation. |
6.1.2. Turning off, or Rebooting the Machine
If your video card was correctly, automatically configured, and you have a nice, blue KDM login screen, then you can reboot and shutdown your machine by choosing TURN OFF. Then you can choose to either reboot or turn off your machine.
|
Luckily, this is not an option in the KDM for thin clients, otherwise anybody could reboot/shutdown the server. |
If you have a machine installed only with the profile mainserver, then you have to login to reboot/shutdown the machine, as in Figure 6-7, then you login as user root. Then you can shutdown your machine with either of the commands halt,init 0, shutdown and reboot with reboot or init 6
If your machine stops with the message "Power Down" on the screen when you want to turn it off, you can try to see if loading the module apm helps. Be warned that not all servers like the module apm, especially machines with several processors. Run the command modprobe apm; if the machine doesn't complain, and the machine turns itself completely off, then you can permanently add the module by running the program modconf from the command line
modconf
Then enter the line kernel/arch/i386/kernel and there choose apm. Now it should turn itself off completely. |
Just remember that not all machines like apm. Why do you want to turn off your server anyway? |
Chapter 7. Something Went Wrong.
7.1. The Video Card Doesn't Function.
If you see a black screen with white text, like this:
and not something like in Figure 6-8, despite having installed one of the profiles workstation or ltspserver, then something went wrong with the configuration of your video card. It might help trying to manually reconfigure the video card with the command
dpkg-reconfigure xserver-xfree86
and answer the questions. |
You can at any time abort this reconfiguration by pressing CTRL-C |
|
This recipe should be sufficient to get your video card working, not perfectly working, just working. |
|
A quick way of determining whether or not your video card is supported under Linux, is to try one of the live CDs with excellent hardware support, such as Snøfrix or Knoppix. Have a look at Section I.1 |
-
Manage XFree86 4.x server configuration file with debconf? Answer:Yes
-
Select the desired X server driver. This is most often the most difficult to answer, maybe the output from lspci can help you. Once you have found your video driver, navigate by using the TAB key on the keyboard down to OK and press ENTER
-
Enter an identifier for your video card. Answer: what you like. Sometimes there is already something written there.
-
Please enter the video card's bus identifier. Answer: leave it blank, that is normally just fine.
-
Enter the amount of memory (in KB) to be used by your video card. Answer: Leave it blank, that is normally just fine.
-
Please select the XKB rule set to use. Answer: xfree86. This is normally already there.
-
Please select your keyboard model. Answer: pc104 or pc105 should be fine; there is a screen with more instructions about keyboard models.
-
Please select your keyboard layout. Answer: us for US, no for Norway, de for Germany, and so on.
-
Please select your keyboard variant. Answer: you could leave this blank.
-
Please select your keyboard options. Answer: You could leave this blank.
-
Please choose your mouse port: Answer: /dev/misc/psaux is a good choice.
-
Please choose the entry that best describes your mouse. Answer: PS/2 is a safe choice.
-
Emulate 3-button mouse? Answer: Yes
-
Enable scroll events from mouse wheel? Answer: Yes or no, depending.
-
Enter an identifier for your monitor. Answer: You can write whatever you like here.
-
Is your monitor an LCD device? Answer: Only you know the answer.
-
Please choose a method for selecting your monitor characteristics. Answer: Simple
-
Please choose your approximate monitor size. Answer: Choose the right size for your monitor.
-
Select the video modes you would like the X server to use. Answer: Use the SPACEBAR to place a star in front of each of the video modes you want. The video mode 1024x768 is normally a good choice for the highest value of video modes.
-
Please select your desired default color depth in bits. Answer: 16 is a safe choice
-
Select the XFree86 server modules that should be loaded by default. Answer: just answer OK to the default.
-
Write default Files section to configuration file? Answer: Yes
-
Write default DRI section to configuration file? Answer: Yes
Once you are done with dpkg-reconfigure, you should see something like
Wrote X server configuration to /etc/X11/XF86Config-4.
It might help to know something about what type of video card you have in your computer, the command lspci is helpful:
tjener:~# lspci
00:00.0 Host bridge: Intel Corp. 82440MX I/O Controller (rev 01)
00:00.1 Multimedia audio controller: Intel Corp. 82440MX AC'97 Audio Controller
00:02.0 VGA compatible controller: Silicon Motion, Inc. SM710 LynxEM (rev a3)
00:07.0 ISA bridge: Intel Corp. 82440MX PCI to ISA Bridge (rev 01)
00:07.1 IDE interface: Intel Corp. 82440MX EIDE Controller
00:07.2 USB Controller: Intel Corp. 82440MX USB Universal Host Controller
00:07.3 Bridge: Intel Corp. 82440MX Power Management Controller
00:0a.0 CardBus bridge: Ricoh Co Ltd RL5c476 II (rev 80)
00:0a.1 CardBus bridge: Ricoh Co Ltd RL5c476 II (rev 80)
Here you notice that I have a Silicon Motion video card. If you need more info from lspci then try lspci -vn. Maybe you need to pipe it through more or less, like lspci -vn|more
If you still experience problems with your video card, then have a look at Section 2.6. Perhaps you should consider installing a backported version of XFree86 4.3; not sure where that is available.
If you just need to change the depth and resolution, then you can open the file /etc/X11/XF86Config-4 with a editor from the command line like
kdesu kwrite
and edit the lines corresponding to the depth you wish to haveDefaultDepth 16and the lines
SubSection "Display"
                Depth     16
                Modes    "1024x768" "800x600" "640x480"
Chapter 8. Fine-tuning[id=finetuning]
8.1. The Famous Command Line[id=cli]
As with most other common operating systems, almost all of your day-to-day tasks can be carried out with the mouse by click-and-point. In addition to that, you can use the famous command line to do them as well. Why would you want to use the command line? Well, it's faster and you have more control over what is going on behind the buttons, so it's an alternative.
8.2. How to Edit System Configuration Files[id=kedit]
It's often nice to be able to edit system configuration files, like with grub or autopartit or bothersome videocard. For this purpose you need a tool, a text editor. We do not use things such as bold, underlining or fancy fonts in these files, so for this purpose we don't need a huge fancy application. There are already several such applications installed with your Skolelinux/Debian-edu system. Some of these are command line based, (vi, vim), while others have a graphical interface, like KEdit and emacs
|
Everybody should learn how to use the command line based editor vi/vim sooner or later, preferably sooner. |
For starters, try using KEdit, you'll find it in ->->
You should also try vi, vim. You find vim in ->->->. Just follow the on-screen instructions.
|
Be warned- vi, vim are rather difficult to use in the beginning, but they're worth the effort in the long run. |
kdesu kwrite
that way you can run the editor as the superuser root (of course, after you have typed the root password).8.3. More or Less[id=moreless]
Sometimes when you issue a command, such as dpkg -l or try to view a file in a Virtual Terminal or in a shell, the output is too much for one screen display. To make it easier to read, you can "pipe" it through one of the applications more or less, like this
dpkg -l|more
and use the SPACEBAR to display the next screen, and q to quit.The pipe is a key ( | ) on the keyboard that has two vertical lines one above the other. It often looks like a one full vertical line. On the US qwerty keyboard this symbol is usually found on the same key as the backslash (\) key (to the left of the ENTER key). On the Norwegian keyboard it's usually found on the key below F1
8.4. Installing a Kernel with Support for up to 4GB RAM and Multi-Processors[id=smp]
Due to the limited amount of space available on one CD, there is only one Linux kernel available on the Skolelinux/Debian-edu CD. So, the chosen Linux kernel is based on the lowest common denominator, which means that it should work on most kinds of hardware.
You can find out what kind of kernel you are running at the moment with the command uname -a, use this command later to verify that you have changed to a different kernel, if you choose to do so.
If you want a kernel for the newer servers with plenty of RAM and multi-processors, you must download and install it afterward, which thanks to the genius package system of Debian, is very easy to do.
Have a look at Section 8.9 for a more detailed description of apt-get and dpkg.
The keyword to look for when you want a Linux kernel with support for more RAM than LOWMEM=940M and more than one CPU, is SMP, aka Symmetric Multi-Processors. This command issued from a shell, will list available Linux kernels, ready for installation:
apt-cache search kernel-image|grep smp
At the time this is being written, this returns:kernel-image-2.4.18-1-686-smp - Linux kernel image 2.4.18 on PPro/Celeron/PII/PIII/PIV SMP. kernel-image-2.4.16-686-smp - Linux kernel image 2.4.16 on PPro/Celeron/PII/PIII SMP. kernel-image-2.4.18-686-smp - Linux kernel image 2.4.18 on PPro/Celeron/PII/PIII/PIV SMP. kernel-image-2.4-686-smp - Linux kernel image for version 2.4 on PPro/Celeron/PII/PIII/PIV SMP. kernel-image-2.4-k7-smp - Linux kernel image for version 2.4 on AMD K7 SMP. kernel-image-2.4.26-1-686-smp - Linux kernel image for version 2.4.26 on PPro/Celeron/PII/PIII/PIV SMP. kernel-image-2.4.26-1-k7-smp - Linux kernel image for version 2.4.26 on AMD K7 SMP.There is really no reason not to choose the latest available kernel, in this case, version 2.4.26. You are then left with the following choices:
kernel-image-2.4.26-1-686-smp - Linux kernel image for version 2.4.24 on PPro/Celeron/PII/PIII/PIV SMP.
kernel-image-2.4.26-1-k7-smp - Linux kernel image for version 2.4.24 on AMD K7 SMP.
You can choose kernel-image-2.4.26-1-686-smp if you have an Intel processor (keyword is 686). If you have an AMD processor (keyword is k7) you can choose kernel-image-2.4.26-1-k7-smp.
Once you know which kernel is the correct one for your machine, you can install it with the command
apt-get install kernel-image-2.4.26-1<your cpu>
|
Some prefer to first download the kernel, and then install it manually with dpkg. See Section 8.9.9. apt-get install kernel-image-2.4.26-1<your
cpu>-smp --download-only |
When you install the new kernel, you may see something like this:
Sætter kernel-image-2.4.26-1-k7 (2.4.24-3) op...

 You are attempting to install a kernel version that is the same as
 the version you are currently running (version 2.4.26-1-k7). The modules
 list is quite likely to have been changed, and the modules dependency
 file /lib/modules/2.4.26-1-k7/modules.dep needs to be re-built. It can
 not be built correctly right now, since the module list for the
 running kernel are likely to be different from the kernel installed.
 I am creating a new modules.dep file, but that may not be
 correct. It shall be regenerated correctly at next reboot.

 I repeat: you have to reboot in order for the modules file to be
 created correctly. Until you reboot, it may be impossible to load
 some modules. Reboot as soon as this installation is finished (Do not
 reboot right now, since you may not be able to boot back up until
 installation is over, but boot immediately after). I cannot stress
 that too much. You need to reboot soon.

Please hit Return to continue.
Here there is nothing else to do but hit ENTER to continue.
After you have installed a SMP-enabled kernel, and have rebooted your machine, you can use these commands to see if the newly-installed kernel sees all of your processors and RAM;
free
cat /proc/cpuinfo
8.5. Changing the Size of the LVM-Partitions[id=lvmresize]
|
You should definitely supplement this short introduction to lvm with the full in-depth documentation on LVM which is available from The Linux Documentation Project under the link LVM-HOWTO |
At the moment, there are 7 partitions[19] of the lvm type in Skolelinux/Debian-edu. They are grouped in two different vg's, vg_system and vg_data:
-
/usr, see Section 8.5.1
-
/var, see Section 8.5.4
8.5.1. Resizing the /usr Partition[id=lvm-usr]
This lv belongs to vg_system. It's present in the profiles mainserver, workstation and thinclientserver.
All installed programs are placed in this partition. If this partition is full, you can't add new packages to the system.
The resizing of this partition is a bit tricky.
-
The tricky part about resizing this partition is that you have to unmount the partition that you are using, which is kind of like sawing off a tree branch that you are sitting on. However, we can manage it by using a neat little trick- switching to the shell ash. First, you need to bring the machine down to runlevel 1, then you switch to the shell ash.
First of all, you need to tell all your users that they have to logout, otherwise they will be forcibly logged out, then type
init 1
from the command line -
The machine is now in runlevel 1. Login as user root and switch to another shell
exec /bin/ash
You will recognise that you are using a different shell by the prompt, which looks like: \h:w\$. If you make a typo in the shell ash, you have to start writing the command all over again, because the BACKSPACE and Arrow keys don't work here. You start all over with CTRL-C -
First you need to notice the current size of /usr before you change it df -h /usr
Filesystem Size Used Avail Use% Mounted on /dev/vg_system/lv_usr 1.0G 400M 600M 40% /usr -
Then have a look at how much free space there is in vg_system
vgdisplay /dev/vg_system
Look for a line such as:
Free PE / Size 175 / 5.47 GB
-
Then you unmount the partition (Note: the command for unmount is umount)
umount /usr
-
Then, to be on the safe side, do a check of the file system
fsck -yf /dev/vg_system/lv_usr
[20] -
If you found, when checking the space available in vg_system, something like this:
vgdisplay /dev/vg_system
Free PE / Size 175 / 5.47 GB
then you have 5.47GB free space that you can use to extend lv_usrIf you want to increase the size with 1GB, then this is the command to use:
e2fsadm -L +1G /dev/vg_system/lv_usr
If you want to increase the size with 100MB, then this is the command to use:
e2fsadm -L +100M /dev/vg_system/lv_usr
If you want to decrease the size with 250MB, then this is the command to use:
e2fsadm -L -250M /dev/vg_system/lv_usr
. Due to the bug [21]Watch for this pattern when resizing:
resize2fs 1.27 (8-Mar-2002)
Begin pass 1 (max = 2564)
Extending the inode table     XXXXXXXXXXXXXXXXXXXXXXXXXXX
Begin pass 2 (max = 160)
Relocating blocks             XXXXXXXXXXXXXXXXXXXXXXXXXXX
Begin pass 3 (max = 52)
Scanning inode table          XXXXXXXXXXXXXXXXXXXXXXXXXXX
Begin pass 5 (max = 9)
Moving inode table            XXXXXXXXXXXXXXXXXXXXXXXXXXX
-
If you do not see on your screen a long line of uppercase Xs, like this:
XXXXXXXXXXXXXXXXXXXXXXXXXXXXXXXXXXXXXXXX
when you resize a partition, then something has gone wrong.If something has gone wrong, you can try to mount, and the unmount the partition again, and then try to resize it again, but do not try to resize it with the same amount as last time.
If you have to resize your partition a second time, because the first try failed, then you should try to resize it with only 32MB, because it will "remember" the size you tried to resize it with the first time, and will use that value in addition to the amount you specify the second time. So, if you failed resizing the first time using +1200M, and try again with +1200M, the net effect will be +2400M, probably not what you wanted. If you try with +32M in the second try, then the net effect will be +1232M, which is probably close to what you wanted.
-
If the resize was successful, then you can mount the partition with mount /usr. Then check the new size of the partition with df -h /usr. In this case it should look something like:
Filesystem Size Used Avail Use% Mounted on /dev/vg_system/lv_usr 2.0G 400M 1.6G 20% /usr -
Now you can restart the machine with init 6, and your users can logon.
8.5.1.1. Problems and Solutions
- Q: When I try to unmount a partition, it fails with the error "device busy"
- Q: I have resized the partition, but I can't see any difference in the size.
- Q: After I have mounted the partition, and the machine starts up again from runlevel 1, it freezes with the message
-
NFS.....
A: This is most likely due to the fact that a user, or a program, is using that partition. If you are trying to unmount /skole/tjener/home0, then it is possible that not all of your users have logged out. If you are trying to unmount /var, then you must first unmount the partition /var/opt/ltsp/swapfiles. If the device is still busy, then if possible, try to bring the machine down to runlevel 1, init 1 .
A: This might be bug #439; the solution is to remember to check and repair the file system before you try to change it, fsck -fy. Then you try a second time to resize the partition, but don't try to change it with more than 32M, use e2fsadm -L +32M.
Q: After I have mounted the partition, and the machine starts up again from runlevel 1, it freezes with the message
NFS.....
A: The only solution I know of, is to restart the machine hard, which means to use the power button to turn the machine off and then on again. This problem could have been avoided if you had used init 6, or reboot after you had resized the partition in runlevel 1, and not just used the exit.
8.5.2. Resizing /skole/tjener/home0[id=lvm-home0]
This lv belongs to vg_data. It's only present in the profile mainserver
This is the partition where the users' home directories are stored.
The resizing of /skole/tjener/home0 is done pretty much the same way as with /usr. As a matter of fact it's much easier, since it doesn't involve changing to runlevel 1 or changing the shell. I'll briefly mention the relevant commands; see resize /usr for more info.
-
Login as root, and tell all your users they must logout.
-
Check the current size of your partition,df -h /skole/tjener/home0
-
Unmount the partition, umount /skole/tjener/home0
-
Check and repair the file system, fsck -fy /skole/tjener/home0
-
Check the amount of available space in the volume group,vgdisplay /dev/vg_data. You can also use pvscan
-
Resize the partition, in this example it's increased with 400M, e2fsadm -L +400M /dev/vg_data/lv_home0
-
Mount the partition, mount /skole/tjener/home0
-
Check the new size of the partition, df -h /skole/tjener/home0
-
If you do not see any change in the size, then the resizing probably wasn't successful. Have a look at /usr Section 8.5.1, and the Problems and Solutions
8.5.3. Resizing /skole/backup[id=lvm-backup]
This lv belongs to vg_data. It's only present in the profile mainserver
This is the default partition used for placing the backups made and administered with the Skolelinux/Debian-edu-developed Webmin module slbackup.
Resizing this partition is very similar to resizing /skole/tjener/home0. See Section 8.5.2- it belongs to the same vg-group, vg_data.
If you want to increase /skole/backup with 600MB, the command would be
umount /skole/backup
e2fsadm -L +600M /dev/vg_data/lv_backup
mount /skole/backup
8.5.4. Resizing /var[id=lvm-var]
This lv belongs to vg_system. It's present in the profiles mainserver and thinclientserver.
The resizing of this partition is done in a similar way to the resizing of /usr, except that you don't need to switch to another shell. But you must remember to unmount the partition /var/opt/ltsp/swapfiles if this is done a machine with the profile Thinclientserver installed. See swapfiles
If you want to increase /var with 400MB, the command would be
e2fsadm -L +400M /dev/vg_system/lv_var
8.5.5. Resizing /var/opt/ltsp/swapfiles[id=lvm-swapfiles]
This lv belongs to vg_system. It's only present in the profile thinclientserver
This partition contains the swapfiles for the thinclients. The size of each of these swapfiles is 32MB.[22][23]
This partition is resized similarly to /skole/tjener/home0.
A reasonable size for this partition would be 32MB times the number of thin clients you plan to have. If you try to boot more thin clients with swapfiles than you have space for in /var/opt/ltsp/swapfiles, then the thin client will not boot.
These swapfiles will be placed in /var/opt/ltsp/swapfiles, with the file names ltsp010.swap, ltsp011.swap,ltsp012.swap. If you delete these swapfiles, they will be created again next time the thin client boots.
If you want to increase /var/opt/ltsp/swapfiles with 600MB, the command would be
e2fsadm -L +600M /dev/vg_system/lv_ltsp_swap
|
Unless you first umount the partition /var before trying to change this partition, you will not succeed. You will then only get the message device is busy. If you see this, make sure you have first umounted /var |
8.5.6. Swap[id=lvm-swap]
This lv belongs to vg_system. It's present in the profiles mainserver, workstation and thinclientserver.
8.5.7. Resizing /var/spool/squid[id=lvm-squid]
This lv belongs to vg_system and it's only present in the profile mainserver. This partition hold the cache belonging to squid, which is a FTP, HTTP and HTTPS proxy cache. This partition is changed the same way as swapfiles. Make sure you stop squid before you try to resize,
/etc/init.d/squid stop
otherwise you only end up withumount: /var/spool/squid: device is busy
The maximum size of this cache is default set to 100MB; look in the file /etc/squid.conf for the line
# cache_dir ufs /var/spool/squid 100 16 256
8.5.8. Adding a New Volume(lv)[id=newlv]
For things such as video and picture, as well as users that need extra file space, you might need to create a new volume. Let's pretend you need a volume for our video footage. Let us name it video, and place it in vg_data as /dev/vg_data/lv_video, and mount it at /skole/video
First you need to find out how much space you have available in vg_data
vgdisplay /dev/vg_data
or maybe there is more space in vg_systemvgdisplay /dev/vg_system
Another option that displays the same kind of information ispvscan
You must create the mount point /skole/video
mkdir /skole/video
Then you create the new volumelvcreate -L 2G -n lv_video vg_data
In this example, the size is 2GB. Have a look at lvm-home0 to find out how to resize this. Then you need to make a file systemmke2fs -j /dev/vg_data/lv_video
Then add this new partition, using your favourite texteditor, to /etc/fstab, otherwise this new partition won't be mounted automatically at boot. In our example you add this line at the end of /etc/fstab
/dev/vg_data/lv_video /skole/video ext3 defaults 0 2
Now you test your new partition by mounting it manually with mount /skole/video. Have a look at the size with
df -h /skole/video
8.5.8.1. Adding the New Volume to autofs[id=newlvmautofs]
|
This has not yet been tested with the new LDAP schemas that comes with Skolelinux/Debian-edu 1.0. |
Skolelinux/Debian-edu uses autofs to export partitions to machines that might need them, workstation and thinclientserver needs to be able to mount the users home directories. So, if you have made another home partition, for example /skole/tjener/home1 and /skole/tjener/home2 then you must make sure that they are also exported along with /skole/tjener/home0 via auofs to the needed machines. The necessary information lies in the LDAP-database, so we must add this new information the LDAP-database. This is most easily done by adding this new information to a file, and then adding the contents of this file to our LDAP-database. Let's call this file /root/video.ldif, with these contents:
dn: cn=video,ou=tjener,ou=skole,ou=Automount,dc=skole,dc=skolelinux,dc=no
objectClass: top
objectClass: automount
cn: video
automountInformation: -rw,rsize=8192,wsize=8192,intr tjener:/skole/video
description: /skole/video mount point
This is the info that you want to add, like this:
/etc/init.d/slapd stop
/etc/init.d/nscd stop
slapadd -l /root/video.ldif
/etc/init.d/slapd start
/etc/init.d/nscd start
In addition, this partition must be added to the export file by adding the following line to the file /etc/exports
/skole/video @allhosts(rw) 10.0.2.0/255.255.254.0(rw)[24]After that you must run exportfs -ra
8.5.9. Adding a New Disk to LVM in Skolelinux/Debian-edu
This is a short recipe; additional details will be available at a later date.
-
Hook up the new disk to the system. In this example, it becomes /dev/hdb, and you want to add it to the volume group vg_data
-
pvscan
-
df -h
-
pvcreate /dev/hdb
-
Check with pvscan what the devfs-path to your new disc is
vgextend vg_data /dev/ide/host0/bus0/target1/disc
-
To remove the disk again from the vg-group, unmount all partitions, and then do a
vgreduce vg_data /dev/ide/host0/bus0/target1/disc
8.6. Editing Host Netgroups
A "host netgroup" (hence "netgroup") can be compared to a guest list when you are inviting people to a party. You have made the guest list to avoid unwanted guests, for instance crooks. In a computer network, the guests are a bit different. They are "Internet hosts", e.g. printers, thin client servers or workstations. If these hosts are on the guest list, they are welcome to do their task on the network. If they are not, they are automatically kept out by the doorkeeper.
A netgroup thus keeps track of the guests, or "hosts" in "Internet lingo". It can also keep track of other netgroups, and this simplifies administration of, for example, access to the Internet or to a file server. It is much easier to administer groups of hosts than specifying every single host everywhere.
You have to use netgroups correctly to avoid extra administration. For example, it is useless to have a netgroup named "workstation-hosts" with 250 different hosts in it. It is better to use subgroups. The workstations could be grouped into "computerlab01-hosts", "computerlab02-hosts" and "teachers-hosts", and these could be subgroups to another netgroup named "workstation-hosts".
In the future, Skolelinux will probably use netgroups for various other tasks. Today they are used to prevent access of unwanted guests to the file server.
8.6.1. The Netgroup Module
To edit netgroups, you have to use Webmin. The module is named "Edit host netgroups" and is found under the "System"-tab.

On a newly-installed Skolelinux server, the following netgroups are added:
- ltsp-server-hosts
-
All of the thin client servers in the network
- printer-hosts
-
All of the printers in the network
- server-hosts
-
All of the servers in the network. This is primarily "tjener", but if you move, for example, the backup service to another host, add that host here.
- workstation-hosts
-
All of the groups containing workstations, or all of the workstations in a small network
- all-hosts
-
This group contains no individual hosts, but all of the other netgroups.
 |
Naming Conventions |
|---|---|
|
Note that all of the netgroup names end with "-hosts". This is to make it easier to distinguish netgroups from other groups whenever necessary. We suggest you use the same naming convention. |
8.6.2. Adding Hosts to a Netgroup
In the overview, click on the netgroup you want to change. A new window appears, showing hosts, subgroups and netgroups available to add as subgroups and an area for adding new hosts.

Enter the name on a line of its own for every host you want to add to the netgroup.
If you check the "Verify validity of hosts" box, every hostname will be tested but only valid ones will be added. Note: this may slow down the process.
If you check the "Make sure the hostnames can be used by the file server" box, every hostname will be tested but only those usable to the file server will be added. Note: this may slow down the process.
Click on "Add" to add the entered hosts to the netgroup. You will see the same page, but with the new hosts included in the list.

Click on "Back" when you are finished editing the netgroup. Remember to save your changes.
8.6.3. Saving Changes
Return to the overview when you are finished making your changes. Notice the actions in the action queue. When you are done, enter your LDAP-password and click on "Execute actions". The changes are sent to the catalogue server, and you get a new window showing the replies from the server. For every successful action, the server replies "Success".
You can remove actions you regret or made by mistake. Select the actions you want to remove from the queue and click on "Delete selected actions". Actions depending on those removed will not be executed. If you remove, for example, the action "Add netgroup 'computerlab01-hosts'", then the action "Add host(s) (dhcp123, dhcp124, dhcp125)" will not be executed.

8.6.4. Adding a New Netgroup
Enter the name of the new netgroup in the "Name of group" text field in the "New group"-area and click on "Create group". The name has to be between 9 and 40 characters and contain only alphanumeric characters and hyphens.

The new netgroup is now listed together with the other groups.

8.6.5. Adding a Subgroup
In the overview, click on the group to which you want to add subgroups. If you want to add "computerlab01-hosts" as a subgroup to "workstation-hosts", click on "workstation-hosts".

Select the group you want to add as a subgroup and click on "Add selected groups". The subgroups are now listed as a subgroup.

Remember to save your changes.
8.6.6. Deleting a Netgroup
In the overview, select the netgroups you want to remove and click on "Delete selected groups".
Remember to save your changes.
8.6.7. Removing Hosts from a Netgroup
In the overview, click on the group you want to change. Select the hosts you want to remove and click on "Remove selected hosts".
Remember to save your changes.
8.6.8. Removing a Subgroup
In the overview, click on the group you want to change. Select the subgroups you want to remove and click on "Remove selected subgroups".
Remember to save your changes.
8.7. Thin Client Setup
Each thin client has a wide range of options that can be changed on an individual thin client basis.
-
Video card
-
PXE-network card or regular network card
-
Will it act as a print server?
-
Serial, PS/2 , USB or scrollmouse?
-
Do you want to enable the floppy drive, or use USB pendrives?
All these options are specified in the file /opt/ltsp/i386/etc/lts.conf, but you need to assign each thin client a static IP address. You do this by adding the MAC address of the network card in your thin client, all done in the file /etc/dhcp3/dhcpd-skolelinux.conf[25]There is also a Webmin module for this operation, https://tjener.intern:10000/dhcpd3/index.cgi
8.7.1. Assigning a Machine a Static IP address
|
After you have made any changes to /etc/dhcp3/dhcpd-skolelinux.conf, either by editing the file directly, or via Webmin, you need to restart the DHCP3-server for the changes to take affect. This is either done from the command line with /etc/init.d/dhcp3-server restart or in Webmin by pressing the button labeled 'Apply Changes'. |
All servers in Skolelinux/Debian-edu, mainserver and thinclientserver, run DHCP-servers. This means that any machine, workstation, thinclient and other machines (laptops, Windows, Mac machines) will get a dynamic IP address, that is, the IP address given to the individual machine is likely to be different every time that machine connects.
In order to make your life easier, you should make these machines have a static IP address. Add their MAC addresses to the right group in the DHCP-setup.
8.7.1.1. Thin Clients
host ltsp010 {
        hardware ethernet     00:00:00:00:00:00;
        fixed-address         ltsp010;
        #filename              "/tftpboot/lts/vmlinuz-2.4.19-ltsp-1";
        filename              "/tftpboot/lts/pxelinux.0";
        #option option-128     e4:45:74:68:00:00;
        #option option-129     "NIC=3c509";
    }
There are already 100 places set aside for 100 thin clients in the file /etc/dhcp3/dhcpd-skolelinux.conf.
8.7.1.2. Workstation (Linux, Windows, Mac)
host static00 {
       hardware ethernet 00:00:00:00:00:00;
       fixed-address static00;
    }
There is 1 place set aside for a machine with a static IP address in the file /etc/dhcp3/dhcpd-skolelinux.conf. If you need more, then make more by using the one provided there as a template.
8.7.1.4. Thin Client Servers
group {
    host ltspserver00 {
       hardware ethernet 00:00:00:00:00:00;
       fixed-address ltspserver00;
    }
8.7.2. Creating Etherboot ROM Images for Ordinary (non-PXE) network cards.[id=matic]
I strongly advise you to use PXE cards, which eliminate the need for the use of failure-prone media such as floppy disks. But if you have to use floppy disks to boot your thin clients, then there are some small tricks to learn. The floppy disks you need, are ready and available for download at rom-o-matic.com. The latest stable version that is known to work well with Skolelinux/Debian-edu is 5.0.11, which is the recommended one.
There are two things you need to do::
-
Find the correct ROM for your network card. There are over 250 on the list of available network cards, which makes the whole point of PXE very appealing.
-
Once you have managed to find the correct ROM for your network card, you need to put it on a floppy disk, on a Linux machine, as root
cat eb-5.2.5-yournic.zdsk > /dev/fd0
8.7.3. Special Floppy Disk with Support for 30 network cards[id=universalboot]
This floppy disk image contains the ROM for the 30 most popular and widely-used network cards, which means that there is a big chance that you don't need to fiddle around trying to figure out what kind of network card you have.
This floppy disk is a part of the project Thinstation, from there you download "Universal boot floppy". The file you have downloaded should be BootDisk522b.zip. In Windows you use a zip program to unpack it. In Skolelinux/Debian-edu you unpack it with unzip BootDisk522b.zip, (you may need to install unzip, apt-get install unzip). While unzipping the file you should see something like this:
klaus@tjener:$ unzip BootDisk522b.zip
Archive:  BootDisk522b.zip
  inflating: rawrite2.exe
  inflating: ebnet522.dsk
  inflating: Readme.txt
In the file Readme.txtyou will find
detailed information about how the universal boot floppy is made,
together with how you can make one yourself. As root, you can make
one with the command cp ebnet522.dsk
/dev/fd08.7.4. Using the MAC Address to Assign a Fixed IP Number to a Thin Client
In order to be able to specially customise your various thin clients, you have to be able to identify each of them separately. You can do this with the help of each thin client's network card and its unique MAC address (which every network card has).
Most (but not all) network cards have their respective MAC addresses printed on them somewhere. It often looks something like 0000864A585A, or 00-00-86-4A-58-5A, eller 00:00:86:4A:58:5A, which are numbers given in the hexidecimal system. If you don't see anything like that printed on the card, then you can have a look at the file /var/log/syslog, where the thin client's MAC address is registered when it tries to start up. To see what is being logged at the time the thin client starts up, use the command
tail -f /var/log/syslog
then you will see something likeJan 4 19:04:44 tjener dhcpd-2.2.x: DHCPDISCOVER from 00:00:86:4a:58:5a via eth1 Jan 4 19:04:44 tjener dhcpd-2.2.x: DHCPOFFER on 192.168.0.201 to 00:00:86:4a:58:5a via eth1 Jan 4 19:04:45 tjener dhcpd-2.2.x: DHCPREQUEST for 192.168.0.201 from 00:00:86:4a:58:5a via eth1 Jan 4 19:04:45 tjener dhcpd-2.2.x: DHCPACK on 192.168.0.201 to 00:00:86:4a:58:5a via eth1Here you can see the MAC address, together with the IP number given to each thin client.
Now that you know the MAC address, you can type it in the file /etc/dhcp3/dhcpd-skolelinux.conf, for example
host ltsp010 {
        hardware ethernet     00:00:86:4a:58:5a;
        fixed-address         192.168.0.10;
        #filename              "/tftpboot/lts/vmlinuz-2.4.19-ltsp-1";
        filename              "/tftpboot/lts/pxelinux.0";
        #option option-128     e4:45:74:68:00:00;
        #option option-129     "NIC=3c509";
    }
After you have typed in the MAC address, then you must restart the DHCP server, which is done with the command
/etc/init.d/dhcp3-server restart
[26] In this case I have decided that the thin client with the MAC address 00:00:86:4a:58:5a should be named ltsp010 and be given the IP number 192.168.0.10. The names ltspXXX cannot be changed to something else, for example room203. It won't work.Remember that a hash-mark ( # ) before a line in a file /etc/dhcp3/dhcpd-skolelinux.conf is used as a comment symbol, which means that this line is just a comment. In this case I have put a comment symbol at the start of the line
#filename "/tftpboot/lts/vmlinuz-2.4.19-ltsp-1";while at the start of the line
filename "/tftpboot/lts/pxelinux.0";there is no comment symbol. This means that this thin client has a network card of the type PXE, so it must have an image when it starts up pxelinux.0. If it didn't have a PXE-network card, but instead a normal card that needs an Etherboot floppy, see Section 2.4, then it would need the start up image vmlinuz-2.4.19-ltsp-1
Another choice you can make for each single thin client in this file is to activate (that is, remove the comment symbol) at the beginning of
option option-128     e4:45:74:68:00:00;
option option-129     "NIC=3c509";
if and only if you have a 3com509 ISA
network card in your thin client.8.7.5. Customising Thin Clients
In the file /opt/ltsp/i386/etc/lts.conf you have the possibility to specially customise each individual thin client. You can also make adaptations that cover all of the clients at once.
Here I want you to note that there is already a large document which describes how to set up thin clients ltsp.org Look in the documentation menu.
I have only mentioned the most important changes you can make in /opt/ltsp/i386/etc/lts.conf. I recommend that everyone should read the documentation that is found at http://www.ltsp.org
8.7.5.1. Printer Connected to a Thin Client
In order to specify that you have a printer connected to the parallel port of a thin client, the following lines must be added to the file /opt/ltsp/i386/etc/lts.conf :
[ltsp050]
PRINTER_0_DEVICE =/dev/lp0
PRINTER_0_TYPE   =P
exchange ltsp050 with the correct name of your thin client. See part Section 10.1.
8.7.5.2. Serial Mouse
Add the following to the file/opt/ltsp/i386/etc/lts.conf if you have a serial mouse (connected to the COM port)
[ltsp051]
X_MOUSE_PROTOCOL    = "Microsoft"
X_MOUSE_DEVICE      = "/dev/ttyS0"
X_MOUSE_RESOLUTION  = 400
X_MOUSE_BUTTONS     = 2
X_MOUSE_EMULATE3BTN = Y
8.7.5.3. Optical USB Mouse with Wheel
Add these lines to lts.conf
X_MOUSE_PROTOCOL  = "imps/2"
X_MOUSE_DEVICE    = "/dev/input/mice"
RCFILE_01               = "usbdev"
In addition, make a script and save it as /opt/ltsp/i386/etc/rc.d/usbdev with these contents
#!/bin/sh
echo "USB Mouse Support..."
insmod usbcore
insmod usb-uhci
insmod input
insmod mousedev
insmod usbmouse
echo "USB Keyboard Support..."
insmod keybdev
insmod usbkbd
8.7.5.4. Scrolling Mouse
Add the following to /opt/ltsp/i386/etc/lts.conf if you have a scrolling mouse
[ltsp052]
X_MOUSE_PROTOCOL   = "IMPS/2"
It's not certain that this will make the wheel function; it may make your mouse go absolutely crazy.
8.7.5.5. Diskette Station
Add the following to /opt/ltsp/i386/etc/lts.conf if you want to use the thin client's floppy drive.
[ltsp053]
RCFILE_01=floppyd
see section Section 10.2 for more info.
8.7.5.6. Video Card Driver
Some video cards cannot be configured automatically. This is especially true of older video cards. So it may often be necessary to specify which video card driver must be used. Sometimes it may also be necessary to specify that an older version of XFree86 must be used. For example,with the Compaq Deskpro 4000 machine, an older version of XFree86 must be used, so for this type of video card we have to add the following lines to /opt/ltsp/i386/etc/lts.conf
[ltsp054]
XSERVER=XF86_SVGA
8.7.5.7. Screen Resolution
Sometimes it may be desireable to use a different resolution than 1024x768 which is normally the standard for thin clients. Not every video card can manage that resolution. It would also appear a little weird on 14" or 15" screens where 800x600 fits better. These files in /opt/ltsp/i386/etc/lts.conf make that possible:
[ltsp060]
X_MODE_0=800x600
8.8. Do the Network Cards Work?
With the command
ifconfig
you can see the current condition of the network cards. |
This command is also good for finding out which IP address the machine has, as well as its MAC address (which is called "HWaddr"). Another way to collect MAC addresses is to have a look at the syslog file at the time that you start up the machine whose MAC address you want to find. Then all you have to do is cut and paste. Use the command, as root, tail -f /var/log/syslog then you will see something likeJun 2 22:52:28 tjener dhcpd-2.2.x: DHCPDISCOVER from 00:02:b3:8f:66:76 via eth1 Jun 2 22:52:28 tjener dhcpd-2.2.x: DHCPOFFER on 192.168.0.13 to 00:02:53:8f:66:76 via eth1 Jun 2 22:52:29 tjener dhcpd-2.2.x: DHCPREQUEST for 192.168.0.13 from 00:02:53:8f:66:76 via eth1 Jun 2 22:52:29 tjener dhcpd-2.2.x: DHCPACK on 192.168.0.13 to 00:02:53:8f:66:76 via eth1Use CTRL-C to stop the process. |
tjener:~# ifconfig
eth0      Link encap:Ethernet  HWaddr 00:04:75:81:AA:78
          inet addr:10.0.2.2  Bcast:10.0.3.255  Mask:255.255.254.0
          UP BROADCAST RUNNING MULTICAST  MTU:1500  Metric:1
          RX packets:27892 errors:0 dropped:0 overruns:0 frame:0
          TX packets:26194 errors:0 dropped:0 overruns:0 carrier:0
          collisions:5 txqueuelen:100
          RX bytes:23495725 (22.4 MiB)  TX bytes:2810447 (2.6 MiB)
          Interrupt:11 Base address:0xdc00

eth1      Link encap:Ethernet  HWaddr 00:04:75:81:AA:FD
          inet addr:192.168.0.254  Bcast:192.168.0.255  Mask:255.255.255.0
          UP BROADCAST RUNNING MULTICAST  MTU:1500  Metric:1
          RX packets:1976176 errors:0 dropped:0 overruns:26 frame:0
          TX packets:2271670 errors:0 dropped:0 overruns:0 carrier:0
          collisions:0 txqueuelen:100
          RX bytes:486381910 (463.8 MiB)  TX bytes:1131449472 (1.0 GiB)
          Interrupt:10 Base address:0xe000

lo        Link encap:Local Loopback
          inet addr:127.0.0.1  Mask:255.0.0.0
          UP LOOPBACK RUNNING  MTU:16436  Metric:1
          RX packets:44174 errors:0 dropped:0 overruns:0 frame:0
          TX packets:44174 errors:0 dropped:0 overruns:0 carrier:0
          collisions:0 txqueuelen:0
          RX bytes:11789085 (11.2 MiB)  TX bytes:11789085 (11.2 MiB)
If what you see is similar to the above, but you still can't get on the net, then you may have to do something with your DNS-setup. Have a look at this section in the documentaton about Coyote Linux, Section 3.11.
8.9. Administration of Packages
In order to install packages, you need to define where you want to get them from, where your package reservoir is.
You define your package reservoir in the file /etc/apt/sources.list
You can either work with package administration via the command line or with the help of a graphical application such as KPackage Section 13.6, or Webmin Section 13.1
A quick introduction to the use of the command line for working with packaqe administration is given in this section.
deb ftp://ftp.skolelinux.no/debian/ woody main contrib non-free
deb ftp://ftp.skolelinux.no/debian-non-US/ woody/non-US main contrib non-free
deb ftp://ftp.skolelinux.no/skolelinux/ woody local
These lines contain information about where you can get your packaqes.
If you add new lines to this file, then you have to update the database that contains information about what is available.
See Chapter 14 for other lines that you can add as sources for packages.
8.9.1. Updating the Database with Info About Available Packages
The selection of available packages changes constantly. New packages become available; newer versions of packages appear, etc. So it is necessary to make sure that the database that contains information about the packages is kept constantly up-to-date. This is done with the command
apt-get update
It's a good habit to always run this command before you upgrade or add new packages.
8.9.2. Upgrading All Installed Packages to a Newer Version
All of the packages that have already been installed can be upgraded to a newer version with the command
apt-get upgrade
|
Sometimes it's really nice to know what is actually going to happen before you start to upgrade all installed packages. It's possible that it's not the right moment for you to start downloading several large packages. Maybe you need to wait until there is more bandwidth available. If you run apt-get upgrade -s then nothing will actually happen- the upgrade will only be simulated. If there is too much information on the screen, then you can tryapt-get upgrade -s|more . If it looks fine, then you run the above command again, taking away the -sOn the US keyboard, the so-called pipe symbol, | is found immediately to the left of the BACKSPACE key. Use the SHIFT key to type the pipe symbol. |
8.9.3. Overview of Installed Packages
You can get an overview of installed packages using the command
dpkg -l|more
. Be aware that the first two letters indicate the status of the package; "ii" means that it is fully installed.8.9.4. Finding the Name of a Specific Package
If you don't remember the name of a package, you can do a search of the database with the command
apt-cache search <packagename>
. If there is too much text on the screen, then you can tryapt-cache search <packagename>|more
The two symbols < and > must not be used. They are only used in this example.
8.9.5. Showing Available Information about a Package
The commands
apt-cache showpkg <packagename>
andapt-cache policy <packagename>
will give you detailed info about the packacge.8.9.6. Installing a Package
When you have found the package you want, install it with the command
apt-get install <packagename>
If you want to see what will happen when you install it, you can first run a simulation with the commandapt-get install <packagename> -s
8.9.7. Removing an Installed Package
To find the specific package that you want to remove, use the commands that were mentioned earlier for finding the name of the package.
When you know the name of the package, then you can remove it simply with the command
apt-get remove <packagename>
If you want to see what is going to happen when you remove the package, you can run a simulation first with the commandapt-get remove <packagename> -s
8.9.8. Installing one Specific Version of a Package
When you install a package with the command
apt-get install <packagename>
, the newest version will be automatically installed. Sometimes you don't want to install the newest version, just a little older version.apt-get install <packagename>=older_versions_number
If you think that the older version of the backup module of Webmin is better, then you should run
apt-cache showpkg webmin-slbackup
to get an overview of available versionstjener:~# apt-cache showpkg webmin-slbackup Package: webmin-slbackup Versions: 0.0.7-1(/var/lib/apt/lists/ftp.skolelinux.no_skolelinux_dists_woody_local_binary-i386_Packages) (/var/lib/apt/lists/ftp.skolelinux.no_skolelinux_dists_woody-test_local_binary-i386_Packages) (/var/lib/dpkg/status) 0.0.6-1(/var/lib/apt/lists/ftp.skolelinux.no_skolelinux_dists_woody-test_local_binary-i386_Packages) Reverse Depends: education-main-server,webmin-slbackup task-skolelinux-server,webmin-slbackup Dependencies: 0.0.7-1 - webmin (0 (null)) perl (0 (null)) libcgi-application-perl (0 (null)) libhtml-template-perl (0 (null)) libexpect-perl (2 1.15) slbackup (2 0.0.5-1) 0.0.6-1 - webmin (0 (null)) perl (0 (null)) libcgi-application-perl (0 (null)) libhtml-template-perl (0 (null)) libexpect-perl (2 1.15) slbackup (2 0.0.5-1) Provides: 0.0.7-1 - 0.0.6-1 - Reverse Provides:Here you can see that there are two versions available: 0.0.6-1 and 0.0.7-1.
If you want to install version 0.0.6-1, you can do that with the command
apt-get install webmin-slbackup=0.0.6-1
8.9.9. Installing a Package with the Help of dpkg
Sometimes you want to manually download a package from somewhere, such as from Opera's web page. Then you get a so-called .deb-package in your own home directory. You can install it by using the command
dpkg -i <>
. If you first want to do a simulation, run the commanddpkg --no-act -i <packagename>
8.9.10. Searching Through Files that were Installed by a Specific Package
Sometimes it's nice to know exactly which files came from a specific package. You can get that overview with the command
dpkg -L <packagename>
8.9.11. Finding Which Package a File Came From
If you want to know which package a specific package came from, the command
dpkg -S <filename>
will help you find out.8.9.11.1. Unpacking the Files from a Package Without Installing Them
Maybe you have accidentally erased an important systems file, and you do not have any backup of it. What then? If you use the command
dpkg -S <filename>
you will find out which package the file originally comes from. That way you can unpack the package and get back the missing systems file.First, you have to get the relevant .deb-package. When you have done that, you place it in the /tmpdirectory. You unpack the files in that directory with the command
dpkg -X <packagename> /tmp
which will then create the necessary directories in the /tmpdirectory and then place the files there. |
Never unpack the package directly in the /-directory! |
8.9.12. Making Your Own Local Mirror for Deb-Packages
There are some packages which I often install, as well as some packages that I wish I didn't have to download from the Internet every time. Even if the commandapt-get makes it easier to install packages from the Internet, unfortunately apt-get won't increase the speed of my Internet connection. However, I can use apt-get to make my own mirror of the packages that I have downloaded. That way, in the future when I want to install these packages, the command apt-get will fetch the packages that I have already downloaded. This goes more quickly.
mkdir /var/www/dpkg
cp /var/cache/apt/archives/*.deb
/var/www/dpkg
cd /var/www/
dpkg-scanpackages dpkg /dev/null | gzip -9c >
dpkg/Packages.gz
After that, a new line in the file /etc/apt/sources.list must be added to
deb file:///var/www dpkg/Then you must, as usual, run the command apt-get update in order to update your package database.
8.10. The Quota System for Hard Drive Space
-
First, you have to install the necessary packages, if you don't already have them installed.
apt-get install quota quotatool -
Then you have to enable the use of quotas on the desired partition. So you first add a line to the file /etc/fstab. Do this for the partition /skole/tjener/home0
/dev/vg_data/lv_home0 /skole/tjener/home0 ext3 defaults,usrquota,grpquota 0 2
with the flags 'usrquota' and 'grpquota' you have now enabled the use of user quotas and group quotas on the partition /skole/tjener/home0. In order to get this to take effect, you have to unmount the partition and then mount it; if necessary, reboot the machine. -
Then you have to make the databases that contain info about the quotas:
           touch /skole/tjener/home0/quota.user
            touch /skole/tjener/home0/quota.group
            chmod 600 /skole/tjener/home0/quota.user
            chmod 600 /skole/tjener/home0/quota.group
After that, check that quota.user and quota.group are empty before initialising the databases:ls -lh /skole/tjener/home0/quota*
will show that quota.user and quota.group have zero size. Then initialise the databases with the commandquotacheck -avug
after which you check that the databases are no longer zero in sizels -lh /skole/tjener/home0/quota*
-
Then you turn on the quotas: quotaon -a
-
After that you set the quotas for some of the users.
edquota -u klaustakes you to a vi-based quota editor where you set up the quota the way you want it for klaus. If you think that quota is the one you want for all of the users, you can use the size of quota for klaus as a template for the other users. When that's done, you need to check the current status of the disk quotas,repquota /skole/tjener/home0gives youtjener:~# repquota /skole/tjener/home0 *** Report for user quotas on device /dev/vg_data/lv_home0 Block grace time: 7days; Inode grace time: 7days Block limits File limits User used soft hard grace used soft hard grace ---------------------------------------------------------------------- root -- 1198381 0 0 12832 0 0 daemon -- 4 0 0 5 0 0 bin -- 1 0 0 1 0 0 man -- 1000 0 0 28 0 0 lp -- 81 0 0 198 0 0 mail -- 5233 0 0 444 0 0 news -- 1 0 0 1 0 0 proxy -- 126788 0 0 4722 0 0 junkbust -- 5 0 0 3 0 0 klaus -- 1993 1500 2000 268 0 0 test16 -- 5 0 0 4 0 0 test15 -- 5 0 0 4 0 0 test14 -- 5 0 0 4 0 0 test13 -- 5 0 0 4 0 0Here the user klaus has a softlimit of 1.5MB and a hardlimit of 2MB. -
If you have a list of usernames in the file LoginName.txt in the form jan janak janne then you can give all of them the same size of quota as klaus with the command
for x in `cat LoginName.txt `;do edquota -p klaus $x;doneIf you now look at the status of the quotas, you will see that all of the users have got the same quota as klaustjener:~# repquota /skole/tjener/home0 *** Report for user quotas on device /dev/vg_data/lv_home0 Block grace time: 7days; Inode grace time: 7days Block limits File limits User used soft hard grace used soft hard grace ---------------------------------------------------------------------- root -- 1198381 0 0 12832 0 0 daemon -- 4 0 0 5 0 0 bin -- 1 0 0 1 0 0 man -- 1000 0 0 28 0 0 lp -- 81 0 0 198 0 0 mail -- 5233 0 0 444 0 0 news -- 1 0 0 1 0 0 proxy -- 126788 0 0 4722 0 0 junkbust -- 5 0 0 3 0 0 klaus +- 1993 1500 2000 268 0 0 test16 -- 5 1500 2000 4 0 0 test15 -- 5 1500 2000 4 0 0 test14 -- 5 1500 2000 4 0 0 test13 -- 5 1500 2000 4 0 0If you use LDAP then you can quickly get a list of your users with the commandgetent passwd|grep home0|cut -d":" -f1>LoginName.txtcheck that LoginName.txtis the way you want it to be. -
Good commands for learning more about disk quotas for users and groups are
-
man edquota
-
man quota
-
man quotacheck
-
man quotaoff
-
man quotaon
-
man quotastats
-
man quotatool
-
man repquota
-
8.10.1. Stopping the File .xsession-error From Filling up Your Entire Hard Drive
Sometimes a program can get very troublesome and start writing enormous amount of error messages to the file .xsession-errors in a user's home directory. Some programs, especially GIMP, are fully capable in the space of only a few minutes of creating such a large .xsession-erros file that the whole hard drive gets full. So, everything stops working. Then the root user has to go in to the main server and find that file and delete it. This is not exactly what you want to do on a regular schoolday.
So, even if such error message files as .xessions-errors are surely useful to have when you need to diagnose a problem, they are really more of a hassle in the schoolday. So, you need to get rid of it. You can do this by redirecting all messages that would otherwise be written to this file, right into the waste bin /dev/null.
By changing a few lines in the file /etc/X11/Xsession, set a comment symbol(#) in front of these lines, in this way:
#ERRFILE=$HOME/.xsession-errors
#
## attempt to create an error file; abort if we cannot
#if touch $ERRFILE 2> /dev/null && [ -w $ERRFILE ]; then
#  chmod 600 "$ERRFILE"
#elif ERRFILE=$(tempfile 2> /dev/null); then
#  if ! ln -sf "$ERRFILE" "${TMPDIR:=/tmp}/xsession-$USER"; then
#    message "Xsession: unable to symlink \"$TMPDIR/xsession-$USER\" to" \
#             "\"$ERRFILE\"."
#  fi
#else
#  errormsg "Xsession: unable to create X session log/error file.  Aborting."
#fi
#
#exec > "$ERRFILE" 2>&1
And set in these two lines instead:
errfile="/dev/null"
exec > "$errfile" 2>&1
Now you don't need to be afraid that .xsession-errors will fill up your entire hard drive.
Chapter 10. Thin Clients
10.1. Adding a Printer to a Thin Client
|
Before you try to add a printer in Skolelinux/Debian-edu, you should really think about this before you get a printer. So check out the web pages on linuxprinting.org to find out if your printer is supported out-of-the-box by Linux. If you have a printer that is classified as a "paperweight", then get rid of it, or use it as a door stopper. |
Recipe for Setting up a Printer on a Thin Client
-
Plug the printer into the thin client. This example is for a printer on a parallel port, so '/dev/lp0'
-
Add the MAC address of this thin client in Webmin, for example ltsp050.
-
Use a text editor to open the file /opt/ltsp/i386/etc/lts/lts.conf, and add these lines
[ltsp050]
PRINTER_0_DEVICE =/dev/lp0
PRINTER_0_TYPE   =P
If this thin client needs other configuration lines, add them here as well; maybe its video card does not allow autodetection, etc. -
Go to K-menu->Control Center->System->Printing Manager and click on "the magic wand" icon to add a printer. Click on 'Next'. Then for backend selection choose 'Network printer(TCP)'. Click on 'Next'.
-
Click on 'Settings'. Instead of 10.2.0, type 192.168.0, if the printer is connected to a thin client, leave the other values as they are. Click OK. Click on the button 'Scan', and it will then search for your printer, which will take about det 30-60 seconds. In the large frame on the left, you will soon see information about the thin client that has an attached printer, choose that one, and the rest of the process of choosing printer and driver should be pretty easy, I hope. :-)
-
When you try to print out a "test page", you may find that the printer reacts, but still nothing gets printed out. The printer's resolution may be set too high. Try it again with 150 ppt.
10.2. Making Possible the Use of Diskettes with a Thin Client
Get package ltsp_floppy from http://prdownloads.sourceforge.net/ltsp unpack it and run the installation script. After that, use a text editor to add this line RCFILE_01 = floppyd to the file /opt/ltsp/i386/etc/lts.conf for each thin client you want to have floppy access, or add it to [Default] if you want all of them to have it. This is an example which gives all thin clients the capability of using the local floppy drive.
[Default]
        SERVER             = 192.168.0.254
        XSERVER            = auto
        X_MOUSE_PROTOCOL   = "PS/2"
        X_MOUSE_DEVICE     = "/dev/psaux"
        X_MOUSE_RESOLUTION = 400
        X_MOUSE_BUTTONS    = 3
        USE_XFS            = Y
        XkbLayout          = no
        SEARCH_DOMAIN      = intern
        X_MOUSE_EMULATE3BTN = Y
        LOCAL_APPS         = N
        RUNLEVEL           = 5
RCFILE_01 = floppyd
You need a file in the home directory for each user you want to be
able to use diskettes with a thin client. The file should be named
.mtoolsrc. Note the full stop in the file
name. The file should contain the line
drive a: file="$DISPLAY" remote 1.44m mformat_onlyIf you want to give all of your users this file without doing a lot of work, I recommend that you follow the following instructions. As root, create the above-mentioned file, and save it in /tmp. Then do the following:
for dir in /skole/tjener/home0/*; do cp /tmp/.mtoolsrc $dir/; chown --reference=$dir $dir/.mtoolsrc; done
When that's done, then all of the folders in /skole/tjener/home0 will have got the file .mtoolsrc, and the ownership of the file will be the same at the one who owns the folder, otherwise the folder would be owned by root.
Remember to make the following changes in the file /etc/devfs/perms; change the line (fra 0660 til 0666)
REGISTER ^floppy/.* PERMISSIONS root.floppy 0660til
REGISTER ^floppy/.* PERMISSIONS root.floppy 0666
I recommend the graphical program MToolsFM, apt-get install mtoolsfm. There are others, such as Konqueror, but they have some small bugs connected with the use of floppy drives with thin clients. The disadvantage with having the file .mtoolsrc in the home directory, is that you can't just get ready access to the floppy drive from the main server or workstations. I only have thin clients so I haven't looked for a solution to this, but it shouldn't be difficult to find one. (See section Section 10.2.2)
10.2.1. Using MToolsFM
You find MToolsFM in the menu under K-menu->Utilities->Debian

This is the picture that you see when you start MToolsFM. Remember to have a diskette in the floppy drive when you start MToolsFM.
MToolsFM has two windows. Usually, one window shows the contents of the diskette(a:), and the other shows the contents of the hard drive. In this example, the window on the left shows the contents of the diskette while the window on the right shows the contents of the hard drive. YOu can choose yourself how you want it to be by using the function to chaange which you find up in the corner.
You mark the file you want to work on by clicking on the filename. When it has been marked, use the buttons to move the files back and forth. You find these buttons in between the two windows. They are labelled "Copy". By right clicking on filename/directoryname you can get other choices.

10.2.2. .mtoolsrcBoth for Thin Client and Workstation
With the Help of a Little Trick
Make sure that all users who are to use diskettes on both thin clients and workstations have this file floppycheck.sh in Autostart-directory, .kde/Autostart, see section Section 10.2 and Section H.4
This file floppycheck.sh should look like
#!/bin/bash
            CLIENT=`echo $DISPLAY | tr 0-9 "-" | sed -e s/-.*//`
            if [ $CLIENT = "ltsp" ]; then
              echo 'drive a: file="$DISPLAY" remote 1.44m mformat_only' >
            ~/.mtoolsrc
            else
              echo 'drive a: file="/dev/floppy/0" 1.44m mformat_only' >
            ~/.mtoolsrc
            fi
What this script does is make a new version of .mtoolsrc based on what kind of machine the user is
logged onto, thin client or workstation.
Remember to make this script executable with the command
chmod 755 .kde/Autostart/floppycheck.sh
10.3. Enabling the Use of a USB-Pendrive with a Thin Client
It pays to make sure that the thin client in question has the necessary driver modules. Add these lines to /opt/ltsp/i386/etc/lts.conf
[ltsp043]
MODULE_01          = "usb-uhci"
MODULE_02          = "usb-storage"
MODULE_03          = "sd_mod"
RCFILE_02 = usbpen
Make sure that the file you now save is named the same as what is given in the line above with RCFILE_02, you must have floppyd set in as from Section 10.2. After that you can modify floppyd so it works for USB-pendrives.
cp /opt/ltsp/i386/etc/rc.d/floppyd /opt/ltsp/i386/etc/rc.d/usbpen
This is the contents of my file /opt/ltsp/i386/etc/rc.d/usbpen#!/bin/bash # # First, since floppyd runs as nobody, make /tmp world accessible. # chmod 777 /tmp # # Second, probe for the floppy # modprobe usb-storage insmod usb-storage # # Third, make the floppy world accessible. # mknod /dev/sda b 8 0 mknod /dev/sda1 b 8 1 chmod 666 /dev/sd* # # Finally, start floppyd. # floppyd -d /dev/sda1Depending on what type of USB-pendrive you have, you may need to replace the file floppyd -d /dev/sda1 with floppyd -d /dev/sda, that is, without the number "1". If you have SCSI-hard drives, they are usually called /dev/sda1, so you need to check /var/log/syslog to get more information about which device to use for your USB-pendrive.
See Section G.6 for how it is possible on a regular main server, workstation or thin client.
10.3.1. Error Messages of the Type mtools_skip_check=1
With some types of USB-pendrives you will see the following type of error message
Total number of sectors not a multiple of sectors per track!
Add mtools_skip_check=1 to your .mtoolsrc file to skip this test
The you can then either add this line "mtools_skip_check=1" to the file .mtoolsrc, or add this line to the global configuration file for mtools, /etc/mtoolsfm.conf
10.4. Sound on Thin Clients
Certainly! I'm listening to NRK radio on a thin client right now.
Start by downloading the package ltsp_sound
Chapter 11. Special Adaptations for your Users
There are many things you can do for your users, so that their experience of working with a Skolelinux/Debian-edu-machine will excede anything they have known previously, believe me.
11.1. Deciding Which Directories the Users Should Have
To start with, every users get two directories created when the user is created
drwxrwx---        klaus klaus    priv
drwxrwxr-x        klaus klaus    pub
that is, a directory that is open for everyone to view, pub and one that is closed to other users priv.
If you aren't comfortable with the idea that your users are supposed to understand the concept of a closed (priv) and an open directory (pub) in their home directories you can change this. You can either lock the directories at the top level after the users are created chmod 700 /skole/tjener/home0/*, or you can open them a little chmod 711 /skole/tjener/home0/*
If you want your users to have several directories from the start, for example the directories matematics, English, German, French, this can be done by changing a bit of the file /usr/share/webmin/ldap-users/createhomedir, by adding these lines:
# Make a directory related to the subject mathematics
mkdir "$homedir/matematics"
chmod 0770 "$homedir/matematics"

# Make a directory related to the subject English
mkdir "$homedir/English"
chmod 0770 "$homedir/English"

# Make a directory related to the subject German
mkdir "$homedir/German"
chmod 0770 "$homedir/German"

# Make a directory related to the subject French
mkdir "$homedir/French"
chmod 0770 "$homedir/French"
11.2. Deciding the Appearance of the Program Menu
We have a little "problem"- if you can call it that- with Skolelinux/Debian-edu. Rather than too few programs installed, we have far too many. Many of the programs are not necessary for all of the users. They only get in the way and make things cluttered.
Luckily, there are ways to tailor the menu to specific groups of users. There is a program in Skolelinux/Debian-edu that does the whole job for us in a simple way. The program is called kschoolmenu, and you find it in the menu under->->->
|
YOu can also start kschoolmenu from the command line with the command
kcmshell kschoolmenu
|
Making Custom Menus
-
Start kschoolmenu, make your various menus and name them, for example, menu1, menu2, course
-
Make your own menu-groups using the useradm-tool in Webmin; call them something like menu1, menu2, etc.
-
According to which tailored menu you want your users to use, you must add the users to the appropriate menu-group. If you want the user 'perhan' to have the menu called menu1, then you add 'perhan' to the group named menu1. See Section 12.3 to find out how to create groups and users.
The results are placed in the file /var/lib/kschoolmenu, which you can edit by hand if you want. If you have several machines and you want the same menu for all of them, a quick way to do this is to copy the files from /var/lib/kschoolmenu

This is kschoolmenu the way you see it when you have started it. You see 2 windows. In the left window, you see a choice of programs that you can have in the menu. To the right, you see the menu you are about to create. Between them, you see 2 arrows which are used to move the program items to/from your menu.

Here you choose what you want to name the menu, in this case it's called menu1. Remember that you have to create a group with the same name and put all of the relevant users in that group so they can get the same menu. See Section 12.3 to find out how this can easily be done.
11.3. Automatic Start of Program at Login
There are some programs that your users surely use every time they login. So, it would be nice to be able to automatically start them up at login, instead of having to do it manually every time. This can be done by copying shortcuts to the program into the directory .kde/Autostart which is stored in the user's home directory.
An easy way to get a hold of these short cuts is to first "drag" them from the K-menu by holding down the left mouse button and then "releasing" them on the desktop background, choosing "Copy here". Then you have a so-called shortcut file in the directory Desktop. You copy this file into the directory .kde/Autostart, which will automatically start the program when the user logs on.
11.4. Message to Everyone who Logs in
There is a program, xmotd - message-of-the-day browser that makes it possible to show the contents of a file when a user logs in to the system. This is useful, for example, when you want to give information about a new printer, planned down time, etc.
If you don't have xmotd installed, then you can install it with
apt-get install xmotd
Then you have to enable the program xmotd to be able to show a file when the user logs in.Add these lines to the file /etc/X11/Xsession
xmotd  -popdown 25 -geometry 500x500 /usr/local/motd \
-xrm "*title.label: Today's Message"" -always
This will then show the contents of the file /usr/local/motd when the user logs in. -popdown 25 means that the message will disappear
after 25 seconds, while -always means that
the message will be shown every time a user logs in.
Have a look at the manual page for xmotd for a description of the other choices. You can view the manual page from the command line with the command man xmotd.
11.4.1. Message to a Specific User who Logs in.
Sometimes it's necessary&desireable to give a message to a specific user when they log in, for example when the user has used too much space on the hard drive. This is done by adding a few lines to the file /etc/X11/Xsession
if [ -e "/usr/local/message/$USER" ]; then
exec /usr/X11R6/bin/xmessage -file /usr/local/message/$USER &
fi
By creating a file with the name klaus
then this file will be shown when the user klaus logs in.11.5. Giving a Message to All Users That are Logged on
If you have a machine where you have installed both main server and thin client server, then you can use a little Perl script to give a message to all users that are logged on.
#!/usr/bin/perl -w

if (@ARGV != 3){
        print "Use:\n\txwall.pl keyword time message\n";
        print "\t keyword is the word you search with\n";
        print "\t time is the time in seconds you want the message to be visible\n";
        print "\t message is the message, should be written inside quotation marks\n";
        exit (1);
}

$SIG{CHLD}="IGNORE"; # in the unlikely event a child exits before the parent

my ($procmatch, $timeout, $message) = ($ARGV[0],$ARGV[1],$ARGV[2]);

foreach $pid (split /\s/,`/bin/pidof $procmatch`) {
        my ($display, $xauthority, $homedir);
        foreach $envvar (split /\00/,`cat /proc/$pid/environ`){
                if ($envvar=~/DISPLAY=(.*)/){ $display = $1; }
        }
        foreach $var (split /\n/, `cat /proc/$pid/status`){
                if ($var =~ /Uid:\s+?(\d*?)\s+?/) { my @uid = getpwuid($1); $homedir = $uid[7]; }
        }

        if ($display){
                if (fork() == 0) {
                        $ENV{DISPLAY}=$display; $ENV{XAUTHORITY}="$homedir/.Xauthority";
                        exec("xmessage -center -timeout $timeout '$message'");
                }
        }
}
This script is then saved as xwall.pl and
used in the following manner
perl xwall.pl alarmd 10 "Hi! You will see this message for 10 seconds."
Sometimes it can be a bit tricky to find a process that can be used as a keyword that covers all logged in users. I have had good experience with using the process alarmd as a keyword. Try the command ps auxw|grep alarm then you will see if this keyword works for you.
11.6. Automatic User Log In
|
This is not smart security-wise, but very nice if, for example, you have a Skolelinux/Debian-edu network at home and you are the only user. Be aware that the user in question will be able to log in without being asked to give a password. |
It is possible to automatically log in a specific user on a specific thin client when it gets turned on. This is done in the file /etc/kde2/kdm/kdmrc, where the following lines are added:
[X-ltsp010:0-Core]
AutoLoginEnable=true
AutoLoginUser=klaus
Here the user klaus gets automatically logged in to the thin client ltsp010 when it gets turned on. In order for this to work, you need to lock the MAC address til the IP number.
[X-ltsp058:0-Core]
AutoLoginEnable=true
AutoLoginUser=susanna
In this case, the user susanna gets automatically logged in on the thin client ltsp058.
11.6.1. Automatic Input of Username in the Login Window
If you have a thin client placed where there is always one single user who logs in, such as in an office, itmay be fine to set things up so that the user doesn't have to type in their username but just their password. You can do this by adding the following lines to the file /etc/kde2/kdm/kdmrc
[X-ltsp059:0-Greeter]
PreselectUser=Default
DefaultUser=perbart
That way the thin client ltsp059 has already
filled in perbart as username; the only
thing the user has to type in is his password. If some other user
than perbart wants to use that thin client,
they can easily do so by removing perbart
from the login window and typing in their own username.11.7. Setting up Desktop, Menu bar, etc the Same for Everyone When the User is Created
There are some people who think that the appearance of the "desktop" which accompanies Skolelinux/Debian-edu is not totally optimal. Maybe you would like to give all of your users another background picture, other icons on the desktop, other icons on the K-menu and taskbar in KDE. It would be great if that could be done in such a way that everything was done once and for all in a simple fashion.
The secret lies in placing the files that you want all of your users to get when each user is created, in the correct directory, in this case in the directory named /etc/skel. If your users already exist, then see Section 10.2 og Section H.4.
Everything that is placed in the directory /etc/skel will get copied to the user's home directory when the user is created. For example, if a file test.txt is placed there, then it will be put in the home directory with the correct permissions and ownership.
What we want is for everyone from the start should get a predefined setup of background, desktop, K-menu, etc in KDE. The way this is done is to make a user which serves as a template. Call this user, for example, template, see Section 12.3 to find out how to create a user. Now log in as this user and set up thing the way you want them to be. Then copy the directory that contains all of the relevant KDE configuration files into /etc/skel. You find the KDE configuration files in the directories under .kde
First create the directory /etc/skel/.kde with the command mkdir /etc/skel/.kde, then do the copying with the command cp -ar /skole/tjener/home0/mal/.kde/* /etc/skel/.kde
Everything you see in your KDE desktop environment is a setting in one or another KDE configuration file. For example, the attributes for your shortcut icons are covered in the file Desktop/something-or-other.desktop. The following is part of the contents in the shortcut for OpenOffice.org Writer
[Desktop Entry]
Comment=
Exec=/usr/bin/oowriter
Icon=ooo_writer.xpm
Name=OpenOffice.org Writer
ServiceTypes=
Type=Application
Here you can see clearly how you can make changes to attributes such as the file path to where the program is stored, what kind of picture that is to be used for the icon, etc.
11.7.1. The Kicker, the Bottom Menu Line

Another important directory for KDE configuration files is .kde/share/config. This is where you find almost all of the configuration files for KDE programs. The niftiest one to know about is the file .kde/share/config/kickerrc which determines the appearance of the panel at the bottom of your screen.
11.7.2. Desktop Icons, Background
Whatever you have on the desktop in the way of icons and other types of shortcuts is determined by the contents of the directory Desktop. Everything in the directory /etc/skel/Desktop winds up on the desktop for all new users. Copy shortcuts that you want everyone to have into this directory; see Section H.4 to find out how these .desktop-files can be copied.
Chapter 12. Daily Operation of Skolelinux/Debian-edu Network with Webmin
12.1. The Webmin Password
During the installation of Skolelinux/Debian-edu, see Figure 6-4 you were asked to set a password. This password is the basis for 2 different passwords. One of them you use to login to Webmin, at the same time it is also the root password. The other is the LDAP password. To change the root/Webmin password, you can either use the command line with the command passwd or you can use the program kdepasswd, which you find in ->->.
12.2. Backup
There is a backup module included in Webmin. You find it under the tab "Servers" and "Skolelinux Backup", or https://tjener.intern:10000/slbackup

This is the place in Webmin where you find slbackup.

Slbackup has 5 modes of operation;
-
General, Figure 12-2
-
Backup details, Figure 12-3
-
Restore, Figure 12-6
-
Maintenance, Figure 12-8
-
SSH keys, Figure 12-9

This is where you set the time that you want the backup to be done, which will then take place at that time every day.

Here you configure which machine you want to backup. You specify the IP address, together with the directories that you want to backup, and how long you want to keep a copy of the backup.

Here you set up the details for the machine that is going to do the backup. The most important detail is where the backup is going to be stored. The default backup partition is the LVM partition /skole/backup, see section Section 8.5.3. But there is nothing to stop you from setting in an extra hard drive and storing your backup there instead.
If you are observant, you may have noticed that we place the backup on the same hard drive as the one we take backup of. Stupid? Not so, if we take backups as an extra service for our users in case they accidentally delete a file. It is, of course, stupid to store your backup on the same hard drive if the purpose is to guard against a drive getting broken. Then it is wiser to set up a machine with a workstation profile, see Section 2.5, and install some really large capacity hard drives and use slbackup to make the backup external- making that machine your backup server.

What good is it to have a backup utility, if you can't put the files back that have been deleted? By choosing "Restore" you have the possibility to choose which machine you want to get the files from, as well as which file or entire directory you want to get. You can also use everything that you have taken a backup of on the machine in question.

When you have chosen which machine you want to get the backup from, then you will get to make several more choices, among which the date/time you want to restore the backu and where you want the files to be placed. To start with, it's wise to use the directory /tmp/<macinename>.
It's smart to place the files being restored in the directory /tmp/<machinename>. Everything that is stored in this directory gets deleted when the machine reboots. In addition, by placing the files there, in this temporary directory, you make sure that you don't accidentally write over the wrong files (when you replace an old file with a new one that has the same name). After you have taken out the files that you need to restore, then you must go into this directory, /tmp/<machinename>, and use a file manager, see Section 13.4, to get out the files that you want.

By choosing "maintenance" you get the possibility to delete old backups that you no longer have any use for, or place for.

In order to be able to take a backup over the network from other machines, without being asked each time for a password, SSH has been set up in such a way so that you only type in the password once.
12.2.1. Comparison of Various Versions of the Same File
If you have "destroyed" the format of a file, for example /etc/dhcp3/dhcpd-skolelinux, but you know that you have a backup of that file which is good, then you can use on of several programs to compare the various versions of that file. If you have chosen to restore, then the old version of the file /etc/dhcp3/dhcpd-skolelinux will be placed in the directory /tmp/<machinename>/etc/dhcp3/dhcpd-skolelinux. A command-line based program is included to do a comparison of the files. The program is called diff, and is used in this fashion
diff /tmp/<machinename>/etc/dhcp3/dhcpd-skolelinux /etc/dhcp3/dhcpd-skolelinux
In this example, I have two examples of the file dhcpd-skolelinux, There is an error in one of them- it lacks two }-parentheses. This is the result of running the command diff with these two files:
klaus@tjener:~$ diff /etc/dhcp3/dhcpd-skolelinux.conf /tmp/tjener/etc/dhcp3/dhcpd-skolelinux.conf
217c217
<     }
---
>
225c225
<     }
---
>
Fortunately there are other programs that do the same job. One of them mgdiff can be installed with
apt-get install mgdiff
see Section 8.9 for how to add new packages. mgdiff has a graphical interface (GUI). If I start mgdiff and open the two files in this program, this is what I see:
12.2.2. Dedicated Backup Server
|
Slbackup is not really meant to be used in this fashion. So do this at your own risk! |
By setting up a machine with a "workstation",profile Section 2.5, and installing Webmin and slbackup, you can quickly set up a very user-friendly and powerful backup machine.
apt-get install slbackup webmin-slbackup
When combined with making a backup volume, see Section 8.5.8, this is a fine way to do backups of files all the time.By adding more backup clients, see Figure 12-3, by filling in the IP address of the machine you want to backup, for example, the IP address for the "main server" is 10.0.2.2
Be aware that taking a backup over a network can take a long time, so it is best done outside of office hours/school time.
12.2.3. Slbackup from the Command Line
There are commnds that can be run from the command line, so you don't need to start a net browser and Webmin.
List of times backup is available from (lokal og external):
 rdiff-backup --list-increments /skole/backup/tjener
 rdiff-backup --list-increments backup.intern::/skole/backup/tjener

List of files in a given backup ('--list-at-time now' gives the last one):
 rdiff-backup --list-at-time 2004-02-22T01:30:02-04:00 /skole/backup/tjener/etc/ltsp/

Restore files from a given time ('--restore-as-of now' gives the last one):
 rdiff-backup --restore-as-of 2004-02-22T01:30:02-04:00 /skole/backup/tjener/etc/dhcpd.conf /tmp/dhcpd.conf
12.2.4. Slbackup Log Files
You find the log files for slbackup in /var/log/slbackup/slbackup.log. This is where information is logged about when the last backup was done, how much was changed, etc
--------------[ Session statistics ]--------------
StartTime 1086202803.00 (Wed Jun  2 21:00:03 2004)
EndTime 1086204514.88 (Wed Jun  2 21:28:34 2004)
ElapsedTime 1711.88 (28 minutes 31.88 seconds)
SourceFiles 56607
SourceFileSize 1625082476 (1.51 GB)
MirrorFiles 41244
MirrorFileSize 1060012665 (1011 MB)
NewFiles 15372
NewFileSize 564463215 (538 MB)
DeletedFiles 9
DeletedFileSize 65488 (64.0 KB)
ChangedFiles 344
ChangedSourceSize 667575185 (637 MB)
ChangedMirrorSize 666903101 (636 MB)
IncrementFiles 15725
IncrementFileSize 1936873 (1.85 MB)
TotalDestinationSizeChange 567006684 (541 MB)
Errors 0
--------------------------------------------------

Jun 02 21:28:36 - Successfully finished backing up client tjener
Jun 02 21:28:36 - Finished slbackup.
It pays once in a while to have a look at this file, check that you have "Successfully finished backing up"
12.3. wlus - Webmin Ldap User Simple
There are several systems for user information and administration in Skolelinux/Debian-edu, but now we use LDAP and the utility WLUS, and not /etc/passwd and its accompanying commands such as adduser, useradd, etc.
To get access to Webmin, point your favourite web browser to the address https://tjener .intern:10000/ldap-users You can use any web browser you want. You can also connect a Mac machine and run it from there.
The first thing you see is a dialogue box where you log yourself in as the user root, with the password you created during installation, see Figure 6-4 After you have logged in to Webmin you will see this welcome screen for WLUS.

Because we haven't added any users yet, it would be natural for us to choose "New User(s)". But before we do that, we may want to adapt WLUS to our needs.
By clicking on "Module Config" we can change how strict we want our password policy to be, as well as where we want to put our users' home directories, plus other things. When you are done making your changes, click on "Save". Then you are ready to create new users. The first thing you need to do is make a test user. This is a user that functions as a template for setting up things exactly the way you want it to be for all of your users. Have a look at Chapter 11 Now you should be ready to create new users. The first thing you should do is to create a test user. This is a user that you use as a template for setting up things exactly the way you want things to be for all of your users. Have a look at Chapter 11There are two different ways to add new users, either one at a time, or a whole bunch at once using a so-called semicolon-separated file(;). By clicking on "New User(s)" you get up a rather long page. At the top is the possibility to add users manually one by one, by providing first/last name, together with password, if desired. A little farther down the page, you find the possibility to add several users at once, "Add users from file"

When you add a user in this way, the computer provides the username, and if you want, the password as well. But you can override this by ticking "Common password - Yes" and then typing in the password you want.
Remember to also choose what kind of role you want the new user to have.
When new users have been added using WLUS, you get a receipt with information about name, username and password, in a format that makes it easy to print it out, clip it up and give it to the user. It is also possible to add an entire class of users, or even a whole school. By using the other way of adding users, that is the so-called semicolon-separated file.

This file is formatted with the different fields separated by a semicolon. You can create this file by exporting it to a semicolon-separated file from the school's database of attending pupils, or by exporting from OpenOffice/Excel, or by using a regular, simple text editor such as ->->
In order to use the file import function, you have to scroll down to the bottom of the page where you find a dialogue box for adding users from file. Click on browse to find your file with the semicolon-separated users. When you have found that file, click on "Add users from file" When you have got the file with the users, you will see the different semicolon-separated items listed in different columns. At the top of each column you choose the name for its content; as a minimum you should have first name and last name. When you add users from file, you get a nice list of the new users' usernames and passwords, in a format that is easy to print out and distribute to the user. By clicking on "Search" without filling in the search field, you get a list of all users who are registered. By clicking on "User Data" you get the possibility of changing the password for that user, as well as other things such as the name of the user. If you want, you can also choose to move the users home directory, but you will need to personally move the files in question since this is not done by WLUS. When users are on the system, there are some extra possibilities to choose, such as "Delete user" and "Disable Login"


By putting a cross in front of a user, and choosing for example "Disable Login" that user will not be allowed to login.
The result of having chosen "Disable Login" is seen as a fine red cross for that user. By putting a cross in front of the user and clicking on "Enable Login" you will see a green cross reappear in front of that user. The user can login again.

12.3.1. Changing the User's Password
The users can change their own password, as long as they have one that works. By starting the program kdepasswd which they can find in ->->
Of course, they can also use the command passwd from the command line.
This is where you type in the old password, that is, the one that the user used to login. Note: if this is written incorrectly, then the kdepasswd program will "freeze". Log out/in to solve this. This is where you type in the new password. Note: this must be 6,7 or 8 characters, neither more nor less. If everything goes the way it should, then this message will pop up. If you type in a password that is longer than 8 characters, you will get a message that the password has been truncated, that is, only the first 8 characters have been used.


12.3.2. Changing a User's Password from the Command Line
You can change the password for a user from the command line if you know the person's username.
/usr/share/debian-edu-config/tools/passwd brukernavn
You will be asked to type in a new password twice, and then finally you must type in the LDAP-administrator password.12.3.3. Changing the LDAP-Admin Password
In order to make changes in LDAP, such as adding users, changing passwords, etc, you must give a password, the so-called LDAP-admin password. This password is created during installation; see Figure 6-4. This password is one of 3 administrative passwords. The other two are the Webmin password, see Section 12.1 and the root password, see Figure 6-4.
The LDAP-admin password is changed from the command line with this command
/usr/share/debian-edu-config/tools/passwd admin
Then you will be asked to provide the new password twice, as well as to type in the old one./usr/share/debian-edu-config/tools/passwd admin Enter new password for user admin: Reenter new password: Enter bind password:u
12.3.4. Direct Editing of Files in the LDAP-Database.
By using the command
slapcat -l /root/bruker.ldif
you will get a pure text file that contains the LDAP database. In this case, this is in the file named /root/bruker.ldif. This is a so-called ldif-file, ergo the file type "ldif". It would be smart to stop the slapd LDAP daemon, before you bring up this ldif-file This is, along with stopping nscd (Name Service Cache Daemon) is done with the commands/etc/init.d/slapd stop
/etc/init.d/nscd stop
/etc/init.d/slapd start
/etc/init.d/nscd start
You can edit this file /root/bruker.ldifwith the help of your favourite text editor, for example kedit Section 8.2
In this file you can make changes in usernames, home directories, groups, etc., the same as when you use the user administration module in Webmin, Section 12.3. The advantage of using an ldif-file is that you can change several things at once. This is the file you use if you have to reinstall and want to use the same usernames and passwords again- it is a little tedious to have to hand out 1000 new usernames and passwords.
12.3.4.1. Putting the Old LDAP Databasen in a New Installation
Sometimes you just have to do a reinstallation. In order not to inconvenience the users too much, it's nice to let them keep using their old passwords and usernames. If you have that specific ldif-file from LDAP, then you can just put it in the new installation and your users will be able to continue to use their old usernames and passwords.
Recipe for Carrying Over the LDAP Database
-
On the old server, before you do the reinstallation, take out an ldif-file from LDAP,
/etc/init/slapd stop
slapcat -l /root/bruker.ldifRemember that whenslapd is stopped, no one can login.
-
Move this file, /root/bruker.ldif, over to the new installation, either by using a USB-pendrive, or by using a CD.
-
In order to be able to put in the old LDAP database with the help of your bruker.ldif, you have to delete the one that is already there. The database files are found in /var/lib/ldap. A good way to get rid of them is to move them to another directory, just in case you need them later.
mkdir /root/dbb
Now it's possible to use the old usernames and passwords. Remember that the old Webmin root password it the one to use.
/etc/init/slapd stop
/etc/init.d/nscd stop
mv /var/lib/ldap/* /root/dbb
slapadd -l bruker.ldif
/etc/init/slapd start
/etc/init.d/nscd start
12.3.5. How to Start with a New "Fresh" LDAP Database?
NoeSometimes you can get in a situation where someone has experimented a little too much with various configurations, maybe so much that reinstallasjon would be the easiest thing to do.
If that happens with LDAP, there is a simpler way to "start from scratch" than to reinstall the whole system. You can delete your LDAP database that doesn't function the way you want it to, and then put in a new and unused one, in the same condition as it was right after installation. This means that all of your current users will be deleted.
The first thing you have to do is to make a copy of your current LDAP databasen, no matter whether it functions or not.
-
Stopp slapd-demonen og nscd
/etc/init.d/slapd stop
/etc/init.d/nscd stop -
Make a copy of the old LDAP database, that is create a so-called ldif-file
slapcat -l /root/ldap.old.ldif
-
Delete the old LDAP database
mkdir /root/dbb.old
mv /var/lib/ldap/* /root/dbb.old -
Now you can put in a new, clean LDAP database with the command
ldap-debian-edu-install
[27] -
Delete the home directories for the users whom you have just thrown out, 'rm -rf' dletes the entire directory, with asking. Be careful!
rm -rf /skole/tjener/home/user1
osv
rm -rf /skole/tjener/home/user2De aware that you are now permanently deleting these home directories. Just in case you might regret this action later, it's wise to take a backup before you delete them. See Section 12.2
-
If this doesn't work, you can put in the old LDAP databasen again
/etc/init.d/slapd stop
/etc/init.d/nscd stop
mkdir /root/dbb2.old
mv /var/lib/ldap/* /root/dbb2.old
slapadd -l /root/ldap.old.ldif
/etc/init.d/slapd start
/etc/init.d/nscd start -
Once in a while, it's wise to make a copy of the LDAP database,
slapcat -l /root/ldap.TodaysDate.ldif
Chapter 13. Configuration/Use of the Most Used Programs
13.1. Webmin
Webmin is the place where you can control all of Skolelinux/Debian-edu with your web browser.
You find Webmin by pointing your web browser to https://tjener.intern:10000
13.2. OpenOffice.org
You find OOo in ->->
|
OOo can also be started from the command line with the command oowriter. |
13.2.1. Starting OOo the First and Second Time

The first time you start OOo it will ask you what kind of external address book you have. Here you can safely choose "Cancel"

The second time you start up OOo, it will ask you if you want to register as a user of OOo. For the sake of simplicity, you can choose "Never register"
13.2.2. Personal Configuration of OOo
It pays to first configure OOo according to your own preference. OOo has an enormous number of various configurations, everything from the colour of the buttons to what the different buttons do when you click on them.
You find all of these configurations under ->.
The first thing I usually do is change the size of the buttons. I prefer large buttons. You find this choice under
While you are there in Options, have a look at the other options that you have. You can set up Kmail as your email program, your preferred web browser. This is done under ->

There are several useful things you can do here, for example under ->-> you have the opportunity to set up OOo so that it always saves a document in either OOo-format, or in another format such as Microsoft Word 97/2000/XP
OOo has 3 toolbars. The one on the left is called the "Main Toolbar". The one at the top (the one that has the printer icon) is called the "Function Bar". The one that is under that (the one that has underlining and italics) is called the "Object Bar"

13.2.4. Exporting Directly to PDF-format
It's often great to be able to produce a text for others, without giving them the possibility to change the contents. It's also nice to be able to send a document without worrying about whether the person receiving it has OpenOffice.org or MS Word. The format that makes this possible is pdf. In the next version of OpenOffice.org, version 1.1, it's possible to convert to pdf-format just by clicking on a button, like this:
While you wait for version 1.1 in Skolelinux/Debian-edu you'll just have to use the old method for converting to PDF, that is, by setting up a "PDF printer".
Start OpenOffice.org Printer Administration, choose New Printer. Now select Connect a PDF converter. Click on Next. Now choose the default driver and again click on Next. Mark the long line that contains /usr/bin/gs, and then choose a target directory such as pdf. Remember that this directory must exist, because this is where your exported pdf files end up. Then you give a name to this printer- the suggested name is fine.
13.2.4.1. PDF-Conversion for All
If you find out that all of your users need access to a PDF converter, without having to go through a long and complicated process of configuration, you can do it for them. Start by logging yourself in as a test user, referred to here as test. If yours is called something else, then you must replace the name test with the username that you use. Configure and set up a pdf-converter, with the target directory as pdf. The result of this will be a new OpenOffice configuration file, placed in /skole/tjener/home0/test/.openoffice/1.0.2/user/psprint/psprint.conf. The contents of this file is
[PDF-konvertering]
Printer=SGENPRT/PDF-konvertering
DefaultPrinter=0
Location=
Comment=
Command=/usr/bin/gs -q -dNOPAUSE -sDEVICE=pdfwrite -sOutputFile="(OUTFILE)" -
Features=pdf=/skole/tjener/home0/test/pdf
Copies=1
Scale=0
Orientation=Portrait
PSLevel=0
ColorDevice=0
ColorDepth=24
MarginAdjust=0,0,0,0
PPD_PageSize=A4
PerformFontSubstitution=true
SubstFont_Arial=Helvetica
SubstFont_Times New Roman=Times
SubstFont_Cumberland=Courier
SubstFont_Timmons=Times
SubstFont_Helmet=Helvetica
SubstFont_Thorndale=Times
SubstFont_Albany=Helvetica
SubstFont_Courier New=Courier
If all of your users had had this file, then they would automatically see this printer in the list of installed printers, but temember that the target directory must reflect the user in question.
You can either "share" this file for all of your users with the help of a couple of simple scripts, or you can have a look at the files that are in the directory /usr/lib/openoffice/share. It's possible to change these according to your needs, but it pays to do this prior to the first time your users start up OpenOffice.org.
Instead, I will show you the commands I just used to automatically set up pdf-conversion for all of my users.
After having first set up the pdf-converter for my user test, I copy the resulting file over to all of my users:
for dir in /skole/tjener/home0/*;do cp /skole/tjener/home0/test/.openoffice/1.0.2/user/psprint/psprint.conf $dir/.openoffice/1.0.2/user/psprint/psprint.conf;chown --reference=$dir $dir/.openoffice/1.0.2/user/psprint/psprint.conf;done
When this has been done, all of my users will get a new printer in the list of accessbile printers when they try to print out from OpenOffice. Please note that they have to first start up OpenOffice or else they won't have the necesary directories in their home directory. After that you must replace the reference to the test user that is found in the file.cd /skole/tjener/home0
for dir in *;do perl -pi.bak -e "s/test/$dir/"
$dir/.openoffice/1.0.2/user/psprint/psprint.conf;chown
--reference=$dir
$dir/.openoffice/1.0.2/user/psprint/psprint.conf;done
for dir in /skole/tjener/home0/*;do mkdir $dir/pdf;chown --reference=$dir $dir/pdf;done
Please note that there are many possibilities for fun things such as ensuring that all users get the directory pdf set up when the user is created in Webmin, as well as other exciting things such as everyone getting this pdf-converter automatically set up when they start OpenOffice the first time. See Section 11.1, but more about this another time.
13.3. Kmail

You find KMail under ->->
|
You can also get up the K-menu by pressing ALT+ |
The first thing you see is this:

The first thing you do is to set up KMail so that you can send and receive email. Go to the menu line and click on ->
Here you get a list of menu choices on the left. Let's start with "Identity"

This is where you fill in correct information in the fields Name, Organization, Email Address, Reply-To Addressand, if desired, Signature.

Next you have to make KMail ready for sending and receiving email. Click on Network. This depends a bit on how your Internet provider handles your mail, for example SMTP, then you must choose sendmail, or fill out the name of your SMTP-server.

Next, you must add an account so that you can get your mail. You do this by going to ->
This is where you fill in correct information about Name (that is, what you yourself want to call this account), Username, Password, Host, Port (which is most often 110).
It's important to decide here whether you want the password to be saved in a file (as clear text), or if you don't want that, which means that the password will have to be typed in every time someone gets their email. The later is the most secure and most often recommended. The next thing you have to consider is if you want people to be able to only get a copy of the email or get their email and have it deleted form the server. If you make the first choice (not deleting the email) then the server will get filled up with email, even if you delete it locally in KMail.

IMAP is another type of account. Here you must fill in correct information about Name (what you yourself want to call the account), Username, Password, Host, Port (which is most often 143). If you aren't sure what the different fields mean, you can click on "hjelp" to get an explanation.

If you want to require confirmation before sending an email, put a cross in this box. You will then have to confirm that you really want to send an email, which can be a good thing if you just happen to accidentally hit the Send button.

People often get emails in the form of an HTML-file (which is not used any other place than on the Internet), typically from Outlook. There is a certain degree of security risk involved with these files; but by choosing clear text over HTML it can sometimes make things a bit cumbersome. By putting a cross here, it's easier to look at pictures that are sent as email.

Here you have the possiblity of choosing to empty the trash when you exit KMail, or to keep trash size below a set mimit. You can also choose a nice melody to be played when you get an email.
13.3.1. Using KMail

Some of the buttons here are inactive. You can see that they are a lighter shade and you can't click on them because they won't accomplish anything in that particular situation. The buttons that are active and clearly presented are functional. By clicking on the picture of a mailbox with a blue arrow pointing down, you will get email from your mail server. by clicking on the picture with a blank piece of paper you can start to compose a new email.

By clicking on the blank piece of paper or going in to the menu -> another window will appear with a different toolbar. The most important thing here is the picture of a paper clip. By clicking on that, you open up the file manager where you can choose a file to attach as an attachment. The paper clip symbolises an attachment. The other important item here is the picture of an envelope with a blue arrow pointing up. By clicking on that you send off the email.


13.3.2. Automatic Start and Checking of Email at Login.
It is possible to set up KDE so that it starts KMail automatically, as well as checks for email when you login. This is done by copying a shortcut to KMail into the file .kde/Autostart. See section Section 11.3
By changing a little of the shortcut file KMail.desktop, you can get KMail to check for email when it starts up. The file KMail.desktop contains a line that tells something about which options are available when KMail is started up
Exec=kmail -caption "%c" %i %m
By changing this to
Exec=kmail -caption "%c" %i %m -checkit will automatically check for email.
13.4. Konqueror, File Manager
You find the file manager in ->
Your home directory is that part of the hard drive where your files are stored. The symbol for your home directory is a house.
The file manager is, in fact, a web browser called Konqueror. In its current version, Konquerer is not a very good web browser. However, it does function great as a file manager.

I think it's nice to "see" what I've got in my files, by going to the menu-> and by clicking on, for example, "Images",then you can see things a bit more clearly.
You can create new directories/folders by right-clicking somewhere in the background of the file manager. Then a menu pops up where you then choose "Create New" and "Directory". If you want to move a file into another directory, then you can simply "drag" it over to the directory in question by holding the left mouse button down while moving the file over to the directory, then releasing the button when you are over the directory. Alternatively, you can press the right mouse button (that is, right-click) on the file you want to move and a menu pops up. Click on Cut, then find the directory you want to move the file to, right-click on that directory and another menu pops up. Choose Paste and the file is transferred.
Sometimes it's good to be able to see the contents of two directories simultaneously. You can make this happen by choosing ->. Then you can easily move files in a clear manner between directories.
13.9. Mozilla
The version of Mozilla that officially accompanies Debian Woody/Skolelinux is version 1.0. This can be installed with the command
apt-get install mozilla
This version is a bit old, so in some cases it may be worthwhile to install a newer version. The latest version is 1.6. By using a text editor to temporarily add the linedeb http://www.backports.org/debian stable mozillato the file /etc/apt/sources.list, and then updating the database, you can then install the program with the command
apt-get install mozilla
13.9.1. Acrobat Reader as Plugin for Mozilla/Konqueror
By having the line
deb ftp://ftp.nerim.net/debian-marillat/ stable main
in /etc/apt/sources.list then you can use
the command
apt-get install acroread-plugin
to add a plugin that starts Acrobat Reader when you want to view a pdf-file using Mozilla.13.9.2. Adding a Plugin to view NRK-TV and other film clips on the Internet
You need to install mplayer first. The you add a so-called plugin that starts mplayer in the web browser when it is needed. You will find instructions for the installation of mplayer here: Section 14.2. The plugin is called mplayerplug-in and can be downloaded from mplayerplug-in. After you have downloaded the file, then you have to unpack it and compile it yourself. This is all explained on the webpage but I will repeat it here.
tar -xzvf mplayerplug-in-1.2.tar.gz
cd mplayerplug-in
./configure
make
cp mplayerplug-in.so
/usr/lib/mozilla/plugins
In the event that the version of mplayerplug-in is NOT 1.2, but a different number, then you must use that number instead of 1.2.
13.9.3. Macromedia Flash Player Plugin for Mozilla
This package comes from the same place as mplayer and Acrobat Reader, that is, ftp.nerim.net. Make certain that that line is active in the file /etc/apt/sources.list. Then you just install it with
apt-get install flashplayer-mozilla
Chapter 14. Useful Programs that are not Included on the Skolelinux/Debian-edu CD
14.1. Acrobat Reader
By using your favourite text editor to add the line
deb ftp://ftp.nerim.net/debian-marillat/ stable mainto the file /etc/apt/sources.list, see Section 8.2, and then updating the database, you can then use your favourite package manager (see Section 8.9 or Section 13.6) to install Acrobat Reader
These are the necessary packages to install
tjener:~# apt-cache search acrobat
acroread - Adobe Acrobat Reader: Portable Document Format file viewer
acroread-debian-files - Debian specific parts of Adobe Acrobat Reader
acroread-plugin - Adobe Acrobat(R) Reader plugin for mozilla / konqueror
These can be installed with the command
apt-get install acroread acroread-debian-files acroread-plugin
14.2. Mplayer
This is a super multimedia player, which you can use to play DVD, AVI, MPEG, WMV, etc.
This program is not included with Skolelinux/Debian-edu; it must be downloaded. To do this, you have to add the following line to the file /etc/apt/sources.list
deb ftp://ftp.nerim.net/debian-marillat/ stable mainand then complete the installation process with the command
apt-get update
apt-get install mplayer
Of course, you can use your favourite package manage instead, such as Section 13.6, or Section 13.1
Appendix A. Integration of Other Linux Distributions into Skolelinux/Debian-edu with ldap and autofs
These are some short notes made during holidays
Ok, here comes an unpolished howto-workaround, getting a Knoppix
workstation to authenticate against the Skolelinux ldap, with autofs.
Someone should try to make this work with suse, fedore, mandrake and
many more.

[to get ldap working]
[1]
apt-get install  libnss-ldap libpam-ldap nscd
[2]
Then copy from a working Skolelinux Workstation the files
/etc/nsswitch.conf
/etc/libnss-ldap.conf
/etc/nscd.conf
and all the files from
/etc/pam.d/

[to get autofs working]
To get autofs working I first tried everthing I could think of, probably I
did one thing too much, but it works, but it is very unpolished.
[1]
apt-get install autofs-ldap ldap-utils libldap2 libnss-ldap libpam-ldap
[2]
Remove /etc/auto.master
Copy from a working Skolelinux Workstation the files
/etc/default/autofs
[3]
Copy from a working Skolelinux Workstation
/etc/init.d/autofs
and then rerun
update-rc.d -f autofs defaults 20
[4]
Copy from a working Skolelinux Workstation all the files in
/etc/ldap/schema
[5]
Probably also copied from a working Skolelinux Workstation the file
/etc/pam_ldap.conf
Appendix B. Seamless Integration of Mac OS X Machines
In L-97 (the current Norwegian National School Curriculum)there are some goals that would be more easily facilitated through the use of Mac OS X machines, especially in the areas of Art and Crafts. So it would be great if these machines could be integrated with the rest of the Skolelinux/Debian-edunetwork, same password/username and home directory.
I used IKT-driftshåndbok for Skolelinux as a starting point, with the following changes:
-
On the Skolelinux/Debian-edu Main server I did NOT put in insecure in the exports file /etc/exports
-
In order to get automount to function, I created this file on the Mac
{
  "name" = ( "mounts" );
  CHILDREN = (
    {
      "opts" = ( "-P" );
      "name" = ( "tjener:/skole/tjener/home0" );
      "type" = ( "nfs" );
      "dir" = ( "/skole/tjener/home0" );
    }
  )
}
and named it the mounts_table. Then run the command sudo niload -r /mounts . < mounts_table
Appendix C. Software RAID in Skolelinux/Debian-edu
|
This can easily go wrong, resulting in the loss of everything you have on the disks! You have been warned! THIS DOESN'T WORK OPTIMALLY. |
A Quick and "Unpolished" Recipe for Software RAID in Skolelinux/Debian-edu
-
You need to install this package
apt-get install mdadm
-
In order to be able to partition the empty disk, you have to first stop the application smartsuit
/etc/init.d/smartsuite stop
-
If you have previously had software RAID on the disks, then you can remove the superblock with mdadm --zero-superblock /dev/hd{a,c}{1,5,6}
sfdisk -d /dev/hda | sed 's/Id=83/Id=fd/g ; s/Id=8e/Id=fd/g' | sfdisk /dev/hdc
-
echo 'DEV /dev/sd* /dev/hd*' > /etc/mdadm/mdadm.conf
-
mdadm --create /dev/md/1 --level=1 --raid-disks=2 missing /dev/hdc1
mdadm --create /dev/md/5 --level=1 --raid-disks=2 missing /dev/hdc5
mdadm --create /dev/md/6 --level=1 --raid-disks=2 missing /dev/hdc6
mdadm -E -s | grep ARRAY >> /etc/mdadm/mdadm.conf -
pvcreate /dev/md5 -ff
vgscan
pvcreate /dev/md6 -ff
vgscan -
vgcreate vg_md_system /dev/md/6
vgcreate vg_md_data /dev/md/5 -
Take the machine down to runlevel 1, but keep SSH so you can do this remote
for ALL in $(ls /etc/rc1.d/K* | grep -v ssh) ; do $ALL stop ; done
for ALL in $(ls /etc/rc2.d/S* | grep -v ssh) ; do $ALL stop ; done -
mkfs.ext3 /dev/md/1 ; mount /dev/md/1 /mnt ; cp -ax / /mnt
vgdisplay -v | grep -E "^LV Name|^LV Size"vgdisplay -v | grep -E "^LV Name|^LV Size" LV Name /dev/vg_data/lv_home0 LV Size 416 MB LV Name /dev/vg_data/lv_backup LV Size 512 MB LV Name /dev/vg_system/lv_swap LV Size 96 MB LV Name /dev/vg_system/lv_var LV Size 160 MB LV Name /dev/vg_system/lv_usr LV Size 448 MBMake sure that the sizes match with the results you get with the command vgdisplay -v and what you get with lvcreatelvcreate vg_md_data -n lv_home0 -L 416M
lvcreate vg_md_data -n lv_backup -L 512M
lvcreate vg_md_system -n lv_swap -L 96M
lvcreate vg_md_system -n lv_var -L 160M
lvcreate vg_md_system -n lv_usr -L 448M -
umount /mnt ; mkfs.ext3 /dev/md/1 ; mount /dev/md/1 /mnt ; cp -ax / /mnt
for ALL in /dev/vg_md*/lv_* ; do mkfs.ext3 $ALL; done
mkswap /dev/vg_md_system/lv_swap -
sed s/vg_/vg_md_/ /etc/fstab | sed s/[hs]da1/md1/ > /mnt/etc/fstab
cp /mnt/etc/fstab /root
mount | grep "^/dev/vg_" | sed s/vg_/vg_md_/ | while read DEV NULL MOUNT NULL ; do mount $DEV /mnt$MOUNT ; done
cp -a /usr /var /skole /mnt -
cd /mnt/dev ; /sbin/MAKEDEV std sda sdb hda hdb hdc hdd hde hdf hdg hdh md console
sed s:DELAY=0:DELAY=5: /etc/mkinitrd/mkinitrd.conf > /mnt/etc/mkinitrd/mkinitrd.conf
mkinitrd -o /mnt/boot/initrd.img-$(uname -r) -r /dev/md1
rm /mnt/vmlinuz* /mnt/initrd.img*
cd /mnt/boot ; ln -s vmlinuz-$(uname -r) vmlinuz ; ln -s initrd.img-$(uname -r) initrd.img
echo -e "\ntitle Raid\nroot (hd1,0)\nkernel /boot/vmlinuz root=/dev/md1 ro\ninitrd /boot/initrd.img\nboot" >> /boot/grub/menu.lstRemember to choose "Raid" in the GRUB menu when you boot, or else you can set "Raid" to be the default boot option.
-
REBOOT
-
fdisk -l /dev/hdc
Partition /dev/hda just the same as /dev/hdc is partitioned.tjener:~# fdisk /dev/hda The number of cylinders for this disk is set to 4092. There is nothing wrong with that, but this is larger than 1024, and could in certain setups cause problems with: 1) software that runs at boot time (e.g., old versions of LILO) 2) booting and partitioning software from other OSs (e.g., DOS FDISK, OS/2 FDISK) Command (m for help): t Partition number (1-6): 1 Hex code (type L to list codes): fd Changed system type of partition 1 to fd (Linux raid autodetect) Command (m for help): t Partition number (1-6): 5 Hex code (type L to list codes): fd Changed system type of partition 5 to fd (Linux raid autodetect) Command (m for help): t Partition number (1-6): 6 Hex code (type L to list codes): fd Changed system type of partition 6 to fd (Linux raid autodetect) Command (m for help): p Disk /dev/hda: 16 heads, 63 sectors, 4092 cylinders Units = cylinders of 1008 * 512 bytes Device Boot Start End Blocks Id System /dev/hda1 * 1 271 136552+ fd Linux raid autodetect /dev/hda2 272 4092 1925784 f Win95 Ext'd (LBA) /dev/hda5 272 2497 1121872+ fd Linux raid autodetect /dev/hda6 2498 4009 762016+ fd Linux raid autodetect Command (m for help): w The partition table has been altered! Calling ioctl() to re-read partition table. WARNING: Re-reading the partition table failed with error 16: Enheten eller ressursen opptatt. The kernel still uses the old table. The new table will be used at the next reboot. Syncing disks. tjener:~#
mdadm /dev/md/1 --add /dev/hda1
cat /proc/mdstat
mkinitrd -o /boot/initrd.img-$(uname -r) -r /dev/md1
REBOOT
mdadm /dev/md/5 --add /dev/hda5
mdadm /dev/md/6 --add /dev/hda6fikse /boot/grub/menu.lst title Skolelinux/Woody root (hd0,0) kernel /boot/vmlinuz root=/dev/md1 ro initrd /boot/initrd.img savedefault boot [remember grub sees the disks in order, with 0 as the first]
echo -e 'root (hd1,0)\nsetup (hd0)' | grub --batch
REBOOT
echo -e 'root (hd0,0)\nsetup (hd0)' | grub --batch
vgrename vg_md_data vg_data
vgrename vg_md_system vg_system
sed s/vg_md_/vg_/ /etc/fstab > /etc/fstab2 && mv /etc/fstab2 /etc/fstab -
Now you can take one of the disks and what happens.
Appendix D. KDE3.X in Skolelinux/Debian-edu
|
Remember that Skolelinux/Debian-edu uses KDE2, so if you use KDE3 you're on your own. |
D.1. KDE3.X in Skolelinux/Debian-edu
To get KDE3.1 into Skolelinux/Debian-edu you have to add this line to the file /etc/apt/sources.list, see Section 8.9
deb http://download.kde.org/stable/3.1.5/Debian stable main. After that run the commands
apt-get update
apt-get install kdebase
Don't panic when you see a whole bunch of packages being deleted. This normally happens when you try to put KDE3 into Skolelinux/Debian-edu, but remember this is not recommended.
tjener:~# apt-get install kdebase
Reading Package Lists... Done
Building Dependency Tree... Done
The following extra packages will be installed:
  ark artsbuilder efax enscript gv kalarm kappfinder kate kbabel kcalc kcharselect kcontrol kcron kdebase-bin kdebase-data
  kdebase-kio-plugins kdelibs-bin kdelibs-data kdelibs4 kdepasswd kdepim-libs kdeprint kdesktop kdewallpapers kdf kdict kdm kedit kfind
  kfloppy kgeo kghostview khelpcenter kicker kiconedit klipper kmail kmenuedit kmid kmidi kmix kmplot knode knotes konq-plugins konqueror
  konqueror-nsplugins konsole korganizer kpackage kpager kpaint kpersonalizer kruler kscd kscreensaver ksirc ksmserver ksnapshot ksplash
  kstars ksysguard ksysguardd ktip ktouch kview kwin libart-2.0-2 libarts1 libartsc0 libasound1 libdb4.0 libglib2.0-0 libkdenetwork2
  libkonq4 libmad0 libmimelib1 libpng3 libqt3-mt libsensors1 noatun noatun-plugins poster psutils quanta timidity
The following packages will be REMOVED:
  education-thin-client-server education-workstation kbear kchart kdebase-crypto kdebase-doc kdebase-libs kdelibs3 kdelibs3-bin
  kdelibs3-crypto kdelibs3-cups kformula kio-fish kivio klogic koffice koffice-libs kontour koshell kpm kpresenter krecord kschoolmenu
  kspread kugar kword libarts libarts-mpeglib libkdenetwork1 libkmid libkonq3 noteedit timidity-patches
The following NEW packages will be installed:
  efax enscript gv kalarm kappfinder kcontrol kdebase-bin kdebase-data kdebase-kio-plugins kdelibs-bin kdelibs-data kdelibs4 kdeprint
  kdesktop khelpcenter kicker klipper kmenuedit konqueror-nsplugins kpager kpersonalizer ksmserver ksplash ksysguard ksysguardd ktip kwin
  libart-2.0-2 libarts1 libartsc0 libasound1 libdb4.0 libglib2.0-0 libkdenetwork2 libkonq4 libmad0 libpng3 libqt3-mt libsensors1 poster
  psutils timidity
45 packages upgraded, 42 newly installed, 33 to remove and 37  not upgraded.
Need to get 60.2MB of archives. After unpacking 1927kB will be freed.
Do you want to continue? [Y/n]
D.1.1. KDE3.2 in Skolelinux/Debian-edu
To get KDE3.2 into Skolelinux/Debian-edu a line must be added to /etc/apt/sources.list, see Section 8.9
deb http://download.kde.org/stable/3.2/Debian stable main. After that, you must run the commands
apt-get update
apt-get install kdebase
D.2. KDE3.1 on Thin Clients
To get thin clients to work, the following must be changed: In the file /etc/kde3/kdm/kdmrc
[Xdmcp]
Enable=true
Willing=/etc/kde3/kdm/Xwilling
Xaccess=/etc/kde3/kdm/Xaccess
in the file /etc/kde3/kdm/Xaccess
* #any host can get a login window
Appendix F. Custom Start-up Logon for Thin Clients
When thin clients boot, you see a whole bunch of "cryptic" messages flying across the screen; it doesn't need to be that way. For thin clients that boot from a boot diskette, you can make your own start-up logo. That is, a picture comes up, for example one of yourself, with a little progress indicator. This is the best method to teach the students that they are not supposed to turn off a thin client. :-)
-
http://www.kernel.org/pub/linux/kernel/v2.4/linux-2.4.18.tar.gz
-
http://umn.dl.sourceforge.net/sourceforge/ltsp/ltsp_initrd_kit-3.0.4-i386.tgz
-
http://telia.dl.sourceforge.net/sourceforge/etherboot/mknbi-1.2.tar.gz
-
http://www.ltsp.org/contrib/lpp-2.4.18.patch.bz2
-
mv linux-2.4.18.tar.gz /tmp
cd /tmp
-
tar zvxf linux-2.4.18.tar.gz
-
mv linux linux-2.4.18-ltsp
-
mv ltsp_initrd_kit-3.0.4-i386.tgz /tmp
cd /tmp
-
tar zxvf ltsp_initrd_kit-3.0.4-i386.tgz
Dette som root.
-
cd ltsp_initrd_kit
-
mv config-2.4.18-ltsp-1 /tmp/linux-2.4.18-ltsp
-
cd /tmp/linux-2.4.18-ltsp/
mv config-2.4.18-ltsp-1 .config
-
cd /tmp
tar zvxf mknbi-1.2.tar.gz
-
cd mknbi-1.2
make
make install
Dette installerer til /usr/local/
-
bzip2 -d ~klaus/lpp/lpp-2.4.18.patch.bz2
cd /tmp/linux-2.4.18-ltsp
-
cp /home/klaus/lpp/lpp-2.4.18.patch /tmp/linux-2.4.18-ltsp/
patch -p1 < lpp-2.4.18.patch
-
make xconfig
Load configuration from file. In the pop-up box, type .config
Click on Console Drivers -> Frame Buffer Support.
y option for Enable Linux Progress Patch (EXPERIMENTAL)
y option for Virtual Frame Buffer Support (Only for Testing!)
-
cd /tmp
tar zxvf /tmp/custom_logo.tar.gz
cd /tmp/cd boot_logo
./boot_logo kde-logo.pcx linux_logo.h
cp linux_logo.h /tmp/linux-2.4.18-ltsp/include/linux/
cp fbprogress.h /tmp/linux-2.4.18-ltsp/drivers/video/
-
cd /tmp/linux-2.4.18-ltsp
make dep && make bzImage && make modules && make modules_install
-
cd /tmp/ltsp_initrd_kit/
./buildk
tjener:/tmp/ltsp_initrd_kit# ./buildk You can prepare a kernel for the following type of workstation: 1 - PCI/ISA network card 2 - PCMCIA (laptop) network card Enter option (1-2) [2]: 1 Kernel source directory [/usr/src/linux-2.4.18-ltsp]: /tmp/linux-2.4.18-ltsp -
mkdir /tftpboot/lts/lpp
cp *2.4.18* /tftpboot/lts/lpp/
-
mkdir /opt/ltsp/i386/lib/modules/linux-2.4.18-ltsp
cp -ar /lib/modules/2.4.18/* /opt/ltsp/i386/lib/modules/linux-2.4.18-ltsp
Appendix G. Extra External Accessory
G.5. CD/DVD
G.5.1. CD-burner
If you have downloaded a new version of Skolelinux/Debian-edu and want to store it on a CD, then it's nice to be able to do this on a machine with Skolelinux/Debian-edu
The first thing you have to do is to find out "where" your CD-burner is to be found, with the command
dmesg|grep hd
can give you an idea of its location. Look for something that looks like thishdc: CD-RW CRX100E, ATAPI CD/DVD-ROM driveIt's the hdc that shows the location of the CD-burner.
The CD-burner's location must be specified in GRUB, see Figure 6-1. Make sure that the start-up line that you use in GRUB contains the location of the CD- burner, such as this one:
kernel /boot/vmlinuz-2.4.24-1-k7 root=/dev/hda1 ro hdc=ide-scsi
The important thing here is hdc=ide-scsi,
which is done in the file /boot/grub/menu.lst
After that, you add some lines to the file /etc/modules.conf. Add htese lines at the end of the file, making certain that you use he correct location for your machine
# SCSI Emulation
alias scd0 sr_mod                # load sr_mod upon access of scd0
alias scsi_hostadapter ide-scsi  # SCSI hostadapter emulation
options ide-cd ignore=hdc # if /dev/hdc is your CD-Writer ignore=hdc
If you also want to use the CD-player in the normal way, then you replace /dev/hdc with /dev/sr0, see the command hwinfo --cdrom for more info.
G.5.2. CD-burner, method #2
Add the following as the first lines in the file /etc/modules
ide-scsi
sg
sr_mod
and then correct hdc=ide-scsi in /boot/grub/menu.lstG.5.3. DVD-player
In order to be able to play encrypted DVD films, you need some extra packages. To this file /etc/apt/sources.list add the folowing line
deb http://download.videolan.org/pub/videolan/debian woody mainand then run apt-get update followed by apt-get install libdvdcss2. I recommend the following DVD-players xine-ui, apt-get install xine-ui
G.6. USB Pendrive
The are several types of USB pendrives, which operated in slightly different ways.
USB Pendrive Recipe
-
First make the following directory with this command: mkdir /mnt/usbpenn
-
Now add this line to the file /etc/fstab
/dev/sda1 /mnt/usbpenn vfat user,noauto 0 0
-
Some USB pendrives need a different line (sda1 instead of sda)
/dev/sda /mnt/usbpenn vfat user,noauto 0 0
-
The USB pendrive can now be mounted from the command line with mount /mnt/usbpenn
This can be done in a way that you can mount and unmount it by clicking on an icon
See Section 10.3to find out how this is done for a thin client.
Appendix H. Various "Homemade" Solutions
H.1. Downloading New Verisons of Skolelinux/Debian-edu CD, in a Smart Way with the Help of rsync
There are constantly new versions available of the Skolelinux/Debian-edu CD. An entire CD is about 650MB, which with a normal ADSL line takes 2-3 hours to download, even longer time with ISDN. If you want to keep up with the latest version of the Skolelinux/Debian-edu CD, you either have to download it yourself or get someone else to download it and burn it for you.
If you choose to download it yourself, there is a program that makes it possible to use as a starting point an existing CD that you have already downloaded and only download the files that are different in the newer version. In this way, you can download a new version (for example pr44) in a short time if you have the previous version(for example pr43), even using ISDN.
The command that makes this possible is rsync --no-whole-file \--progress -vv --stats \developer.skolelinux.no::skolelinux-cd/skolelinux-i386-pr44.iso \/skole/tjener/home0/iso/skolelinux-i386-pr44.iso
|
This is one single long line. |
What happens here is that the local file /skole/tjener/home0/iso/skolelinux-i386-pr44.iso gets "updated" so that it becomes identical with the file skolelinux-i386-pr44.iso that is stored on the Skolelinux ftp-server.
But before you do this, you have to have a local copy on you computer that you want to update. In this example, the name of the copy is skolelinux-i386-pr44.iso and it is stored in the directory /skole/tjener/home0/iso/. If your local copy is called something else and is placed in another directory, you will need to remember to take that into account when you run the rsync command.
You may be wondering why I upgrade a local file skolelinux-i386-pr44.iso with a file by the same name from Skolelinux. That's because my local file skolelinux-i386-pr44.iso is really a skolelinux-i386-pr43.iso, but with a different name.
Recipe for Upgrading with rsync.
-
First you have to install the package rsync, apt-get install rsync
-
Say you have a CD with skolelinux-i386-pr43.iso, which you want to upgrade to a newer version, for example pr44.
The first thing you have to do is to copy the contents of that CD over to your hard drive. You put the CD into the CD-ROM and then mount /cdrom
-
You can check if the CD is mounted with the command df -h. Look at the line
/dev/cdrom 692M 692M 0 100% /cdrom
-
After that you copy the old version from the CD over to you hard drive with the command
dd if=/dev/cdrom of=/skole/tjener/home0/iso/skolelinux-i386-pr44.iso
. Replace the pr44 with the number of the new version that you want to download -
Now all you have to do is execute the rsync command.
-
If everything works the way it's supposed to do, you will see the following on the screen:
klaus@tjener:/skole/tjener/home0/iso$ rsync --no-whole-file
\--progress -vv --stats
\developer.skolelinux.no::skolelinux-cd/skolelinux-i386-pr44.iso
\/skole/tjener/home0/iso/skolelinux-i386-pr44.iso
opening tcp connection to developer.skolelinux.no port 873
/skole/tjener/home0/iso/woody-i386-1.raw
   679182336 100%    1.96MB/s    0:05:30
rsync[1396] (receiver) heap statistics:
  arena:         115288   (bytes from sbrk)
  ordblks:            2   (chunks not in use)
  smblks:             0
  hblks:              0   (chunks from mmap)
  hblkhd:             0   (bytes from mmap)
  usmblks:            0
  fsmblks:            0
  uordblks:      101336   (bytes used)
  fordblks:       13952   (bytes free)
  keepcost:       13904   (bytes in releasable chunk)

Number of files: 1
Number of files transferred: 1
Total file size: 679182336 bytes
Total transferred file size: 679182336 bytes
Literal data: 21512192 bytes
Matched data: 657670144 bytes
File list size: 35
Total bytes written: 248397
Total bytes read: 16827778

wrote 248397 bytes  read 16827778 bytes  42007.81 bytes/sec
total size is 679182336  speedup is 39.77
Make certain that you have at least 650MB free space when you download using rsync, because rsync creates a temporary file while it is downloading. This file grows and becomes equally large as the CD. When it's finished downloading, the temporary file gets deleted.
H.2. Preventing Users from Logging onto Several Thin Clients Simultaneously.
This can be a real problem when a user logs onto several thin clients at the same time, for example if he tries to change the background picture in both places.
The solution is to set up a little test when a user logs on, to check if he is already logged on. If he is, then he is prevented from logging on again.
The script that makes this possible, or rather makes it impossible for one user to log on to several thin clients simultaneously is found in the file /etc/X11/Xsession.d/10skolelinux-one-login-per-host. YOu will also find instructions there as to how this script should be started. It is started by creating a so-called "flag file" with the command
tjener:~# touch /etc/skolelinux/limit-logins
This is the contents of the file that does the job of preventing one user from logging on to several thin clients simultaneously.
more /etc/X11/Xsession.d/10skolelinux-one-login-per-host

#!/bin/sh
# Make sure a given user do not log into the same computer twice.
# When this is done on an LTSP server, the KDE configuration is likely
# to be destroyed.
#

# debug=1
log() {
    if [ "$debug" ] ; then
        echo "$@"
    fi
}

limit_logins()
{
    num=1
    numps=0
    u=$LOGNAME
    # Do not try to limit the root user
    if [ "$u" != "root" ] ; then
        num=`who | cut -d" " -f1 | grep "^$LOGNAME\$" | wc -l`
    fi

    log "Found $num connections for user $LOGNAME"

    if [ "$num" -gt 1 ] ; then
        numps=`ps -eu "$LOGNAME" | grep -v -e sleep -e COMMAND|wc -l`
        num=`expr $numps + 1`

    fi
    if [ $num -gt 1 ] ; then
        xmessage -buttons greit:0 -timeout 30 -center \
            "You are NOT permitted to log on to more than one machine at the same time!"
        exit 1
    fi
}

# Only enable this if the flag file exists.  When the code is tested
# and found to work fine, we can enable it for everyone. [pere 2003-02-21]
# To enable this script you must create an empty file with the command
# touch /etc/skolelinux/limit-logins
# [klaus 2003-09-06]

if [ -f /etc/skolelinux/limit-logins ] ; then
    limit_logins
fi
H.2.1. Kicking Out a User
Sometimes it is necessary to kick a user out. This is the little script that takes care of that.
#!/bin/sh
# Saved as for example
#/usr/local/bin/ut
#Remember chmod 755 /usr/local/bin/ut
#Used in this way
#'ut username'
# script to kick out a user
#

if [ $1 != "root" ]
then
for i in $(pgrep -u $1)
do
kill -9 $i
done
else
clear
echo "Cannot kick out root."
fi
The script is used in this way, to kick out the user named klaus,
ut klaus
H.3. Ensuring that all Processes/Programs are Really Finished When Logging Out
It's a bit of a problem when OpenOffice often freezes when ending the program, even after the user has logged out. It seems as if shutting off OpenOffice by clicking on the "x" up in the right corner doesn't really do the job right. And if OpenOffice freezes that way, it may not start again when the next user logs on.
There is a way to ensure that all processes really are finished when a user logs out.
Ensuring that all Processes are Finished
-
This is the script that does the job. You can call it something like finish.sh:
#!/bin/bash
# License: GPL
#klaus@skolelinux.no
#This script can be saved as /usr/local/bin/finish.sh
#remember chmod 755 /usr/local/bin/finish.sh
KILL=/usr/bin/pkill
# root can do whatever he wants
[ -x $KILL ] || exit
[ "$1" -a "$1" != "root" ] || exit
# first let's be polite
$KILL -u $1
#then we wait 5 seconds
sleep 5s
#before we finally finish them off
$KILL -9 -u $1
-
Place this script in a directory such as /usr/local/bin/
-
To make sure that this script is run every time the user logs out, use a text editor to add this line
/usr/local/bin/finish.sh $USER
to the file /etc/kde2/kdm/Xreset -
Remember to make the script executeable by running the command
chmod 755 /usr/local/bin/finish.sh
This script will make certain that all processes currently run by a user will really be terminated when he logs out, with the exception of root processes.
H.4. Placing Desktop Icons for Several Users Simultaneously
For more information about desktop icons and menus, see Chapter 11
Sometimes it can be nice for all users to have a specific desktop icon. If you have 1000 users, then it's even nicer if you can place that icon on everyone's desktop in one sweep.
All shortcuts are really a file. These files are stored in the directory Desktop in the user's home directory. For example, the file that represents the shortcut to the web browser Mozilla is Mozilla_Navigator.desktop; the contents of the file start with:
[Desktop Entry]
Type=Application
Exec=mozilla
Name=Mozilla Navigator
Comment=Mozilla Navigator
Icon=/usr/share/pixmaps/mozilla.xpm
This is where you find information about where the program is installed, what kind of icon is used, etc.
For example, if you want everyone to have the icon for OpenOffice.org on their desktop as a shortcut (the file in this case is called textdoc.desktop), then you have to do the following as root:
A File Distributed to All Users Simultaneously
-
First you have to manually add this shortcut to the desktop of one user, for example the user "test". The shortcut will then be found in the directory /skole/tjener/home0/test/Desktop/textdoc.desktop.
-
The next thing you do is create a script that does the following:
-
Copies the file textdoc.desktop over to theDesktop-directory for all of your uesrs.
-
Ensures that the permissions for this file are correct, that is they are set up so that they are owned by the user, and not by the root.
-
-
#!/bin/sh
#Saved as e.g. spread-desktop
#used as follows ./spread-desktop path-to-target.desktop
#remember to make the script executeable with chmod 755 spread-desktop
#If the users are stored somewhere other than home0, then you must
#ahange the variable HOMEDIRS below accordingly.
#If your home directories are in different directories on
#/skole/tjener/home0, e.g. /skole/tjener/home0/2004-A,
#then you need to add them all to HOMEDIRS using the spacebar to separate them.
#For example HOMEDIRS="/skole/tjener/home0/2004-B /skole/tjener/home0/2004-A"
#
HOMEDIRS="/skole/tjener/home0"
#
# If there is a "Desktop"-directory, then we copy into it.
copykde () {
        if [ -d $U/Desktop ]
        then
                cp -a "$FILE" $U/Desktop
                DEST="`basename \"$FILE\"`"
                chown --reference=$U/ $U/Desktop/"$DEST"
        fi
            }
while [ $# -gt 0 ]
        do
        FILE="$1"
        if [ -f "$FILE" ]
        then
# find all folders under  /home
        for H in $HOMEDIRS
        do
        USERLIST="`ls -ad $H/*`"
        if [ "$USERLIST" ]
        then
# for each user
        for U in $USERLIST
        do
        copykde
        done
        fi
        done
        fi
        shift
done
You can save this script in the root home directory. In this example, the file textdoc.desktop is found under the user test, so the command to copy this file over to all of your uses will be:
./spread-desktop /skole/tjener/home0/test/Desktop/textdoc.desktop
Appendix I. Other "Brilliant" Linux Distributions
I.1. Snøfrix id="snofrix"
This is a version of Knoppix; see Section I.2, made by Conrad Newton, conrad.newton@broadpark.no.
This CD can be downloaded from ftp.skolelinux.no/skolelinux/knoppixes/snofrix.
Previously the CD was called "NordisKids"
This is what Conrad Newton himself has to say about Snøfrix:
For those of you familiar with other Linux/Knoppix based CDs,
it can perhaps best be summarized by saying that NordisKids
lives at the intersection point of Morphix Gamer, Freeduc,
and the OpenCD.

In plain language, this means that the CD contains lots of games,
lots of educational software, as well as Windows installers of
Norwegian OpenOffice.org 1.1 and Norwegian Mozilla 1.5.

The making of this CD is an unashamed attempt to win popularity for Linux!
I call it "NordisKids", because like NordisKnoppix it will eventually
support all the languages of the Nordic region.  For the time being,
it only exists in Norwegian language, and only on this website.
I hope to have versions ready for the other Nordic languages before
too long.  But before then, I need your feedback.

The focus group is children (hence the "Kids"), because they are usually
less reluctant than adults to try something new.  My hope is that they
will start by playing games (Question:  how did YOU get into computers?),
and then discover that the CD contains other interesting/useful software.
The CD is likely to be interesting to teachers as well.
I.2. Knoppix
This is probably the most popular all of those "live CD's"
It can be downloaded from the homepage, knoppix.org
I.3. BBC
This is a so-called "business card", that is, it is a mini-Liux distribution, only 50MB and can fit on one of those small business card CD's. Suitable as utility for quickly getting a Linux system running on a computer, it can then easily get on the net.
BBC can be downloaded from http://www.lnx-bbc.org/
I.4. SLAX
SLAX is a "live CD" which is based on the Linux distribution called Slackware. SLAX is a relatively small CD, about 190MB, containing nothing more than a KDE3.2. You get everything you need to burn a cd/dvd, as long as you have a CD-burner or DVD-burner and an extra CD-ROM in your machine.
I.5. Tomsrtbt
This is a little but powerful, one-diskette Linux distribution.It is well suited for quickly and simply testing if a computer works, what kind of components it has (graphics card, processor, RAM, hard drive, etc.). It is easy to get a machine on the net with the help of tomsrtbt. It can be downloaded from http://www.toms.net/rb/
I.6. Freeduc, Live CD-ROM of Free Foftware for Schools
This is yet another "live CD", with a focus on educational software. The homepage for Freeduc is http://www.ofset.org/freeduc-cd/
It can be downloaded from http://prdownloads.sourceforge.net/ofset/freeduc-cd-1.4.1.iso?download
Appendix J. Various Nice Little Scripts
J.1. Little Scripts
J.1.1. Remove Comment Lines
Most system files are full of comment lines, that is lines with a #-symbol in front. These are lines that the program disregards. Sometimes we aren't interested in viewing these comment lines. We only want to see the lines that work. The command egrep -v '^#|^$' <filename> will filter out these comment lines when viewing the file- they won't actually be removed from the file itself.
J.1.2. Making Changes in Several Files Simultaneously
Sometimes you have the need to make the same change to several different files, for example the configuration files for your users. Either you open them one by one and use the entire day on the job, or you can use a nice combination of Perl and shell shell scripting.
The following little bit will replace every reference to kde2 with kde3 in all files that have the file type .txt
for F in *.txt; do perl -pi.bak -e 's/kde2/kde3/g' $F;done
What's fine about this command is that the original file is left untouched (neither written over or deleted), rather it is given an extra ending, that is, .txt.bak. This is nice especially when you find out that your change wasn't the right thing to do afterall- but you did do a backup anyway, right? See Section 8.5.3Appendix K. Contribute to this document and Skolelinux/Debian-edu[id=contribute]
K.1. Translate
Once I'm done with the rewrite and crude translation to English, the tools sgml2xml and poxml will be used so that this file easily can be translated to any language
The id= tags in the titles will be removed when I'm done with the rewrite, they are there so that I can better organise the layout of the doument, the FIXME-notes will also be fixed, later.
K.2. Test Skolelinux/Debian-edu on your computer with an emulator, qemu
Get latest version from http://fabrice.bellard.free.fr/qemu/, at the time of writing that is 0.6.0
Unpack, and create a disk that is big enough,
dd of=/tmp/disk1 bs=1024 seek=600000 count=0
This will create a 6GB disk; the funny thing is that this size is not "real" before you start filling it up inside qemu. That means you can actually create a bigger qemu-disk than your physical disk. Before you create the qemu-disk, you can check your available space with df -h and do the same after you have created a 6BG qemu-disk, you will see the same space is available. The space is not used before you start installing something into qemu- very nice!Either download a iso-image to you harddrive,
/usr/local/bin/qemu -m 128 -boot d -cdrom /tmp/skolelinux-i386-release-1.0.iso -hda /tmp/disk1
which will start a Skolelinux/Debian-edu install with 128MB ram onto qemu-disk /tmp/disk, if you are going to try a Thinclient install, you will need two network cards in your qemu, add the option -nics 2Once you are done with firststage in qemu, you need to start secondstage with
/usr/local/bin/qemu -m 128 -cdrom /tmp/skolelinux-i386-release-1.0.iso -hda /tmp/disk1
otherwise, it will not boot from the harddrive, but from the CD-ROM again.Appendix M. GNU Free Documentation License
Version 1.1, March 2000
Copyright (C) 2000 Free Software Foundation, Inc. 59 Temple Place, Suite 330, Boston, MA 02111-1307 USA Everyone is permitted to copy and distribute verbatim copies of this license document, but changing it is not allowed.
M.1. PREAMBLE
The purpose of this License is to make a manual, textbook, or other written document "free" in the sense of freedom: to assure everyone the effective freedom to copy and redistribute it, with or without modifying it, either commercially or noncommercially. Secondarily, this License preserves for the author and publisher a way to get credit for their work, while not being considered responsible for modifications made by others.
This License is a kind of "copyleft", which means that derivative works of the document must themselves be free in the same sense. It complements the GNU General Public License, which is a copyleft license designed for free software.
We have designed this License in order to use it for manuals for free software, because free software needs free documentation: a free program should come with manuals providing the same freedoms that the software does. But this License is not limited to software manuals; it can be used for any textual work, regardless of subject matter or whether it is published as a printed book. We recommend this License principally for works whose purpose is instruction or reference.
M.2. APPLICABILITY AND DEFINITIONS
This License applies to any manual or other work that contains a notice placed by the copyright holder saying it can be distributed under the terms of this License. The "Document", below, refers to any such manual or work. Any member of the public is a licensee, and is addressed as "you".
A "Modified Version" of the Document means any work containing the Document or a portion of it, either copied verbatim, or with modifications and/or translated into another language.
A "Secondary Section" is a named appendix or a front-matter section of the Document that deals exclusively with the relationship of the publishers or authors of the Document to the Document's overall subject (or to related matters) and contains nothing that could fall directly within that overall subject. (For example, if the Document is in part a textbook of mathematics, a Secondary Section may not explain any mathematics.) The relationship could be a matter of historical connection with the subject or with related matters, or of legal, commercial, philosophical, ethical or political position regarding them.
The "Invariant Sections" are certain Secondary Sections whose titles are designated, as being those of Invariant Sections, in the notice that says that the Document is released under this License.
The "Cover Texts" are certain short passages of text that are listed, as Front-Cover Texts or Back-Cover Texts, in the notice that says that the Document is released under this License.
A "Transparent" copy of the Document means a machine-readable copy, represented in a format whose specification is available to the general public, whose contents can be viewed and edited directly and straightforwardly with generic text editors or (for images composed of pixels) generic paint programs or (for drawings) some widely available drawing editor, and that is suitable for input to text formatters or for automatic translation to a variety of formats suitable for input to text formatters. A copy made in an otherwise Transparent file format whose markup has been designed to thwart or discourage subsequent modification by readers is not Transparent. A copy that is not "Transparent" is called "Opaque".
Examples of suitable formats for Transparent copies include plain ASCII without markup, Texinfo input format, LaTeX input format, SGML or XML using a publicly available DTD, and standard-conforming simple HTML designed for human modification. Opaque formats include PostScript, PDF, proprietary formats that can be read and edited only by proprietary word processors, SGML or XML for which the DTD and/or processing tools are not generally available, and the machine-generated HTML produced by some word processors for output purposes only.
The "Title Page" means, for a printed book, the title page itself, plus such following pages as are needed to hold, legibly, the material this License requires to appear in the title page. For works in formats which do not have any title page as such, "Title Page" means the text near the most prominent appearance of the work's title, preceding the beginning of the body of the text.
M.3. VERBATIM COPYING
You may copy and distribute the Document in any medium, either commercially or noncommercially, provided that this License, the copyright notices, and the license notice saying this License applies to the Document are reproduced in all copies, and that you add no other conditions whatsoever to those of this License. You may not use technical measures to obstruct or control the reading or further copying of the copies you make or distribute. However, you may accept compensation in exchange for copies. If you distribute a large enough number of copies you must also follow the conditions in section 3.
You may also lend copies, under the same conditions stated above, and you may publicly display copies.
M.4. COPYING IN QUANTITY
If you publish printed copies of the Document numbering more than 100, and the Document's license notice requires Cover Texts, you must enclose the copies in covers that carry, clearly and legibly, all these Cover Texts: Front-Cover Texts on the front cover, and Back-Cover Texts on the back cover. Both covers must also clearly and legibly identify you as the publisher of these copies. The front cover must present the full title with all words of the title equally prominent and visible. You may add other material on the covers in addition. Copying with changes limited to the covers, as long as they preserve the title of the Document and satisfy these conditions, can be treated as verbatim copying in other respects.
If the required texts for either cover are too voluminous to fit legibly, you should put the first ones listed (as many as fit reasonably) on the actual cover, and continue the rest onto adjacent pages.
If you publish or distribute Opaque copies of the Document numbering more than 100, you must either include a machine-readable Transparent copy along with each Opaque copy, or state in or with each Opaque copy a publicly-accessible computer-network location containing a complete Transparent copy of the Document, free of added material, which the general network-using public has access to download anonymously at no charge using public-standard network protocols. If you use the latter option, you must take reasonably prudent steps, when you begin distribution of Opaque copies in quantity, to ensure that this Transparent copy will remain thus accessible at the stated location until at least one year after the last time you distribute an Opaque copy (directly or through your agents or retailers) of that edition to the public.
It is requested, but not required, that you contact the authors of the Document well before redistributing any large number of copies, to give them a chance to provide you with an updated version of the Document.
M.5. MODIFICATIONS
You may copy and distribute a Modified Version of the Document under the conditions of sections 2 and 3 above, provided that you release the Modified Version under precisely this License, with the Modified Version filling the role of the Document, thus licensing distribution and modification of the Modified Version to whoever possesses a copy of it. In addition, you must do these things in the Modified Version:
-
Use in the Title Page (and on the covers, if any) a title distinct from that of the Document, and from those of previous versions (which should, if there were any, be listed in the History section of the Document). You may use the same title as a previous version if the original publisher of that version gives permission.
-
List on the Title Page, as authors, one or more persons or entities responsible for authorship of the modifications in the Modified Version, together with at least five of the principal authors of the Document (all of its principal authors, if it has less than five).
-
State on the Title page the name of the publisher of the Modified Version, as the publisher.
-
Preserve all the copyright notices of the Document.
-
Add an appropriate copyright notice for your modifications adjacent to the other copyright notices.
-
Include, immediately after the copyright notices, a license notice giving the public permission to use the Modified Version under the terms of this License, in the form shown in the Addendum below.
-
Preserve in that license notice the full lists of Invariant Sections and required Cover Texts given in the Document's license notice.
-
Include an unaltered copy of this License.
-
Preserve the section entitled "History", and its title, and add to it an item stating at least the title, year, new authors, and publisher of the Modified Version as given on the Title Page. If there is no section entitled "History" in the Document, create one stating the title, year, authors, and publisher of the Document as given on its Title Page, then add an item describing the Modified Version as stated in the previous sentence.
-
Preserve the network location, if any, given in the Document for public access to a Transparent copy of the Document, and likewise the network locations given in the Document for previous versions it was based on. These may be placed in the "History" section. You may omit a network location for a work that was published at least four years before the Document itself, or if the original publisher of the version it refers to gives permission.
-
In any section entitled "Acknowledgements" or "Dedications", preserve the section's title, and preserve in the section all the substance and tone of each of the contributor acknowledgements and/or dedications given therein.
-
Preserve all the Invariant Sections of the Document, unaltered in their text and in their titles. Section numbers or the equivalent are not considered part of the section titles.
-
Delete any section entitled "Endorsements". Such a section may not be included in the Modified Version.
-
Do not retitle any existing section as "Endorsements" or to conflict in title with any Invariant Section.
If the Modified Version includes new front-matter sections or appendices that qualify as Secondary Sections and contain no material copied from the Document, you may at your option designate some or all of these sections as invariant. To do this, add their titles to the list of Invariant Sections in the Modified Version's license notice. These titles must be distinct from any other section titles.
You may add a section entitled "Endorsements", provided it contains nothing but endorsements of your Modified Version by various parties--for example, statements of peer review or that the text has been approved by an organization as the authoritative definition of a standard.
You may add a passage of up to five words as a Front-Cover Text, and a passage of up to 25 words as a Back-Cover Text, to the end of the list of Cover Texts in the Modified Version. Only one passage of Front-Cover Text and one of Back-Cover Text may be added by (or through arrangements made by) any one entity. If the Document already includes a cover text for the same cover, previously added by you or by arrangement made by the same entity you are acting on behalf of, you may not add another; but you may replace the old one, on explicit permission from the previous publisher that added the old one.
The author(s) and publisher(s) of the Document do not by this License give permission to use their names for publicity for or to assert or imply endorsement of any Modified Version.
M.6. COMBINING DOCUMENTS
You may combine the Document with other documents released under this License, under the terms defined in section 4 above for modified versions, provided that you include in the combination all of the Invariant Sections of all of the original documents, unmodified, and list them all as Invariant Sections of your combined work in its license notice.
The combined work need only contain one copy of this License, and multiple identical Invariant Sections may be replaced with a single copy. If there are multiple Invariant Sections with the same name but different contents, make the title of each such section unique by adding at the end of it, in parentheses, the name of the original author or publisher of that section if known, or else a unique number. Make the same adjustment to the section titles in the list of Invariant Sections in the license notice of the combined work.
In the combination, you must combine any sections entitled "History" in the various original documents, forming one section entitled "History"; likewise combine any sections entitled "Acknowledgements", and any sections entitled "Dedications". You must delete all sections entitled "Endorsements."
M.7. COLLECTIONS OF DOCUMENTS
You may make a collection consisting of the Document and other documents released under this License, and replace the individual copies of this License in the various documents with a single copy that is included in the collection, provided that you follow the rules of this License for verbatim copying of each of the documents in all other respects.
You may extract a single document from such a collection, and distribute it individually under this License, provided you insert a copy of this License into the extracted document, and follow this License in all other respects regarding verbatim copying of that document.
M.8. AGGREGATION WITH INDEPENDENT WORKS
A compilation of the Document or its derivatives with other separate and independent documents or works, in or on a volume of a storage or distribution medium, does not as a whole count as a Modified Version of the Document, provided no compilation copyright is claimed for the compilation. Such a compilation is called an "aggregate", and this License does not apply to the other self-contained works thus compiled with the Document, on account of their being thus compiled, if they are not themselves derivative works of the Document.
If the Cover Text requirement of section 3 is applicable to these copies of the Document, then if the Document is less than one quarter of the entire aggregate, the Document's Cover Texts may be placed on covers that surround only the Document within the aggregate. Otherwise they must appear on covers around the whole aggregate.
M.9. TRANSLATION
Translation is considered a kind of modification, so you may distribute translations of the Document under the terms of section 4. Replacing Invariant Sections with translations requires special permission from their copyright holders, but you may include translations of some or all Invariant Sections in addition to the original versions of these Invariant Sections. You may include a translation of this License provided that you also include the original English version of this License. In case of a disagreement between the translation and the original English version of this License, the original English version will prevail.
M.10. TERMINATION
You may not copy, modify, sublicense, or distribute the Document except as expressly provided for under this License. Any other attempt to copy, modify, sublicense or distribute the Document is void, and will automatically terminate your rights under this License. However, parties who have received copies, or rights, from you under this License will not have their licenses terminated so long as such parties remain in full compliance.
M.11. FUTURE REVISIONS OF THIS LICENSE
The Free Software Foundation may publish new, revised versions of the GNU Free Documentation License from time to time. Such new versions will be similar in spirit to the present version, but may differ in detail to address new problems or concerns. See http://www.gnu.org/copyleft/.
Each version of the License is given a distinguishing version number. If the Document specifies that a particular numbered version of this License "or any later version" applies to it, you have the option of following the terms and conditions either of that specified version or of any later version that has been published (not as a draft) by the Free Software Foundation. If the Document does not specify a version number of this License, you may choose any version ever published (not as a draft) by the Free Software Foundation.
M.12. How to use this License for your documents
To use this License in a document you have written, include a copy of the License in the document and put the following copyright and license notices just after the title page:
Copyright (c) YEAR YOUR NAME. Permission is granted to copy, distribute and/or modify this document under the terms of the GNU Free Documentation License, Version 1.1 or any later version published by the Free Software Foundation; with the Invariant Sections being LIST THEIR TITLES, with the Front-Cover Texts being LIST, and with the Back-Cover Texts being LIST. A copy of the license is included in the section entitled "GNU Free Documentation License".
If you have no Invariant Sections, write "with no Invariant Sections" instead of saying which ones are invariant. If you have no Front-Cover Texts, write "no Front-Cover Texts" instead of "Front-Cover Texts being LIST"; likewise for Back-Cover Texts.
If your document contains nontrivial examples of program code, we recommend releasing these examples in parallel under your choice of free software license, such as the GNU General Public License, to permit their use in free software.